A Guide to URL Redirection for WordPress Sites
If you're launching a redesign or revision of an existing WordPress website, chances are the URL structure might change. In this post, we cover why URL redirections are important for WordPress sites, the different kinds of redirects, and how to easily set up and monitor redirections with the Redirection plugin.


This post is based on the webinar Three Launch Essentials by Nathan Ingram over at iThemes Training.
Why URL Redirection is Important for Your WordPress Site
Why take the time to set up URL redirections? For search engines:- It’s likely that the old URL structure was indexed by search engines.
- If the new site changes the indexed URL structure, search engines will show pages not found on the next crawl which could hurt your search ranking.
- If the old site was around a while, especially if it has useful content, the chances are high that users bookmarked certain pages.
- When the new site is launched with a different URL structure, these bookmarks will show a page not found.
5 Types of URL Redirects
- Used to tell search engines that a page location has permanently changed
- 99.44% of the time, this is the only type of redirect you’ll ever need
- Used to tell search engines that a page location changed for now, but not forever
- Sometimes used in high traffic ecommerce sites in the checkout process to make sure pages that hold one-time data aren’t bookmarked or refreshed
- Similar to 303 with some changes in the way info is passed page to page
- Like 307 but with a permanent status
A Quick & Easy Way to Set Up WordPress Redirects: How to Use the WordPress Redirection Plugin
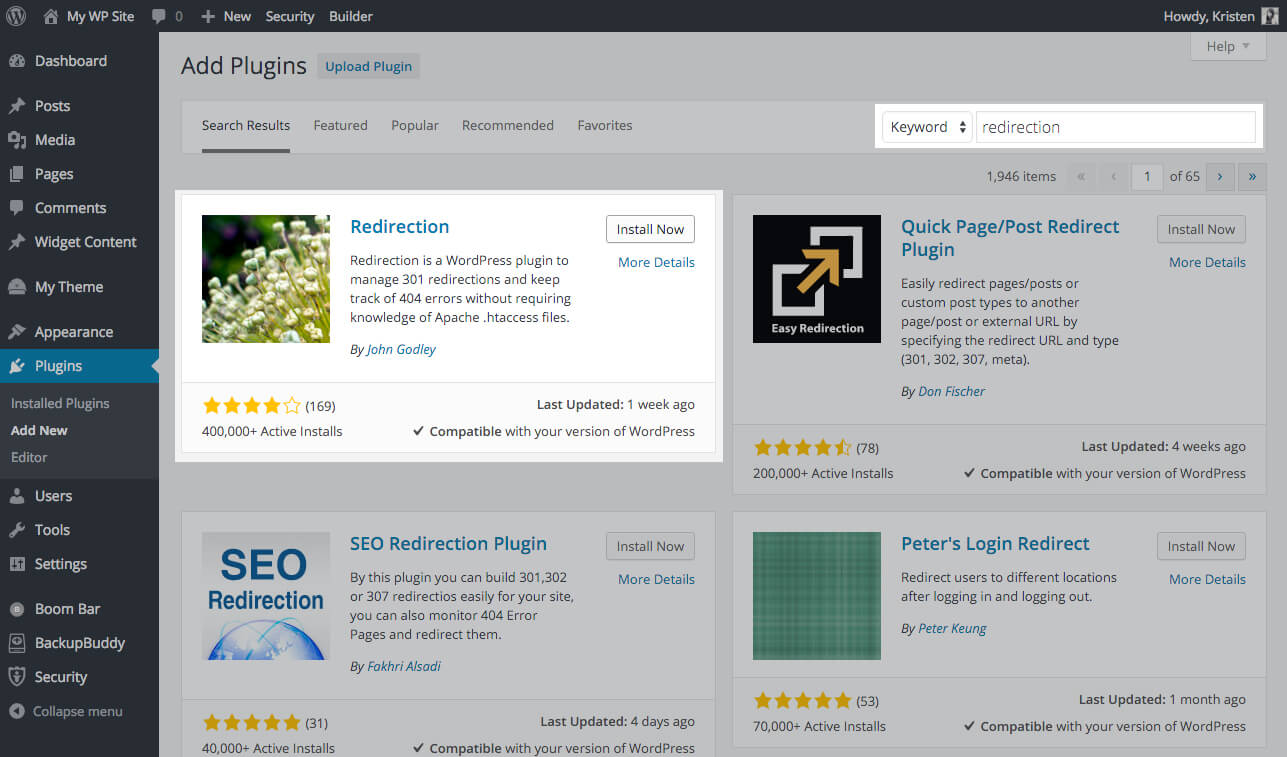
Manually adding redirections can be a pretty cumbersome process because it requires editing your .htaccess file. But in the WordPress world, there’s a fantastic plugin called the Redirection plugin from John Godley that can handle adding redirects for you, right from the WordPress dashboard. This plugin has long been the standard in setting up and monitoring WordPress redirections because it very easily allows you to import a list of URLs in a spreadsheet, so you don’t have to manually enter the redirects.1. To install the plugin, simply search for “redirection” from the Plugins > Add New page in your WordPress dashboard. Click “Install Now.”
2. Once activated, you can access the plugin menu from Tools > Redirection.
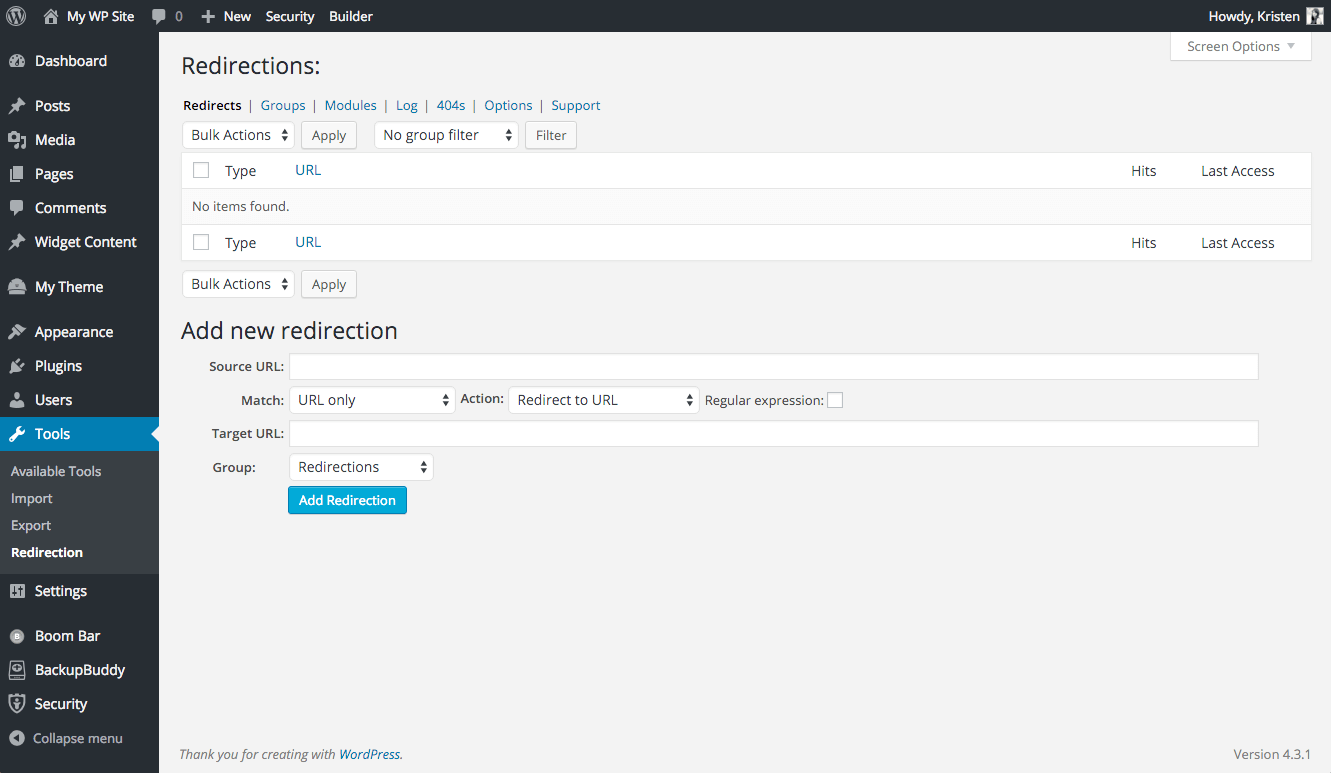
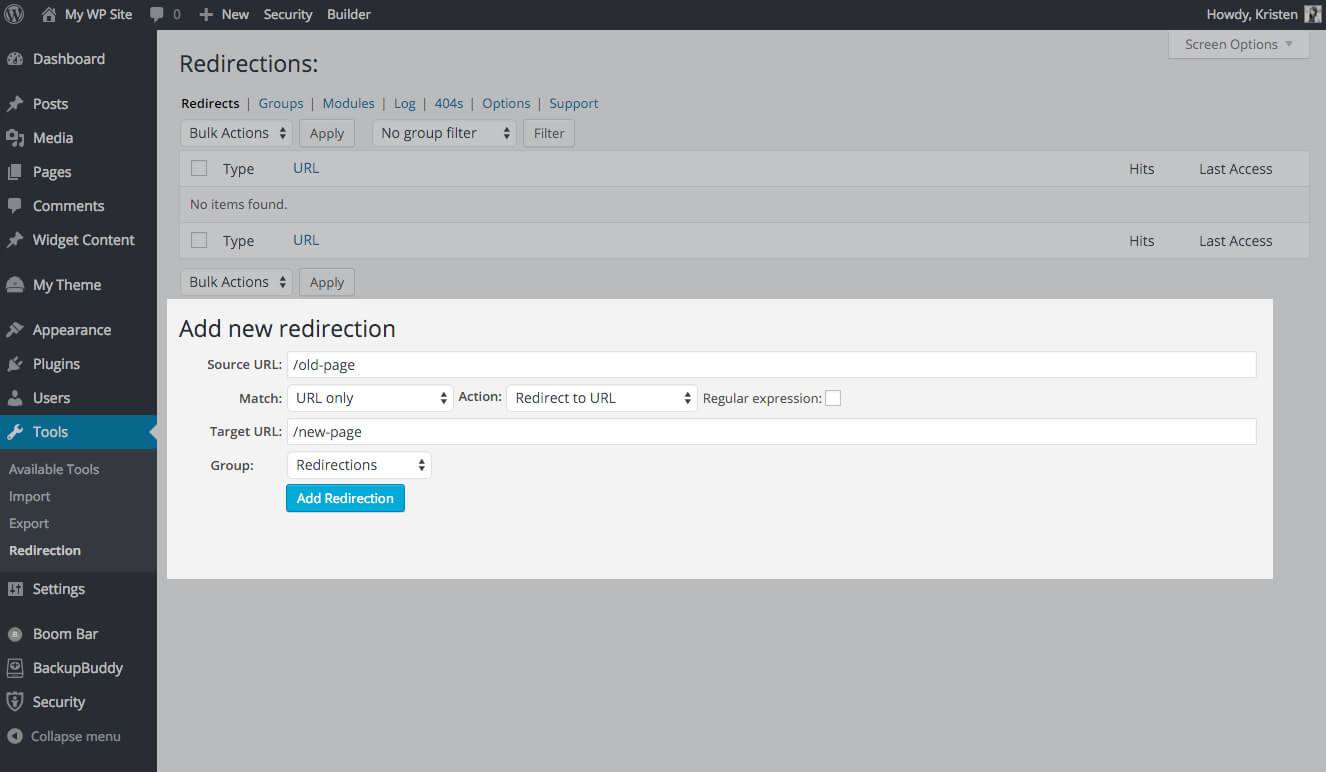
3. To manually type in a redirection, simply type in the source URL and the new target URL into the fields and click “Add Redirection.” This is a great technique if you only have a handful of URL changes to make.
Save Time by Importing URLs into the Redirection Plugin
If you have a lot of redirections to add, you’ll want to save time and use the Redirection plugin’s Import feature. Important: don’t forget to perform a URL crawl prior to launching the new site or you won’t be able to access the old site’s URL structure.How to Export Your Old URLs
You can use the Screaming Frog SEO Spider tool (available for Windows, Mac and Linux; free version crawls up to 500 URLs) to run a crawl and export the list into a spreadsheet.1. Download the application and then open the app. Enter the URL of the old site into Screaming Frog to start the crawl.
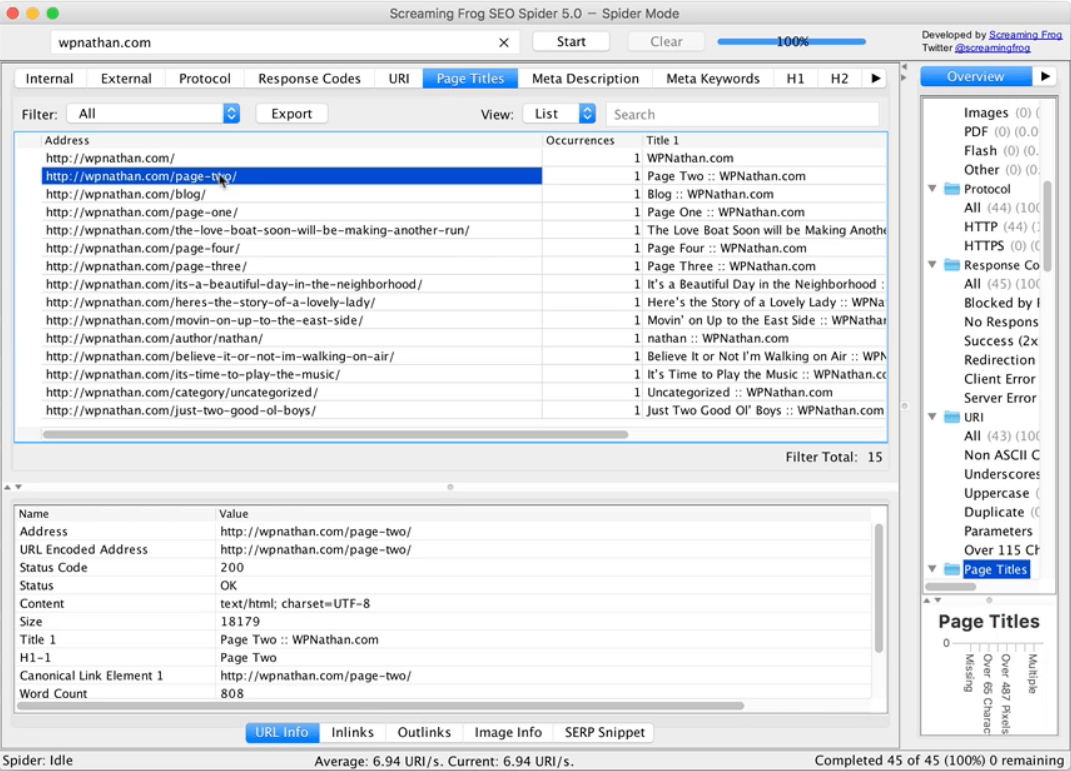
2. Once the crawl is complete, jump to the Page Titles tab to get the list of the pages on your site. Click the Export button located in the top left of the page to export as an .xslx file.
3. Download the export file and open the Excel doc. You’ll want to clean up this export file, so delete everything other than the URL list so that it’s alone in Column A. Note: you’ll also want to go through this list to remove pages that aren’t changing (such as the Home page or the Contact page).
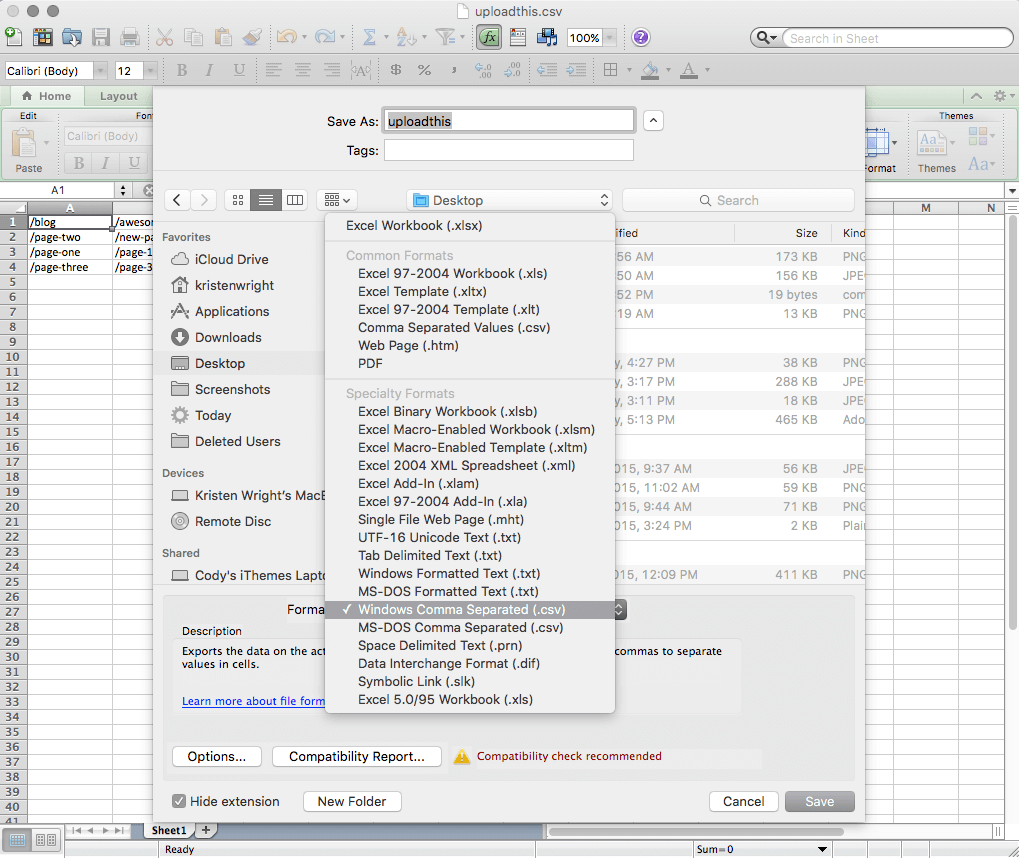
4. The next step is to enter the URLs on the new site into column B. Do a quick find & replace to remove the actual domain name out of your URLs. Your final spreadsheet file should look like this:

5. Once you’re done, it’s important to save this file as a WINDOWS Comma Separated CSV file. Other types of CSVs will not import correctly (including the standard Comma Separated Values (.csv) file for Mac).
How to Import the WordPress Redirection CSV
1. Back in the WordPress dashboard, go to Tools > Redirection. Click Options and browse to find the CSV file.
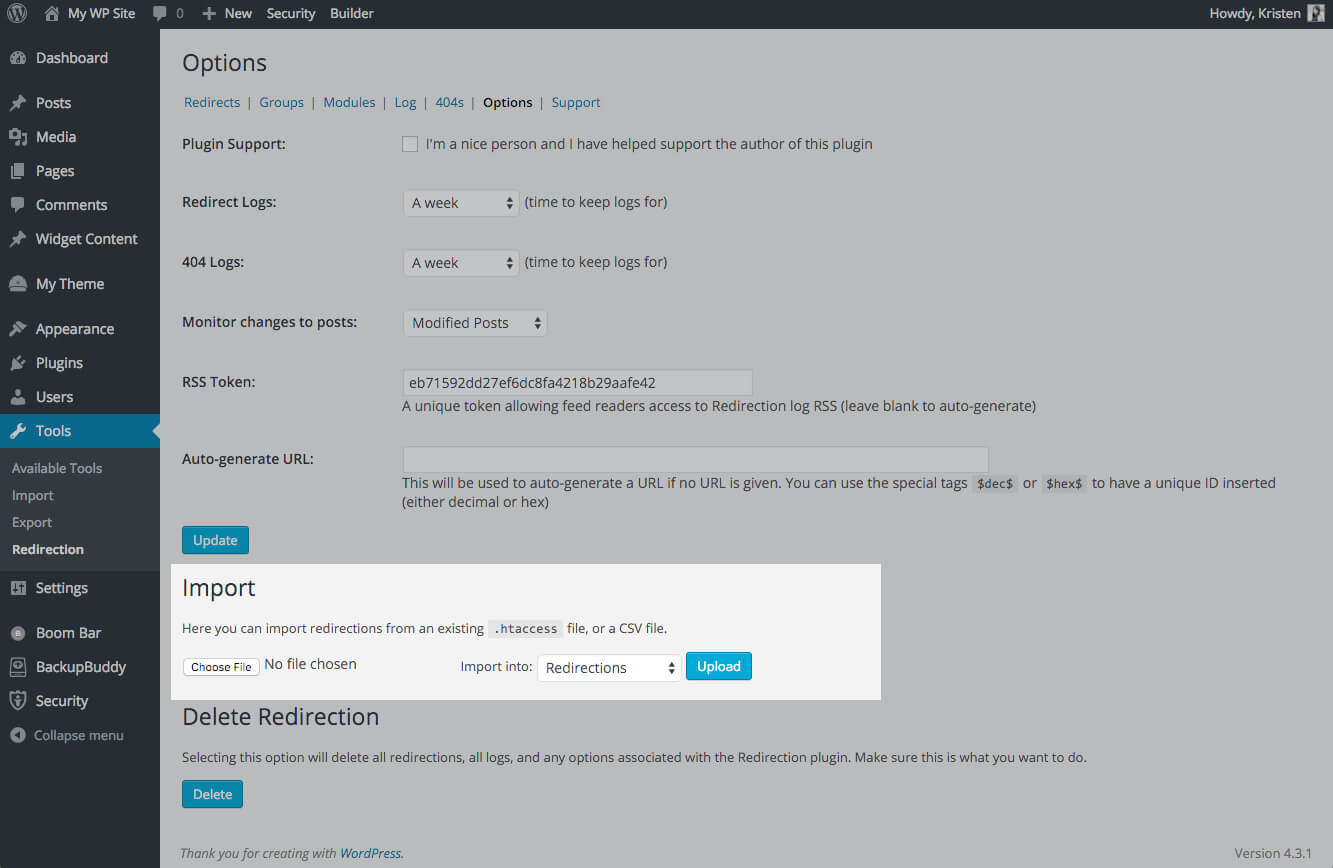
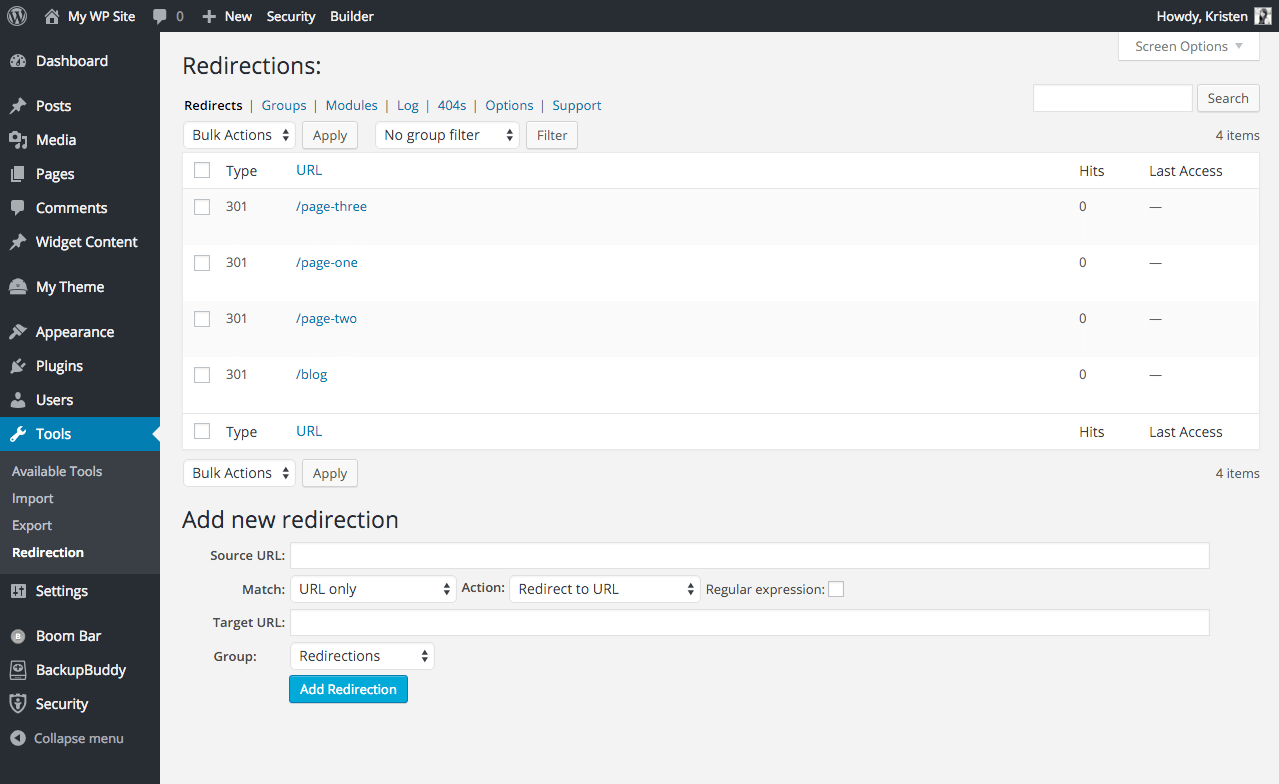
2. Click Upload. That’s it! You should now see your redirections appear in the Redirects tab. From now on, if users visit the old URLs, they’ll be automatically forwarded to the correct one.

Get More WordPress Training & Tips from iThemes Training
Join the community at iThemes Training today to get access to 500+ hours of professional WordPress training plus weekly live webinars to grow your WordPress design and development skills.
Learn more about iThemes Training
This post is based on the Three Launch Essentials by Nathan Ingram. In this webinar, Nathan covers WordPress website launch essentials including Redirection, Google Analytics, and Google Webmaster Tools.
Join us for the next Solid Academy Webinar!
Free weekly webinars that will help you master WordPress and increase your business's bottom line.
What is a WordPress Phishing Attack?
Learn how to identify and prevent phishing attacks on WordPress websites.
Kiki SheldonWebsite Protection: 5 Ways to Keep Your Website Safe
Robust website protection is the shield that stands between your business and relentless cyber attacks. Prioritizing website protection enables businesses to fortify defenses to safeguard their online presence and preserve the trust of their customers in the face of ever-evolving cybersecurity threats.
Kiki Sheldon23 Ideas To Grow Your WordPress Business in 2023
WordPress is the most popular website-building platform worldwide, trusted by numerous brands. WordPress enables you to build a user-friendly and highly reliable site, together with tools and plugins to enhance your marketing and work like a lead magnet. All these features make WordPress the platform chosen by more than 43% of businesses globally.
SolidWP Editorial TeamSign up now — Get SolidWP updates and valuable content straight to your inbox
Sign up
Get started with confidence — risk free, guaranteed
