Two Ways to Perform a WordPress Site Move
This post discusses two methods for how to perform a WordPress site move. You can save yourself some time and headaches by using the WordPress backup plugin BackupBuddy, or you can perform a WordPress migration manually. Different Scenarios for a WordPress Site Move Here are the most common reasons you may want to move a WordPress website: You may want to move your WordPress website to a new domain or URL You may want to move your WordPress website to a new hosting company or a new server You may want to move a WordPress website from a WordPress staging environment to a live website The Basic Components of a WordPress Website A WordPress website is made up of two basic components.

Different Scenarios for a WordPress Site Move
Here are the most common reasons you may want to move a WordPress website:- You may want to move your WordPress website to a new domain or URL
- You may want to move your WordPress website to a new hosting company or a new server
- You may want to move a WordPress website from a WordPress staging environment to a live website
The Basic Components of a WordPress Website
A WordPress website is made up of two basic components. All of these will need to be addressed to complete a successful WordPress site move:- Your WordPress database. The WordPress database contains the content (text) of your WordPress posts, pages, comments, and users.
- The files that make your WordPress website function. This includes all the image files in your media library (.jpg, .png, etc.), plus all your theme or plugin files. These files are not stored in your WordPress database.
How to Manually Perform a WordPress Site Move
Let’s begin by discussing how to perform a manual WordPress site move. This method requires more time and can prove to be a bit more challenging.1. Begin by Backing up Your WordPress Database
- In your hosting cPanel, look for a link that says “phpMyAdmin”
- Once you are on “phpMyAdmin,” select the “Databases” menu option at the top.
- Choose the databases you plan on moving. This should result in a list of all the tables.
- Select the “Check All” button at the bottom of the list.
- Open the drop-down menu and select “Export”.
- Select “Quick” export method, and leave the format as SQL.
- Last, click “Go” and the download should begin.
2. Create a New Database on Your New Host Server
- Open “MySQL Database” in cPanel and create a new database.
- Create a user and a secure password.
- Add the new user to database and choose “all privileges.”
3. Edit the wp-config.php File
- Open “wp-config.php” file located in the main folder.
- Enter in the database, username and password.
- Save the file and close.
4. Import Your Database
- Upload the old database tables into the new database.
How to Perform a WordPress Site Move With BackupBuddy
BackupBuddy is a 3-in-1 WordPress backup plugin that allows users to easily complete a WordPress site move.1. Run a Complete Database Backup & Download Files
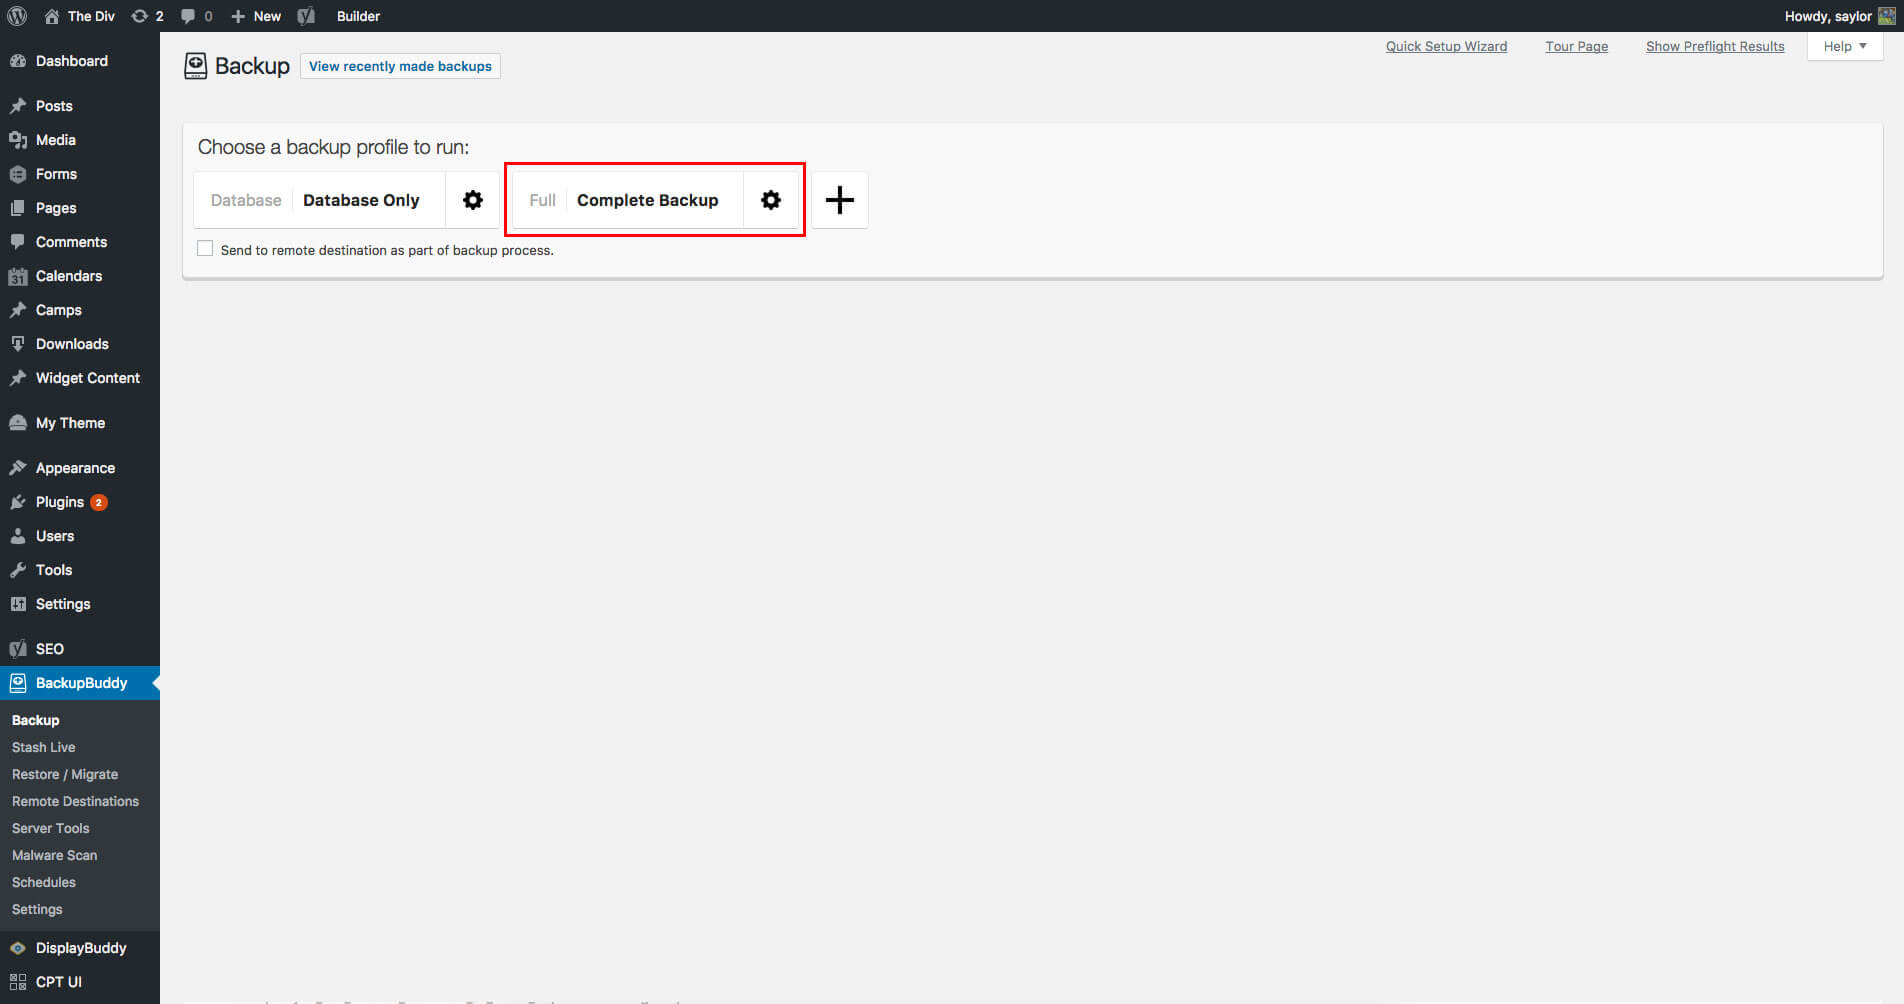
Just like you would on a manual WordPress site move, you will need to run a complete backup of your entire WordPress site, including your database and files.- Expand the BackupBuddy menu in your WordPress dashboard, and click “Complete Backup” at the top of the page.
- After the backup completes, download the backup zip file to your computer.
 Next, navigate to the Restore / Migrate page in the BackupBuddy menu to download the importbuddy.php file.
- Download the importbuddy.php file to your computer. When you do this, a prompt will appear requesting you to confirm your ImportBuddy password. Enter a new password or leave blank to use the ImportBuddy password you set up when you first installed BackupBuddy.
- Click “OK” for the download to begin.
2. Use ImportBuddy to Complete the Site Move
Next, we will follow the ImportBuddy steps to complete the WordPress site move.- Upload the importbuddy.php file and the BackupBuddy zip file to the directory (folder) you are moving the new site to on your server. Note: this directory should be completely empty.
- Open a browser and type in your site URL, adding /importbuddy.php (like https://sitename.com/importbuddy.php)
- A prompt will appear asking for the ImportBuddy password you received or created after downloading the importbuddy.php file earlier
- Click “Authenticate.”
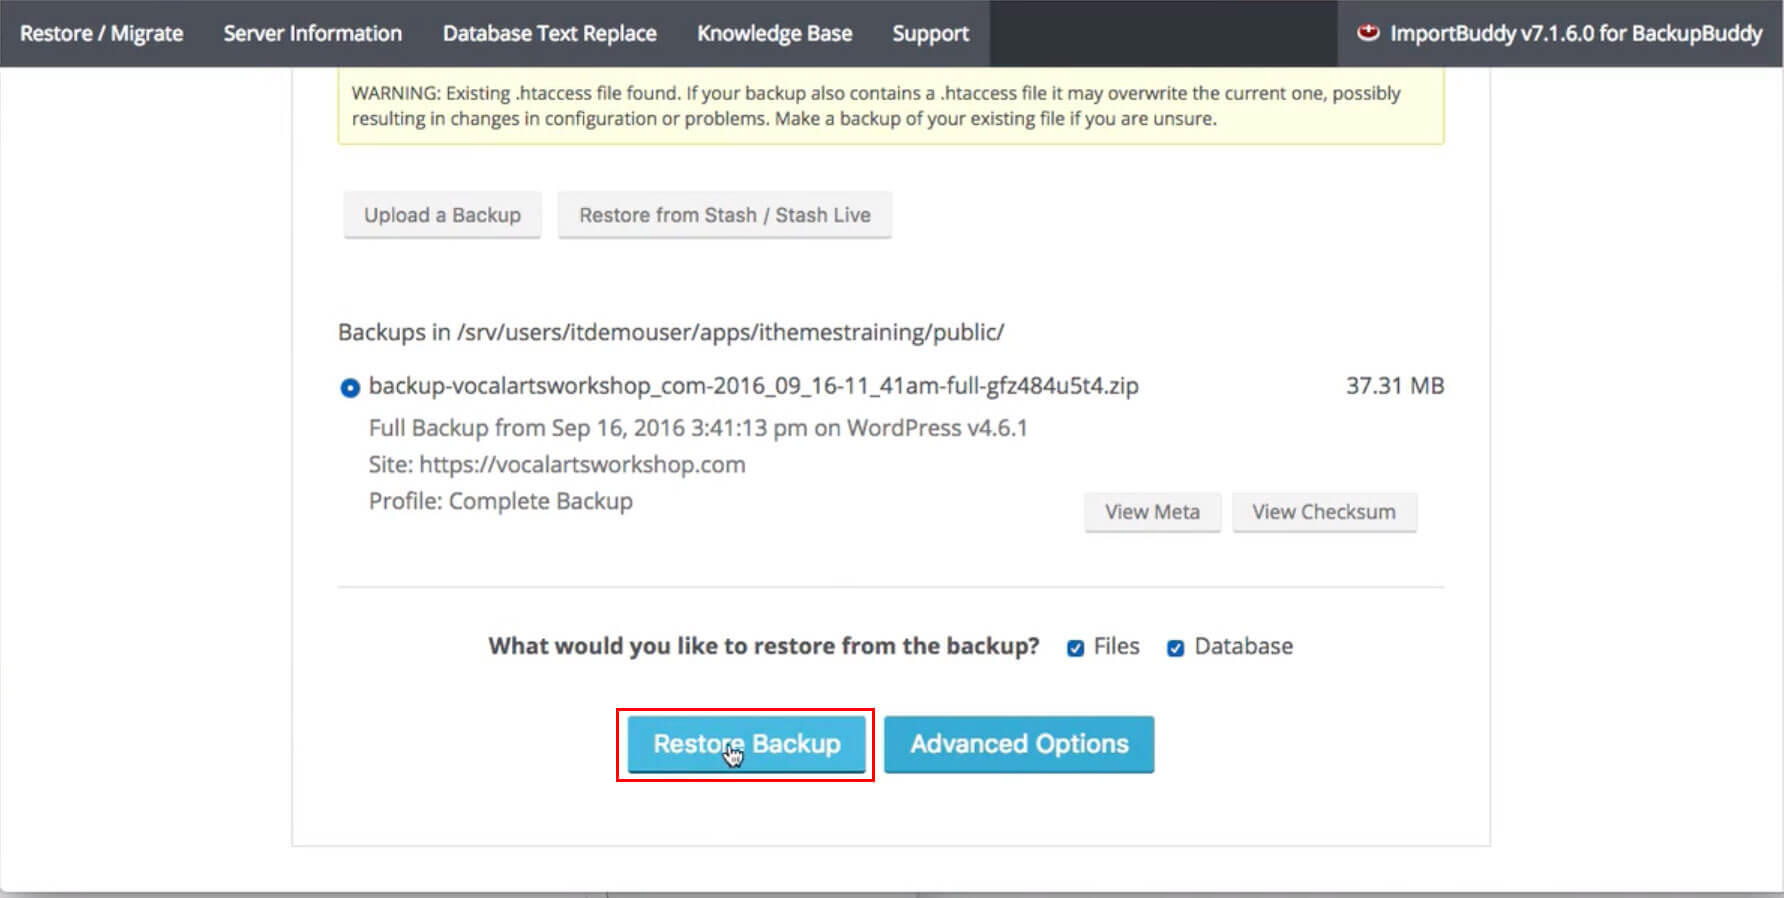
- Click “Restore Backup”
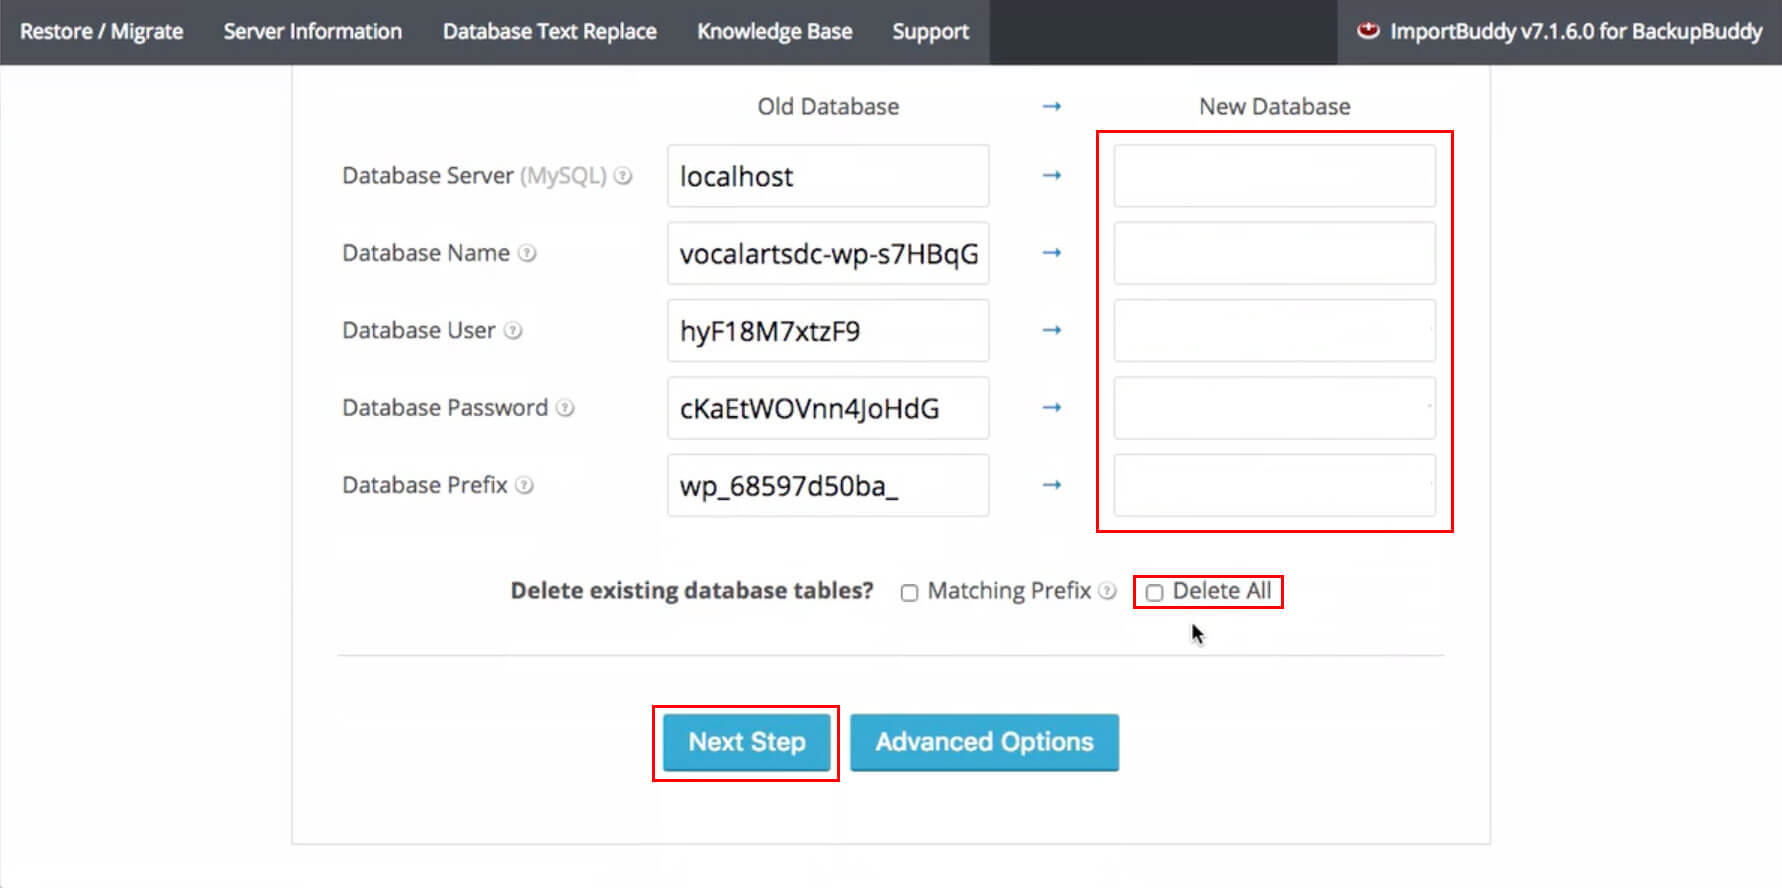
- Fill in the empty fields with database information found in your wp-config.php file. You may use the same “Database Prefix” provided, just copy and paste it to the empty field.
- Select “Delete All”
- Click “Next Step”
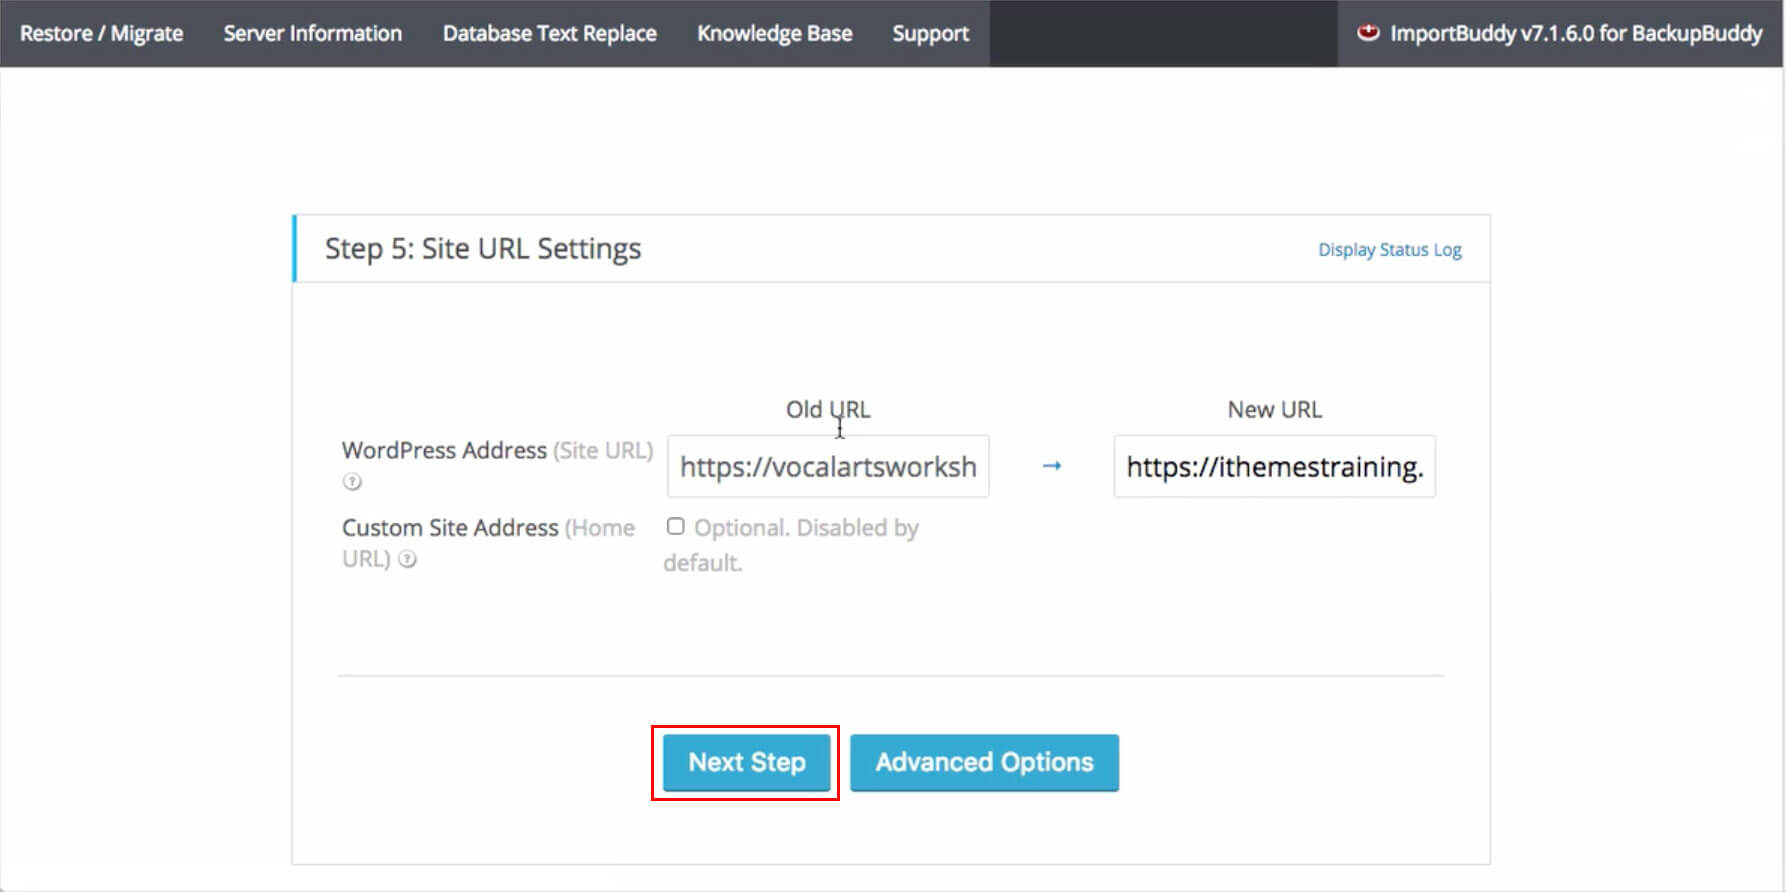
- Enter in the New URL you plan to use.
- Click “Next Step”
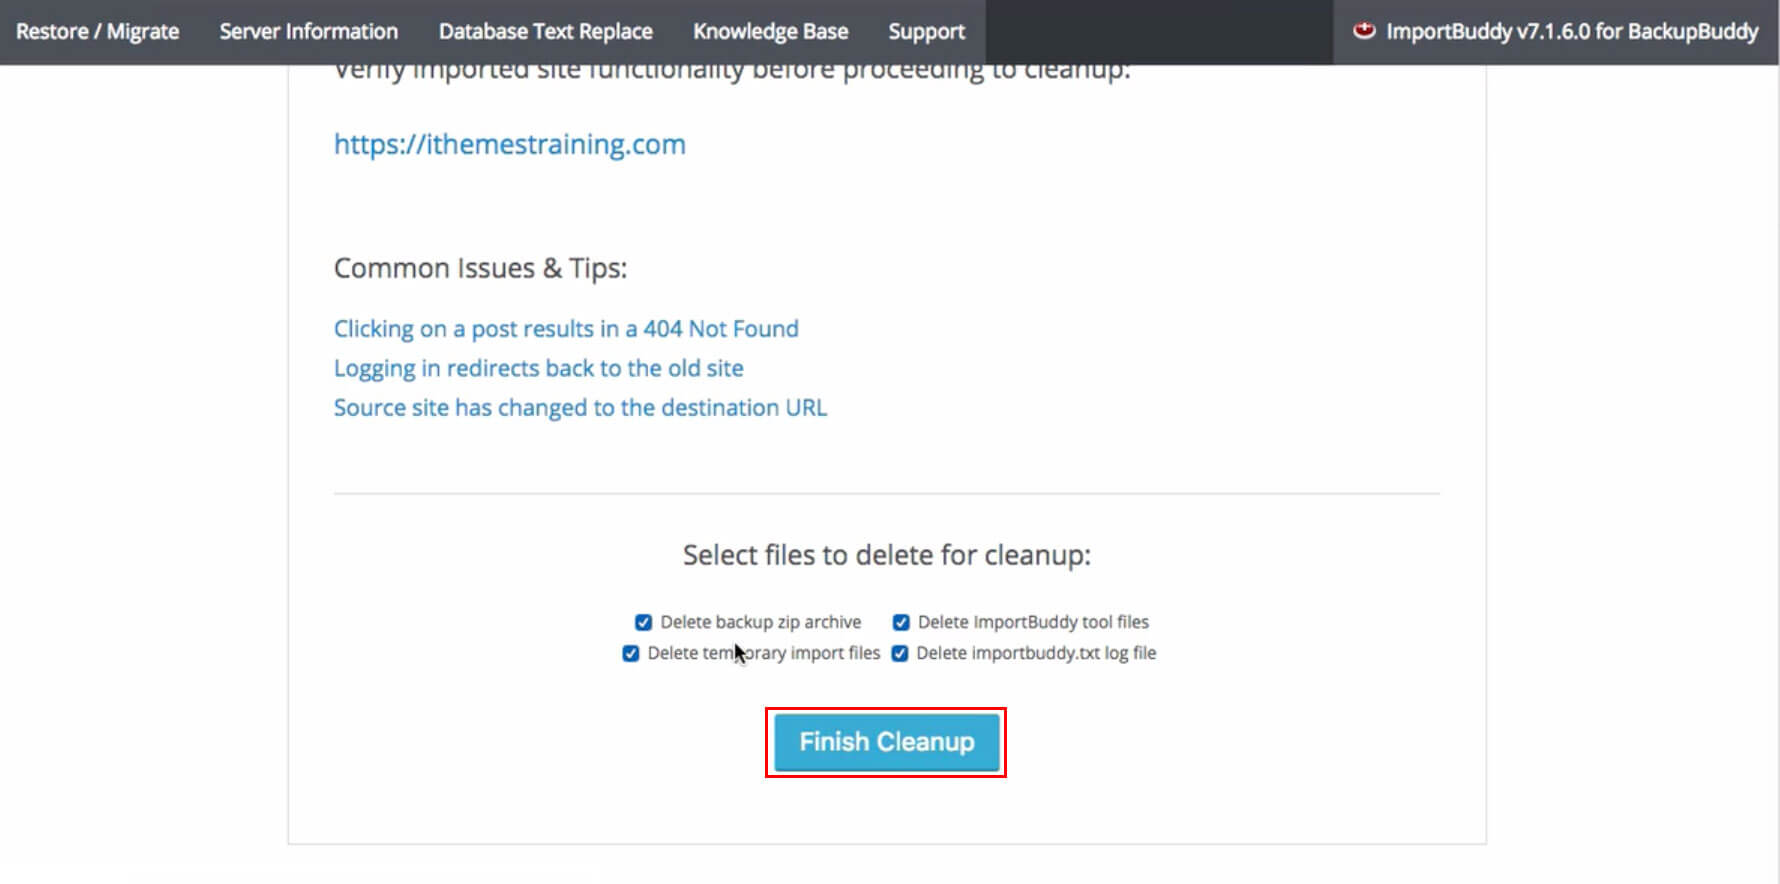
- Verify your site is working in a new window.
- If your site is up and running, click “Finish Clean Up.”
More Help on Moving a WordPress Site with BackupBuddy
We’ve shown instructions for moving a WordPress site with the assumption you have already created a new MySQL database. If this is not the case, check out how to move a WordPress site to a new domain for more information on moving a WordPress site with BackupBuddy.BackupBuddy – A Must-Have Plugin for Your WordPress Website
In addition to providing a quick and easy way to do a WordPress site move, BackupBuddy offers a solid WordPress backup strategy. With BackupBuddy, you are able to easily backup your WordPress site, set up schedules to run automatic WordPress backups and store backup files off-site in a secure location. If you find yourself needing to consistently move or restore WordPress sites, invest in BackupBuddy and reap the benefits.Install the WordPress backup plugin and easily backup, restore and move your WordPress site.
Get BackupBuddy now
Join us for the next Solid Academy Webinar!
Free weekly webinars that will help you master WordPress and increase your business's bottom line.
What is a WordPress Phishing Attack?
Learn how to identify and prevent phishing attacks on WordPress websites.
Kiki SheldonWebsite Protection: 5 Ways to Keep Your Website Safe
Robust website protection is the shield that stands between your business and relentless cyber attacks. Prioritizing website protection enables businesses to fortify defenses to safeguard their online presence and preserve the trust of their customers in the face of ever-evolving cybersecurity threats.
Kiki Sheldon23 Ideas To Grow Your WordPress Business in 2023
WordPress is the most popular website-building platform worldwide, trusted by numerous brands. WordPress enables you to build a user-friendly and highly reliable site, together with tools and plugins to enhance your marketing and work like a lead magnet. All these features make WordPress the platform chosen by more than 43% of businesses globally.
SolidWP Editorial TeamSign up now — Get SolidWP updates and valuable content straight to your inbox
Sign up
Get started with confidence — risk free, guaranteed
