Built by WordPress security experts
Reliable, set-it-and-forget it secure backups
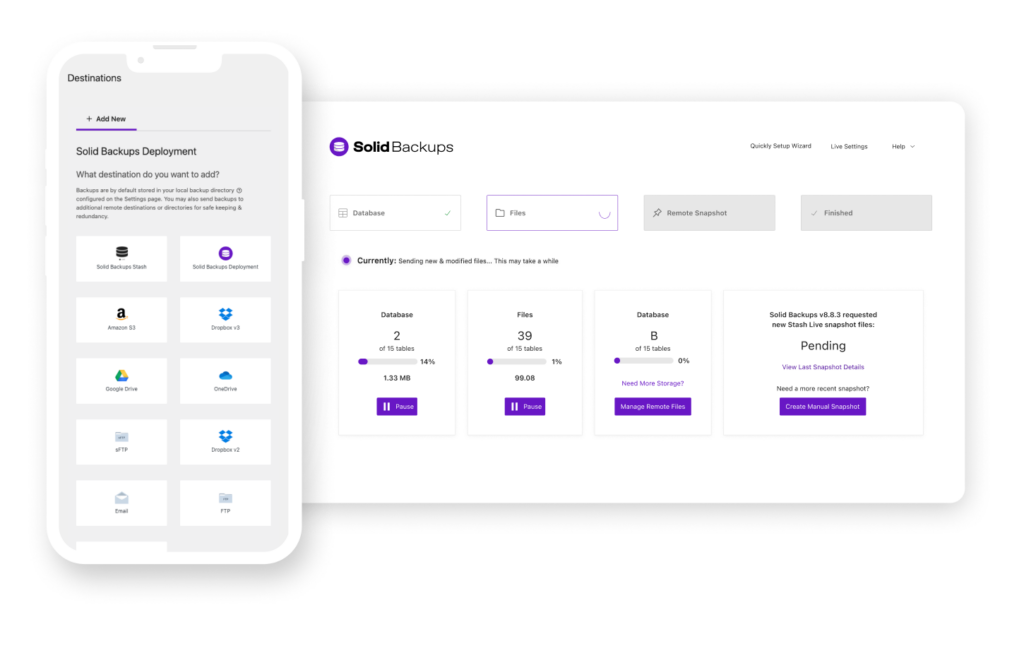
A complete WordPress backup solution with secure, offsite archives
Roll back database changes and restore sites or individual files
Set-and-forget secure scheduled backups
Everything you need in a backup solution
One-click restore and more

Try Solid Suite — risk free
We are seriously committed to offering a superior product. If for any reason our products aren’t living up to your expectations, we offer a zero risk 30-day money back guarantee.
30,000 websites are hacked every day
20-40%
Of WordPress sites have vulnerable code right now
50%
Nearly half of all targeted cyberattacks prey on small- to medium-sized businesses
20%
Of businesses nearly faced bankruptcy after a cyber attack (2022)
2.98M
The average cost of a data breach for businesses with fewer than 500 employees was $2.98 million in 2021

Customer trust, business stability, and brand reputation are lost when your site is breached
1,779
Vulnerabilities disclosed in WordPress-related plugins, themes, and the core WordPress platform in 2022
57%
The United States saw a 57% jump in cyberattacks as hackers exploit vulnerable websites with unhardened security practices
Let’s make sure your website isn’t one of them
Trusted by thousands of businesses all over the world


“I was using one of Solid Security’s competitors and we still got hacked! Since I’ve been using Solid Security our site has been rock solid! Love the products and the team.”
Erica Eide, Founder at EricaEide.com
“The Solid Suite of products helps me help my clients get more visible online and help them make more money with their website. Highly recommended!”
Paul Taubman, Chief Online Strategist at DigitalMaestro.com
“Using SolidWP products helps me make a difference in the success of others. I know I can count on them to deliver the results I want for my clients.”
Sue Spencer, Founder at Spencer Web Design
