8 Ways to Secure Your WordPress Login
The WordPress login URL is the same for every WordPress site, and it doesn’t require any special permissions to access. Anyone with any experience working with WordPress knows the login URL is located on the /wp-login.php page. The accessibility of the WordPress login page makes it the most attacked—and potentially the most vulnerable—part of any WordPress website.

The WordPress login URL is the same for every WordPress site, and it doesn’t require any special permissions to access. Anyone with any experience working with WordPress knows the login URL is located on the /wp-login.php page.
The accessibility of the WordPress login page makes it the most attacked—and potentially the most vulnerable—part of any WordPress website. Luckily for us, the iThemes Security Pro plugin makes it easy to secure your WordPress login.
Let’s take a took at the tools in iThemes Security Pro that you can use to secure your WordPress login and make it nearly impenetrable!
1. Limit Login Attempts
The first step to secure your WordPress login is to limit failed login attempts. By default, there isn’t anything built into WordPress to limit the number of failed login attempts someone can make. Without a limit on the number of failed login attempts an attacker can make, they can keep trying a combination of different usernames and passwords until they find one that works.
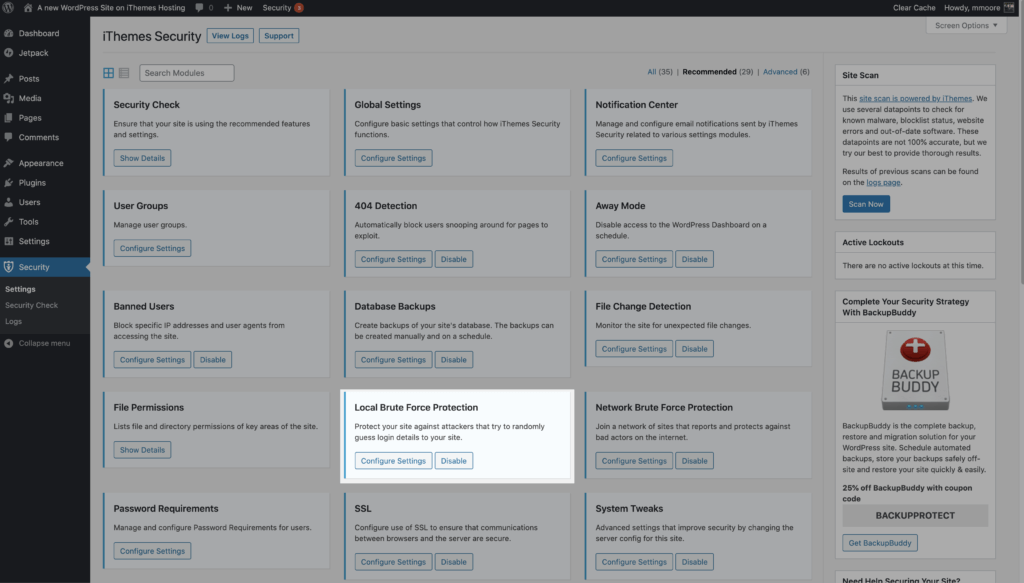
The iThemes Security Pro Local Brute Force Protection feature keeps tracks of invalid login attempts made by a host or IP address and a username. Once an IP or username has made too many consecutive invalid login attempts, they will get locked out and will be prevented from making any more attempts for a set period of time.
To get started using the Local Brute Force Protection feature, enable it on the main page of the iThemes Security Pro settings page.
The Local Brute Force Protection settings allow you to set the thresholds for lockouts.
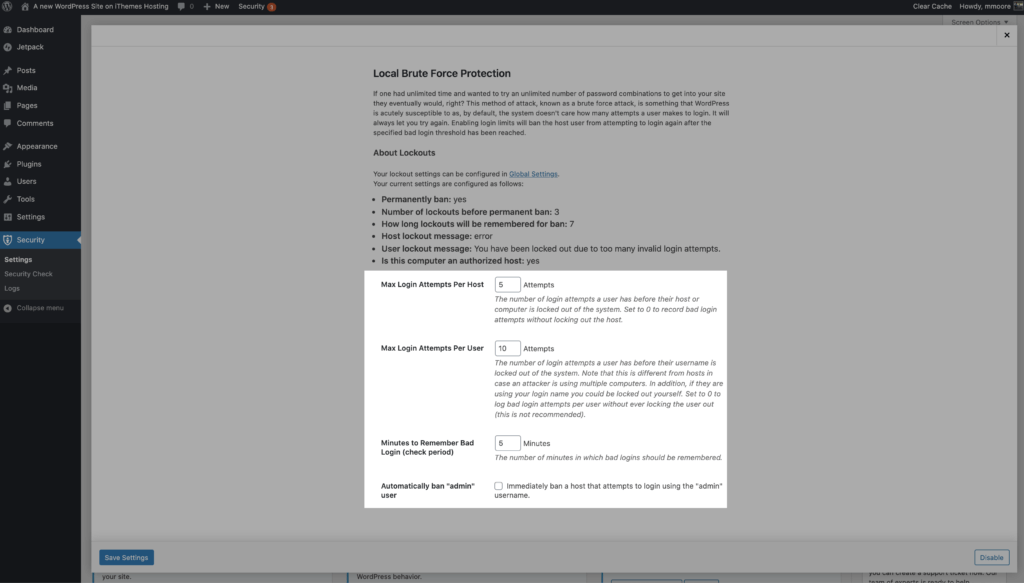
- Max Login Attempts Per Host – The number of invalid login attempts an IP is allowed before it gets locked out.
- Max Login Attempts Per User – This is the number of invalid login attempts a username is allowed before it gets locked out.
- Minutes to Remember Bad Login – This is how long an invalid login attempt should count against an IP or username for a lockout.
- Automatically ban “admin” user – When enabled, anyone using the Admin username when logging in receives an automatic lockout.
There are a couple of things that you want to keep in mind when you are configuring your lockout settings. You want to give move invalid login attempts to users than you give IPs. Let’s say your website is under a brute force attack and the attacker using your username. The goal is to lock out the attacker’s IP and not your username, so you will still be able to login and get work done, even when your website is under attack.
You also don’t want to make these settings too strict by setting the number of invalid login attempts too low and the time to remember invalid attempts too long. If you lower the number of invalid login attempts for hosts/IPs to 1 and set the minutes to remember a bad login attempt to a month, you are drastically increasing the likelihood of inadvertently locking out legitimate users.
2. Limit Outside Authentication Attempts Per Request
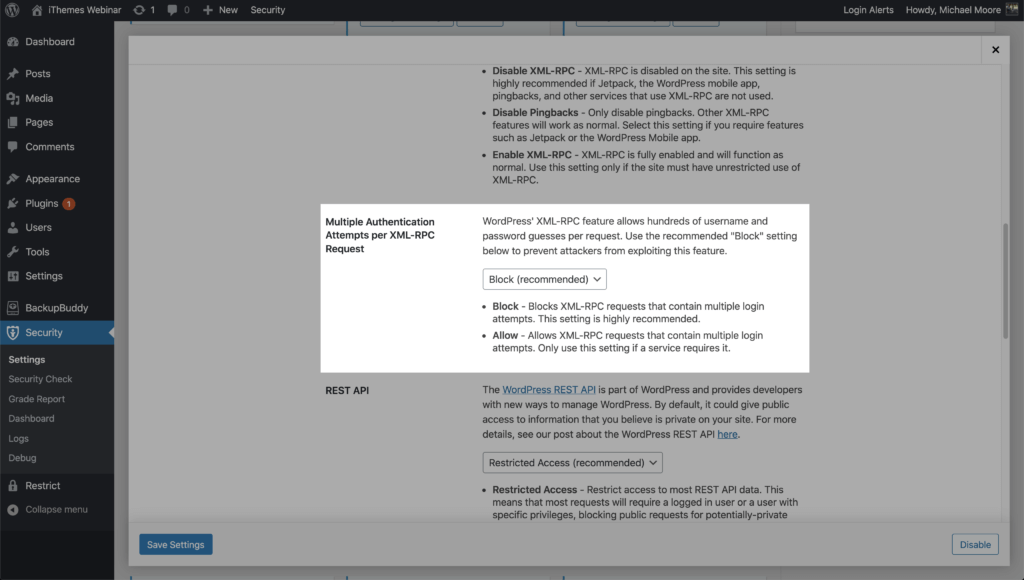
There are other ways to log into WordPress besides using a login form. Using XML-RPC, an attacker can make hundreds of usernames and password attempts in a single HTTP request. The brute force amplification method allows attackers to make thousands of username and password attempts using XML-RPC in just a few HTTP requests.
Using iThemes Security Pro’s WordPress Tweaks settings, you can block multiple authentication attempts per XML-RPC request. Limiting the number of username and password attempts to one for every request will go a long way in securing your WordPress login.
3. Network Brute Force Protection
Limiting login attempts is all about local brute force protection. Local brute force protection looks only at attempts to access your site and bans users per the lockout rules specified in your security settings.
Network Brute Force protection takes this a step further. The network is the iThemes Security community and is over a million websites strong. If an IP is identified as trying to break into websites in the iThemes Security community, the IP will get added to the Network Brute Force banned list.
Once an IP is on the Network Brute Force banned list, the IP be blocked on all websites in the network. So, if an IP attacks my website and gets banned, it will be reported to iThemes Security Brute Force Network. My report can help to get the IP banned on the entire network. I love that I can help to secure other people’s WordPress login just by enabling the iThemes Security Network Protection.
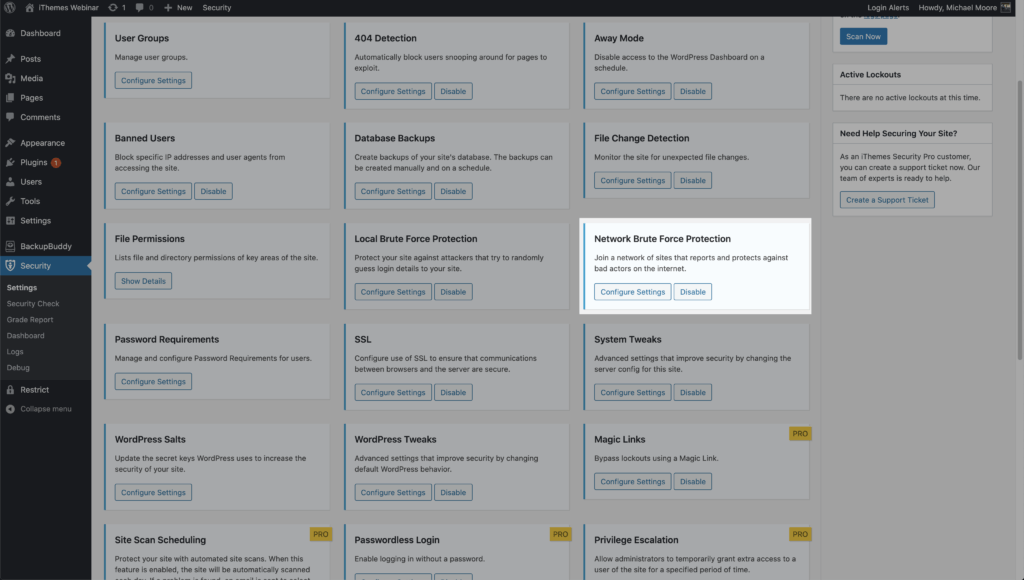
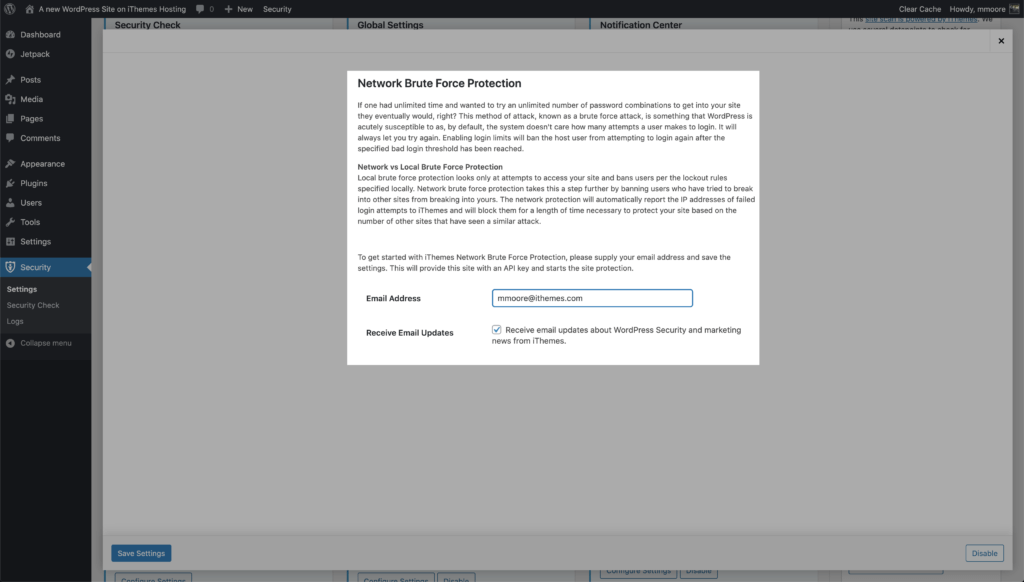
To start using Network Force Protection, enable it on the main page of the security settings.
Then enter your email address, choose whether or not you want to receive email updates and then click the Save button.
4. Force Strong Passwords
In a list compiled by Splash Data, the most common password included in all data dumps was 123456. A data dump is a hacked database filled with user passwords dumped somewhere on the internet. Can you imagine how many people on your website use a weak password if 123456 is the most common password in data dumps?
Using a weak password is like trying to lock your front door with a piece of tape. It has never taken long for hackers to brute force their way past a weak password into a website. Now that hackers are leveraging computer graphics cards in their attacks, the time it takes to crack a password has never been lower.
For example, let’s take a look at a chart created by Terahash, a high-performance password-cracking company. Their chart shows the time it takes to crack a password using a hashstack cluster of 448x RTX 2080s.

By default, WordPress uses MD5 to hash user passwords stored in the WP database. So, according to this chart, Terahash could crack an 8 character password … almost instantly. That is not only super impressive but is also really scary. The good news is that we can secure our WordPress login by requiring that our high-level users use strong passwords.
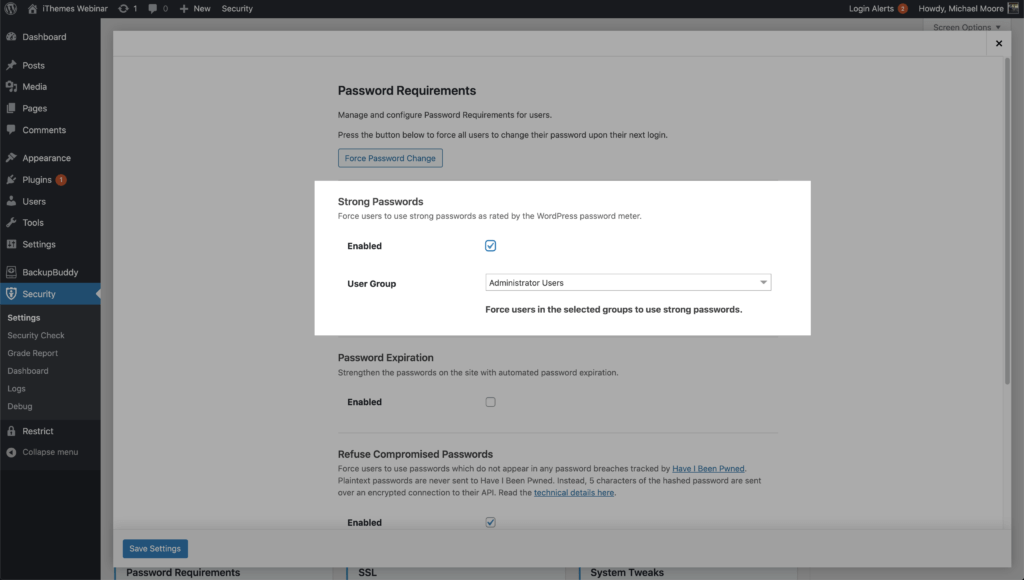
The iThemes Security Pro Passwords Requirement feature allows you to force specific users to use a strong password. Enable the Password Requirements feature on the main page of the security settings, and then select the users you want to require to use a strong password.
5. Refused Compromised Passwords
According to the Verizon Data Breach Investigations Report, over 70% of employees reuse passwords at work. But the most important stat from the report is that 81% of hacking-related breaches leveraged either stolen or weak passwords.
Hackers use a form of a brute force attacked called a dictionary attack. A dictionary attack is a method of breaking into a WordPress website with commonly used passwords that have appeared in database dumps. The “Collection #1? Data Breach that was hosted on MEGA included 1,160,253,228 unique combinations of email addresses and passwords. That is a billion with a b. That kind of score will really help a dictionary attack narrow the most commonly used WordPress passwords.
It is a must to prevent users with Author level capabilities and above from using compromised passwords to secure your WordPress login. You may also think about not letting your lower level users use compromised passwords.
It is completely understandable and encouraged to make creating a new customer account as easy as possible. However, your customer may not know that the password they are using has been found in a data dump. You would be doing your customer a great service by alerting them to the fact that the password they are using has been compromised. If they are using that password everywhere, you could save them from some major headaches down the road.
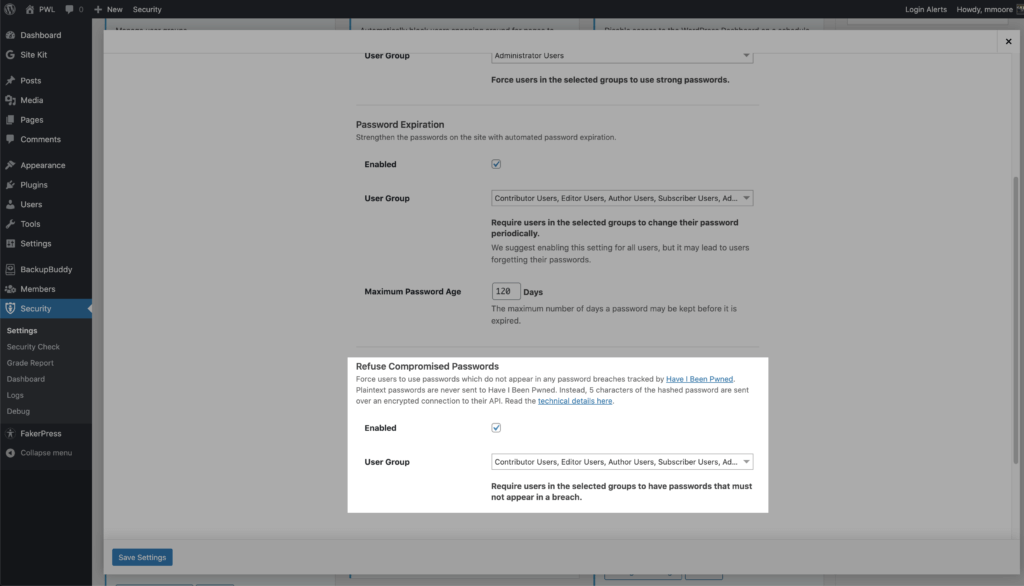
The iThemes Security Pro Refuse Compromised Passwords feature forces users to use passwords that have not appeared in any password breaches tracked by Have I Been Pwned. Enable the Password Requirements feature on the main page of the security settings, and then select the users you want to prevent using a compromised password.
6. Use Two-Factor Authentication
Using two-factor authentications is the best thing that you can do to secure your WordPress login. Two-factor authentication is a process of verifying a person’s identity by requiring two separate methods of verification. Google shared on its blog that using two-factor authentication can stop 100% of automated bot attacks. I really like those odds.
Using two-factor authentication can stop 100% of automated bot attacks.
The iThemes Security Pro Two-Factor Authentication feature provides a ton of flexibility when implementing 2fa on your website. You can enable two-factor for all or some of your users, and you can force your high-level users to use 2fa on each login.
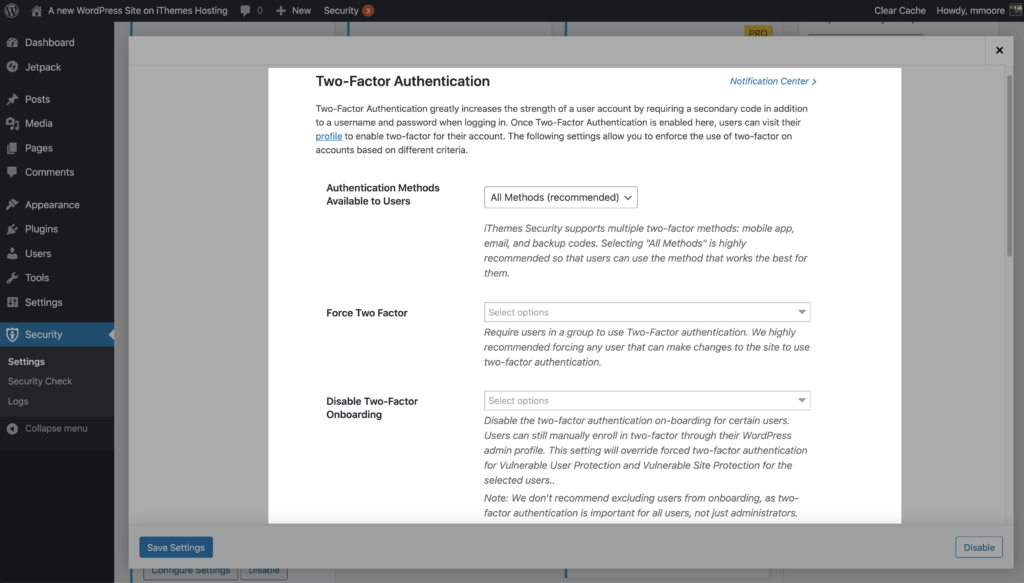
For your convenience, iThemes Security Pro offers 2 different methods of two-factor authentication.
- Mobile App – The mobile app method is the most secure method of two-factor authentication provided by iThemes Security Pro. This method requires you to use a free two-factor mobile app like Authy.
- Email – The email method of two-factor will send time-sensitive codes to your user’s email address.
- Backup Codes – A set of one-time use codes that can be used to login in the event the primary two-factor method is lost.
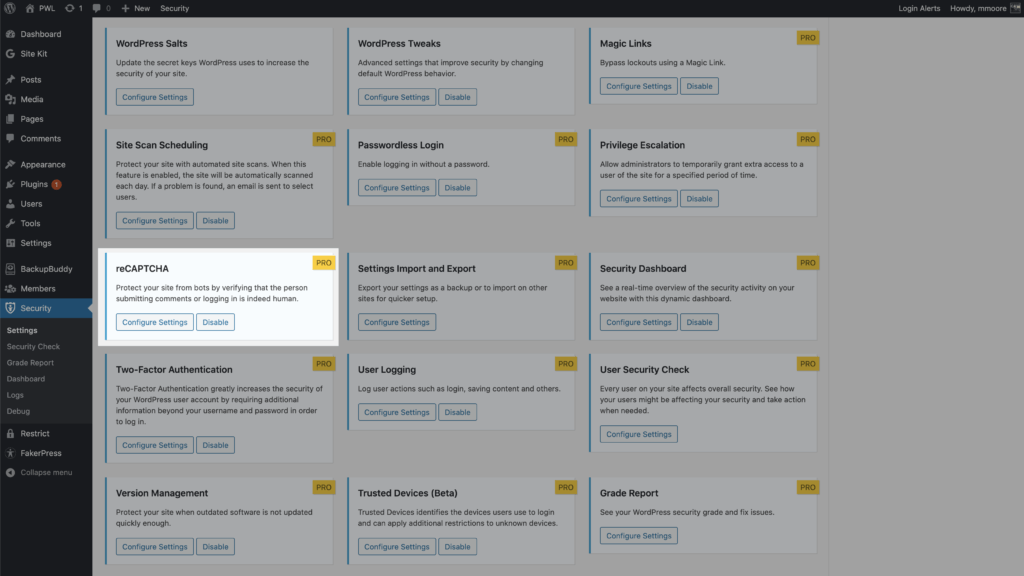
7. Block Bad Bots with Google reCAPTCHA v3
The iThemes Security Pro Google reCAPTCHA feature in iThemes Security Pro protects your site from bad bots. These bots are trying to break into your website using compromised passwords, posting spam, or even scraping your content. reCAPTCHA uses advanced risk analysis techniques to tell humans and bots apart.
What’s great about reCAPTCHA version 3 is that it helps you detect abusive bot traffic on your website without any user interaction. Instead of showing a CAPTCHA challenge, reCAPTCHA v3 monitors the different requests made on your site and returns a score for each request. The score ranges from 0.0 to 1. The higher the score returned by reCAPTCHA, the more confident it is that a human made the request. The lower this score returned by reCAPTCHA, the more confident it is that a bot made the request.
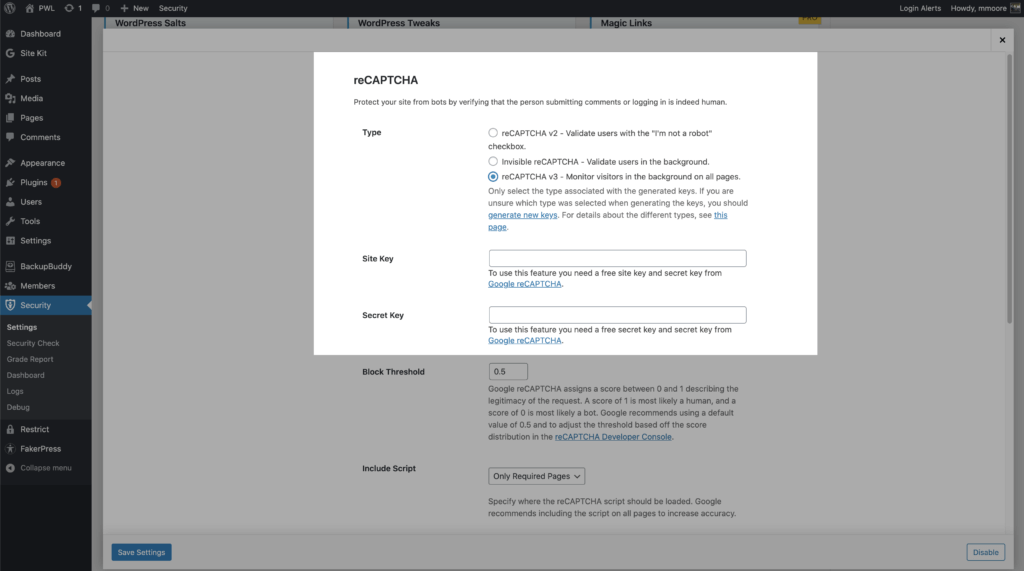
To get started using Google reCAPTCHA v3, enable the option on the main page of the security settings.
Next you will need to select reCAPTCHA v3 as you reCAPTCHA type and generate your keys from your Google admin
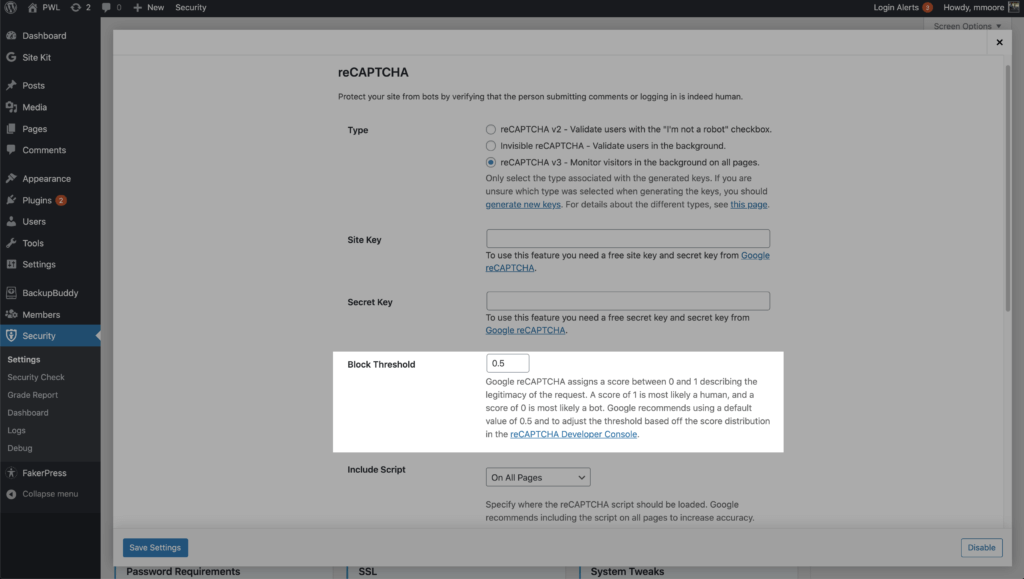
iThemes Security Pro allows you to set a block threshold using the reCAPTCHA score. Google recommends using 0.5 as your default. Keep in mind that you could inadvertently lock out legitimate users if you set the threshold too high.
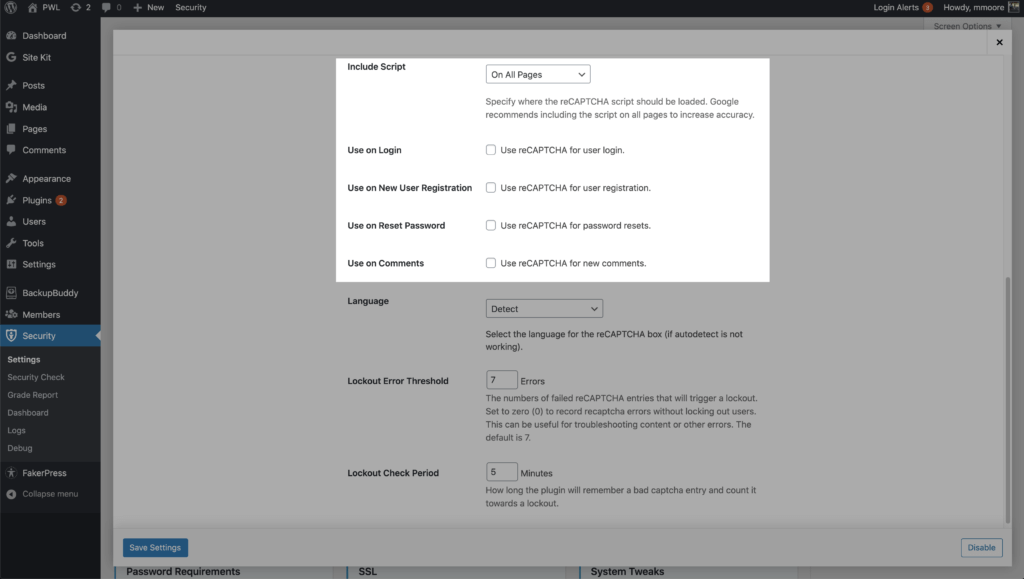
You can enable reCAPTCHA on your WordPress user registration, reset password, login, and comments. iThemes Security Pro allows you to run the Google reCAPTCHA script on all pages to increase the accuracy of its bot vs. human score. Enabling reCAPTCHA v3 is a great way to secure your WordPress login.
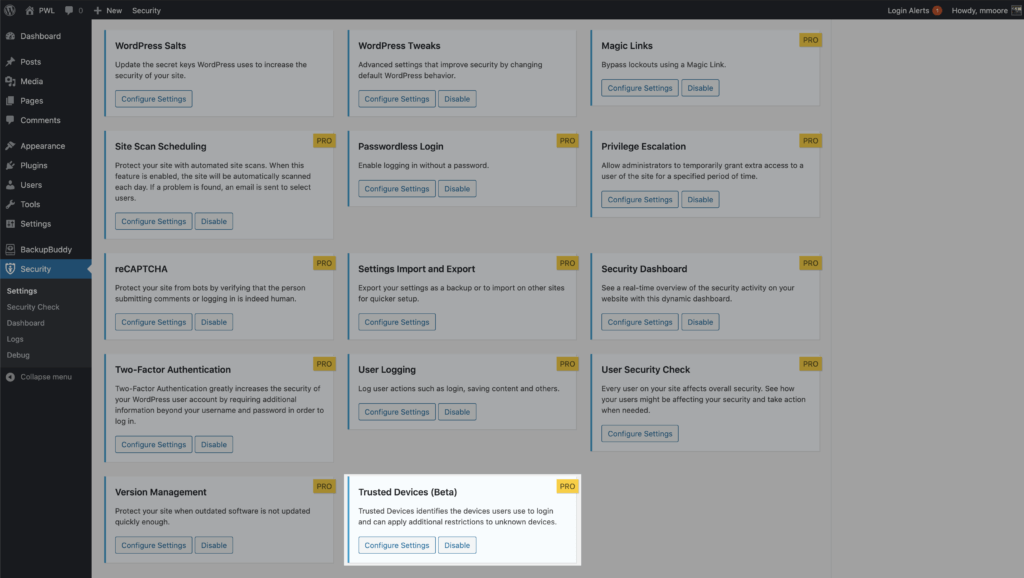
8. Limit Device Access to the WP Dashboard
The last step to securing your WordPress login is to limit access to your WordPress dashboard to a set of devices. The iThemes Security Pro Trusted Devices feature identifies the devices that you and other users use to login to your WordPress site. When a user has logged in on an unrecognized device, Trusted Devices can restrict their administrator-level capabilities. This means that a hacker was able to bypass your other login security methods–not very likely– they wouldn’t have the ability to make any malicious changes to your website.
To start using Trusted Devices, enable them on the main page of the security settings, and then click the Configure Settings button.
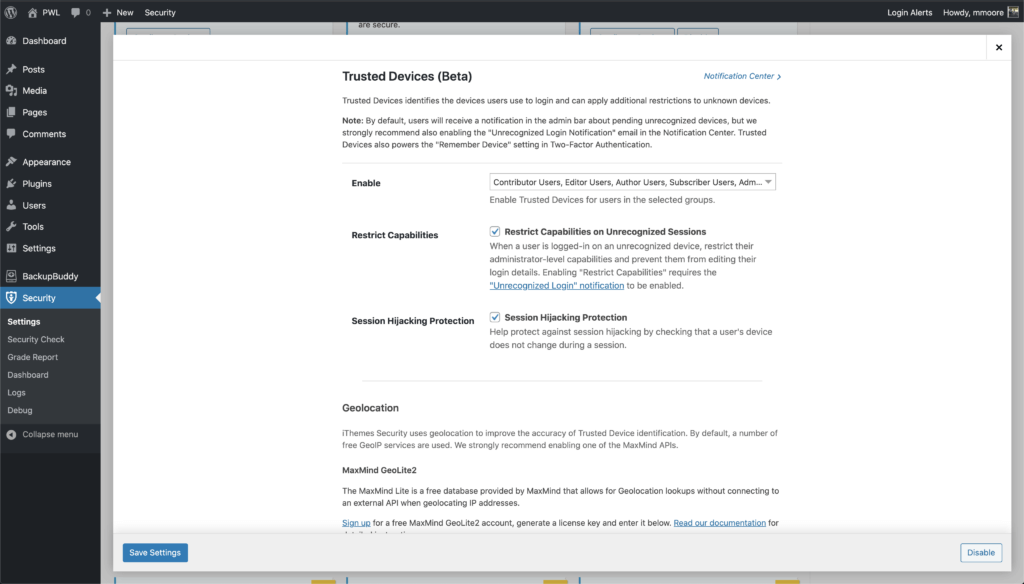
In the Trusted Devices settings, decide which users you want to use the feature, and enable then Restrict Capabilities and Session Hijacking Protection features.
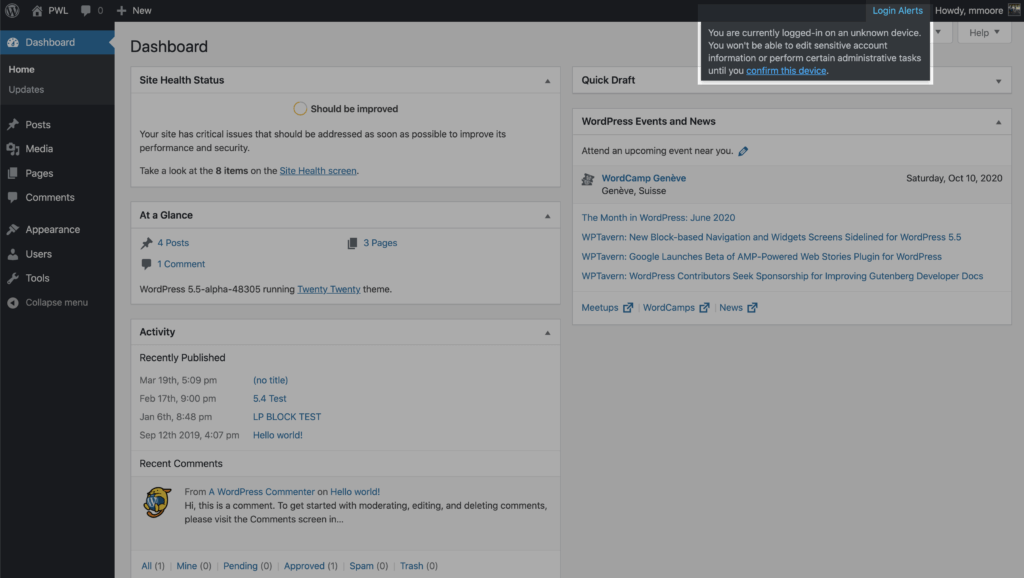
After enabling the new Trusted Devices setting, users will receive a notification in the WordPress admin bar about pending unrecognized devices. If your current device hasn’t been added to the trusted devices list, click the Confirm This Device link to send the authorization email.
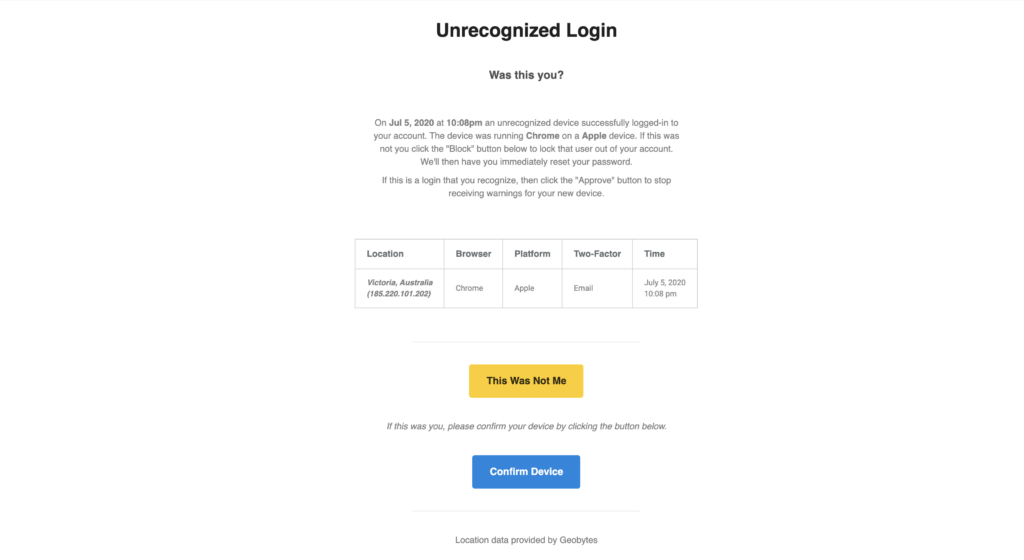
Click the Confirm Device button in the Unrecognized Login email to add your current devices to the Trusted Devices list.
Wrapping Up
The accessibility of the WordPress login page makes it the most attacked—and potentially vulnerable—part of any WordPress site. However, if you are using iThemes Security Pro you can rest easy.
Make sure you are using the 8 iThemes Security Pro tools to secure your WordPress login that were shared in this post.
- 1. Limit Login Attempts
- 2. Limit Outside Authentication Attempts Per Request
- 3. Network Brute Force Protection
- 4. Force Strong Passwords
- 5. Refused Compromised Passwords
- 6. Use Two-Factor Authentication
- 7. Block Bad Bots with Google reCAPTCHA v3
- 8. Limit Device Access to the WP Dashboard
Join us for the next Solid Academy Webinar!
Free weekly webinars that will help you master WordPress and increase your business's bottom line.
What is a WordPress Phishing Attack?
Learn how to identify and prevent phishing attacks on WordPress websites.
Kiki SheldonWebsite Protection: 5 Ways to Keep Your Website Safe
Robust website protection is the shield that stands between your business and relentless cyber attacks. Prioritizing website protection enables businesses to fortify defenses to safeguard their online presence and preserve the trust of their customers in the face of ever-evolving cybersecurity threats.
Kiki Sheldon23 Ideas To Grow Your WordPress Business in 2023
WordPress is the most popular website-building platform worldwide, trusted by numerous brands. WordPress enables you to build a user-friendly and highly reliable site, together with tools and plugins to enhance your marketing and work like a lead magnet. All these features make WordPress the platform chosen by more than 43% of businesses globally.
SolidWP Editorial TeamSign up now — Get SolidWP updates and valuable content straight to your inbox
Sign up
Get started with confidence — risk free, guaranteed

