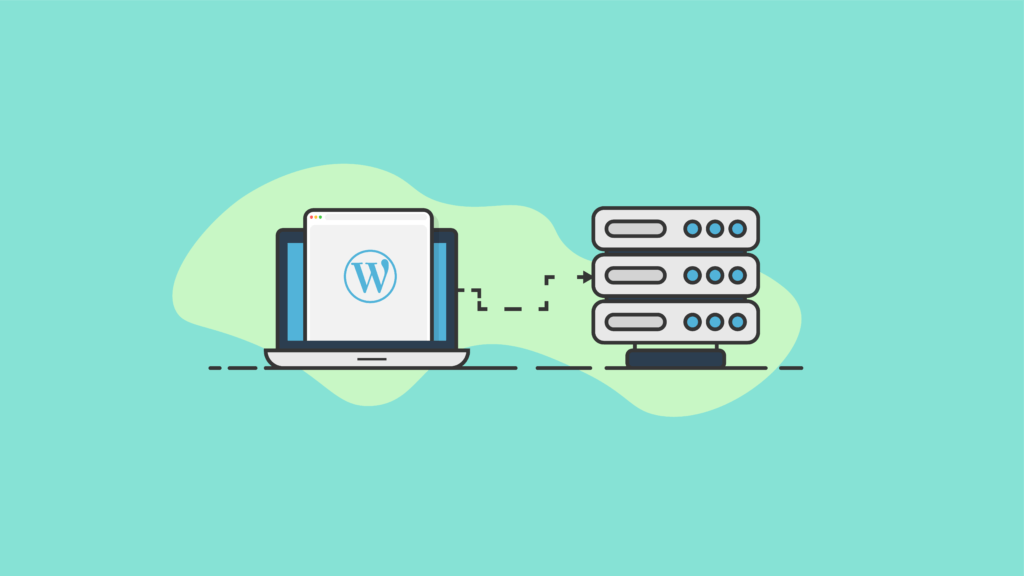
How to Move a WordPress Website to a New Web Host or Server
Need to move a WordPress website to a new host or server? The good news is that it is possible to move an entire WordPress website to a different web host or server in just a few steps. Even better news? You won't have to rebuild the site or worry about manually migrating anything. In this guide, we'll cover a step-by-step guide for how to move a WordPress site or blog to a different server or hosting company.

Need to move a WordPress website to a new host or server? The good news is that it is possible to move an entire WordPress website to a different web host or server in just a few steps. Even better news? You won’t have to rebuild the site or worry about manually migrating anything.
In this guide, we’ll cover a step-by-step guide for how to move a WordPress site or blog to a different server or hosting company.
3 Common Reasons to Move a WordPress Site to a New Host or Server
Here are a few common reasons why you may need to move a website to a new domain.
- You need a better web host – Maybe the web hosting company you’ve used no longer measures up to your needs for speed, reliability, cost, security or storage. It’s time to move on!
- You need to move a development site to the live server – Website developers often develop on a separate server or locally until a site design (or redesign) is complete. The dev site will need to be pushed to the live server.
- Ownership of a website has changed – Maybe you sold your company or blog and the new owner has different plans for where the website will be hosted. Or maybe you’re handing off a website you built for a client to their control.
Before You Begin: Preparing to Move a WordPress Site
For the purpose of this tutorial, we’ll be moving a WordPress site from one server to another. The domain stays the same. (Need to move WordPress to a new domain? We have a tutorial specific to that scenario, too.)
Update DNS or Nameservers For Domain To Point to New Web Host/Server Location
If you’re keeping the same domain name for the website you’ll be moving, you’ll likely need to make sure you’ve updated the nameservers or DNS record for your domain name to point to the new host or server.
Access & Tools Needed
To get ready to move your website to a new domain, you’ll need access to your website’s files, as well as a few tools to make the process quick and easy.
- Access to the files on your website’s server – Usually, this just involves admin access to the web hosting account of your existing website, with cPanel or File Management access. File access can also be accomplished with sFTP/FTP access to your website’s server using a text/code editing tool with file manager options.
- Access to the web hosting account of your web host/server – Where will you be hosting your website? You’ll need the same file-level access to that web hosting account (it may be the same as your existing website if you added the new domain to your existing web hosting account).
- Access to create a new MySQL database for your new server/host
- BackupBuddy, the WordPress backup plugin – This post will walk through the entire process of moving a WordPress site from one domain to another using the BackupBuddy’s Manual Migration method. Using the BackupBuddy plugin is the quickest way to move a WordPress site.
- The ImportBuddy file/script – BackupBuddy comes with a download for the ImportBuddy file that will help you complete the move of your website to a new domain.
Ready to get started? Let’s go.
Steps to Move a WordPress Site to a New Server or Web Host
Here are the steps you need to walk through to move your site to the new domain or URL.
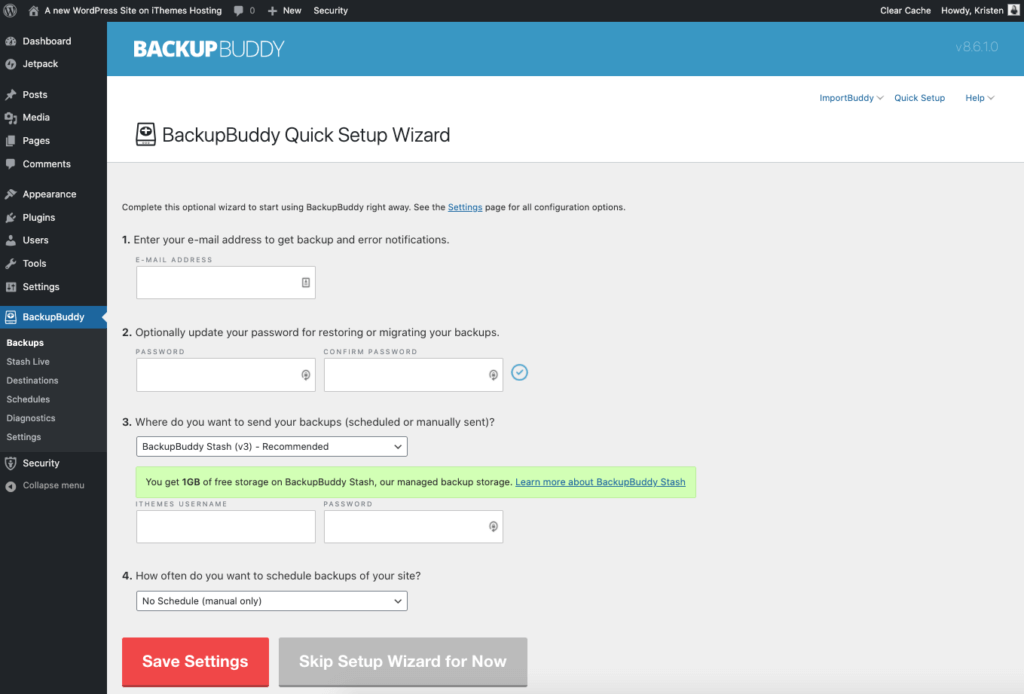
1. Install the BackupBuddy plugin on your WordPress site.
After activation, run through the Quick Setup to enable the most important features.
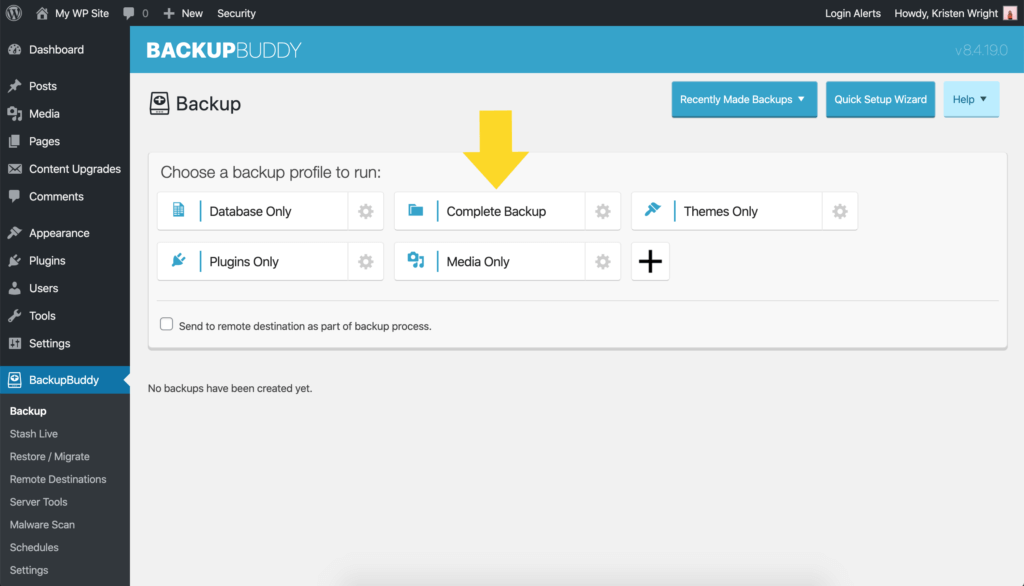
2. Make a Complete Backup with BackupBuddy.
You’ll need to make a Complete backup of the site you wish to move. A Complete Backup is one of the 5 types of WordPress backups you can make with BackupBuddy, and covers backing up everything in your WordPress installation.
From your WordPress admin dashboard, visit the BackupBuddy > Backups page. Click the Complete Backup button.
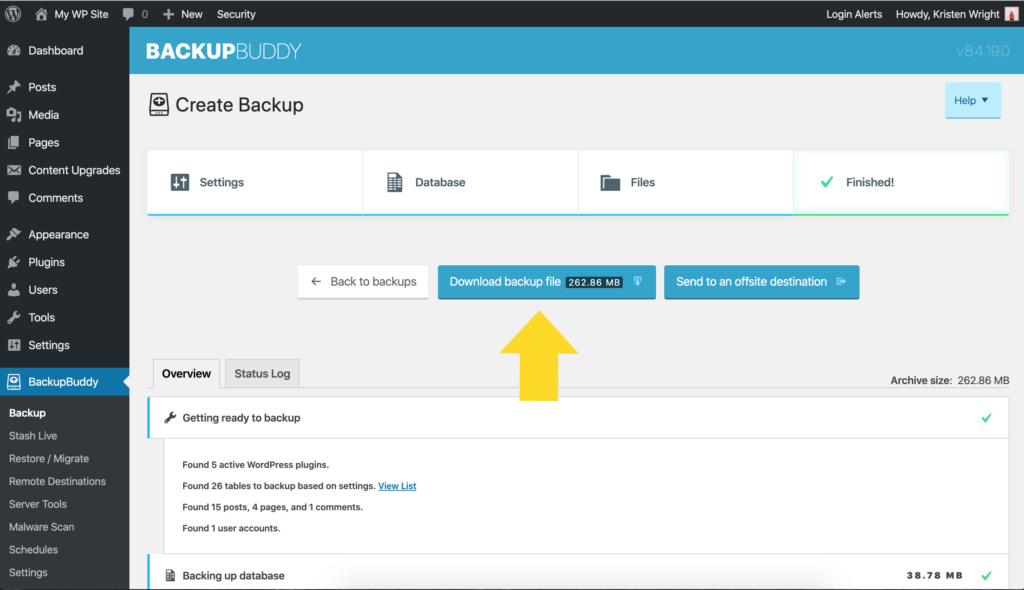
After the backup completes, download the Backup zip file. After the backup completes, download the zip file and save it to your computer. Do not unzip this file.
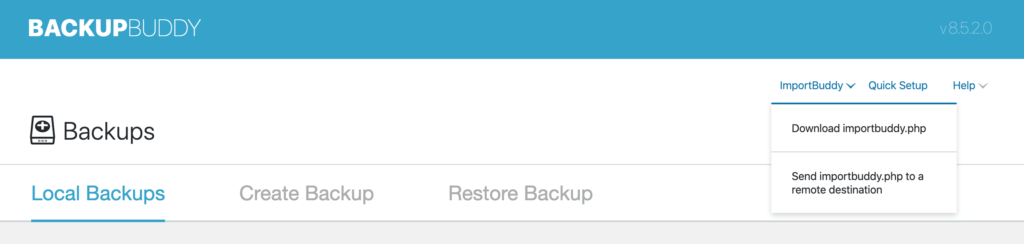
3. Download the ImportBuddy file
Next, you’ll need to navigate back to the BackupBuddy > Backups menu to download the importbuddy.php file. You’ll see the download option from the top right ImportBuddy menu.
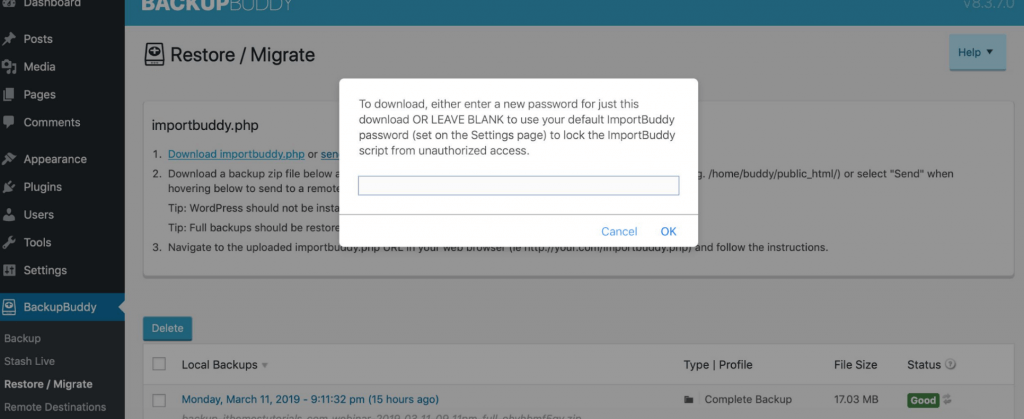
Confirm your ImportBuddy password. In the window that pops up, enter a new password or leave blank to use the ImportBuddy password you set up when you first installed BackupBuddy. This password is important because it locks the ImportBuddy script from unauthorized access. Click OK and the download will begin.
4. Create a New Database and Database User from cPanel
The next part of the process of moving a WordPress site to a new host or sever requires you to have access to the cPanel of the hosting account where the site will be hosted.
A WordPress site is essentially “a pretty face on a database” so that’s why we’re creating a new database here. This database will be connected to the new version of the “moved” WordPress site. You’ll want to copy the database name, username and password you create in this section to use during the ImportBuddy migration process later.
Log in to your new hosting account to access cPanel. Note: your host may use a different hosting backend service other than cPanel, but the process will be similar.
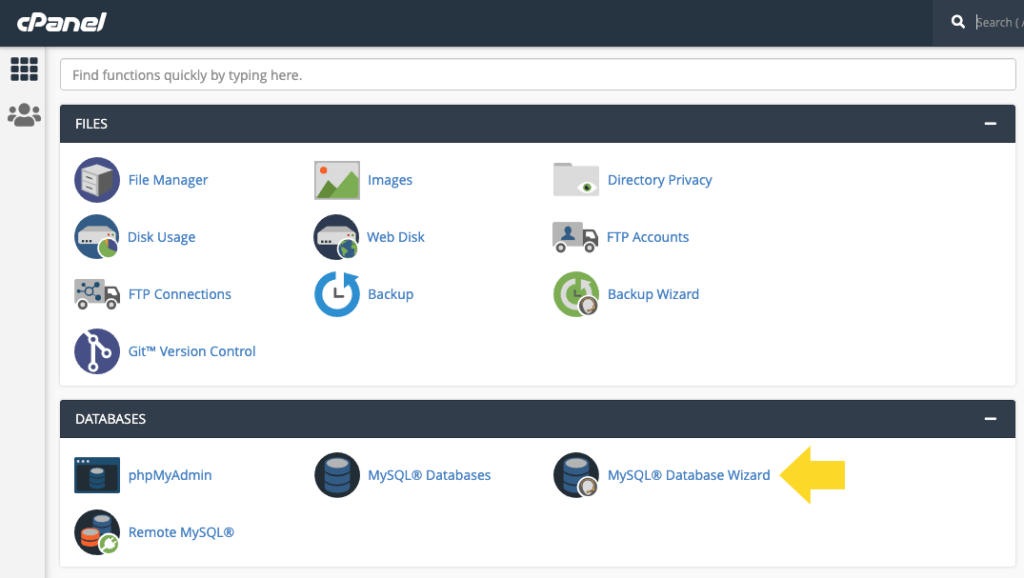
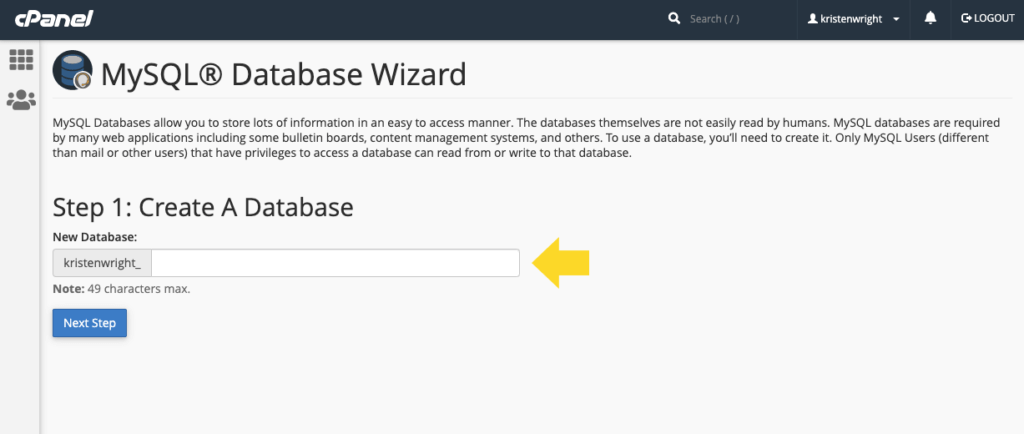
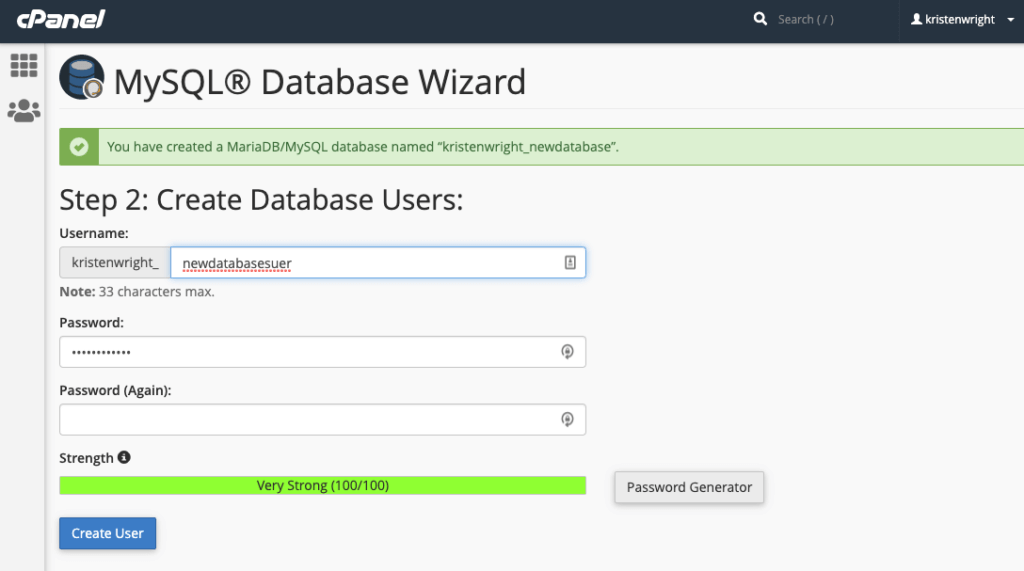
From cPanel, locate the MySQL Database Wizard icon in the list and click on it. The MySQL Database Wizard will guide you through the next steps. First, add the name of the new database. Click “Next Step.”
Next, add a database user. Use the password generator to create a strong password. Don’t forget to copy the username and password you create here to a secure location using a service like 1Password. Click “Create User.”
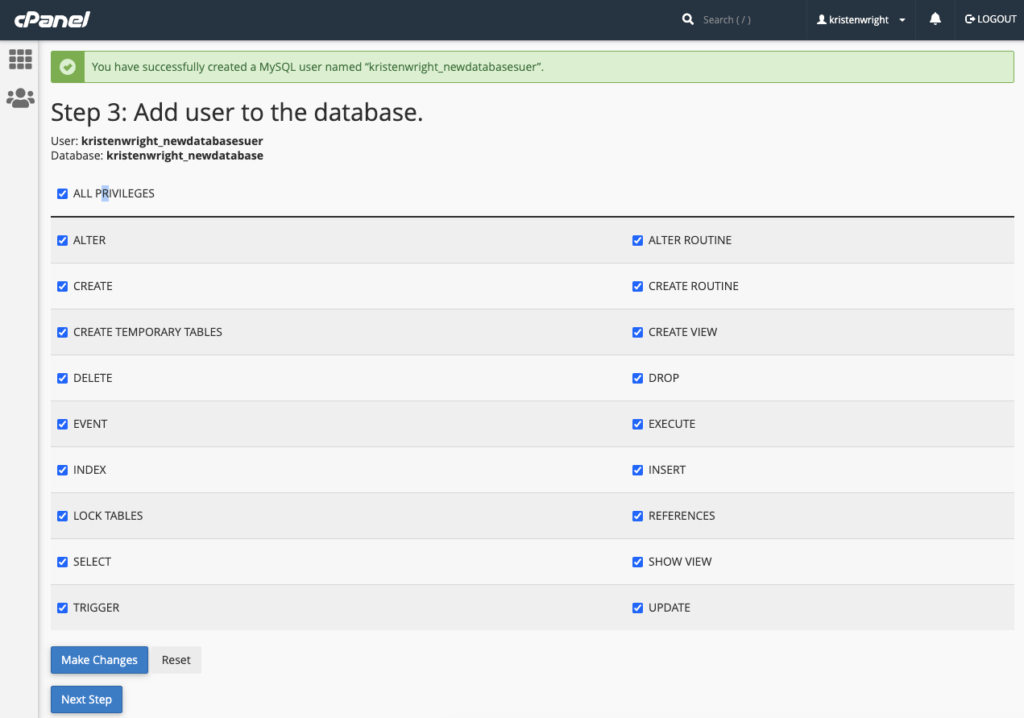
The next screen will add the new user to the database. Click the “All Privileges” checkbox and then click “Next Step.”
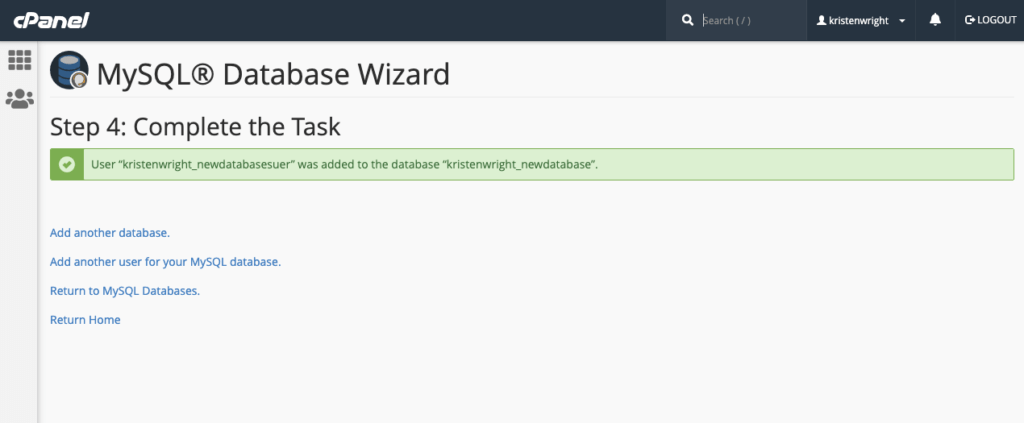
The final screen confirms the creation of the new database and the new user. Confirm that you’ve copied the database name, the database user and password to a secure location.
5. Upload the Backup Zip File & ImportBuddy File to the New Directory
In this next section, we’ll be uploading the backup zip file and the ImportBuddy file into the directory of the new/moved site. Basically, a directory is where your WordPress site “lives” on your server. All the files that run the WordPress site are located within this folder (directory).
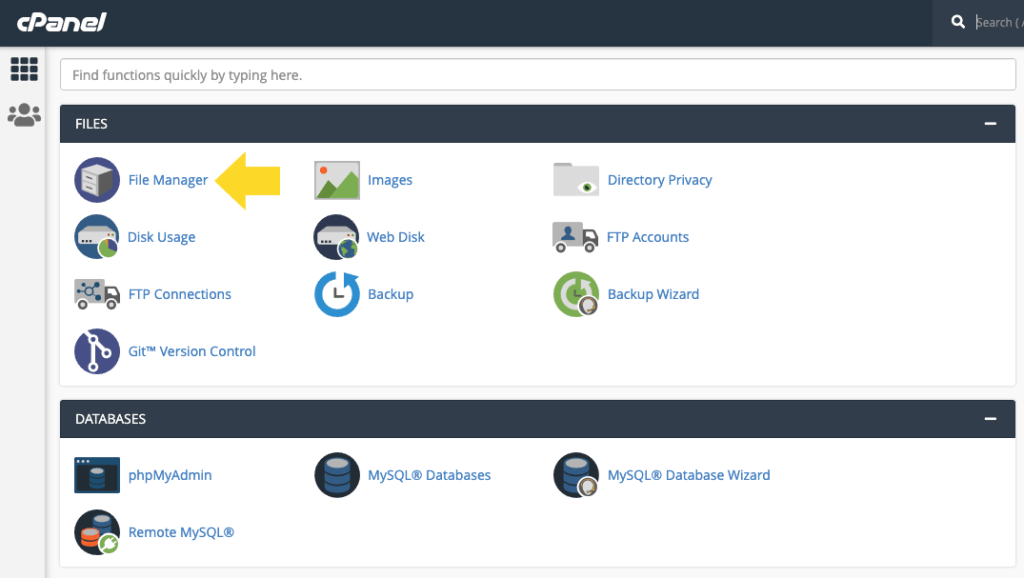
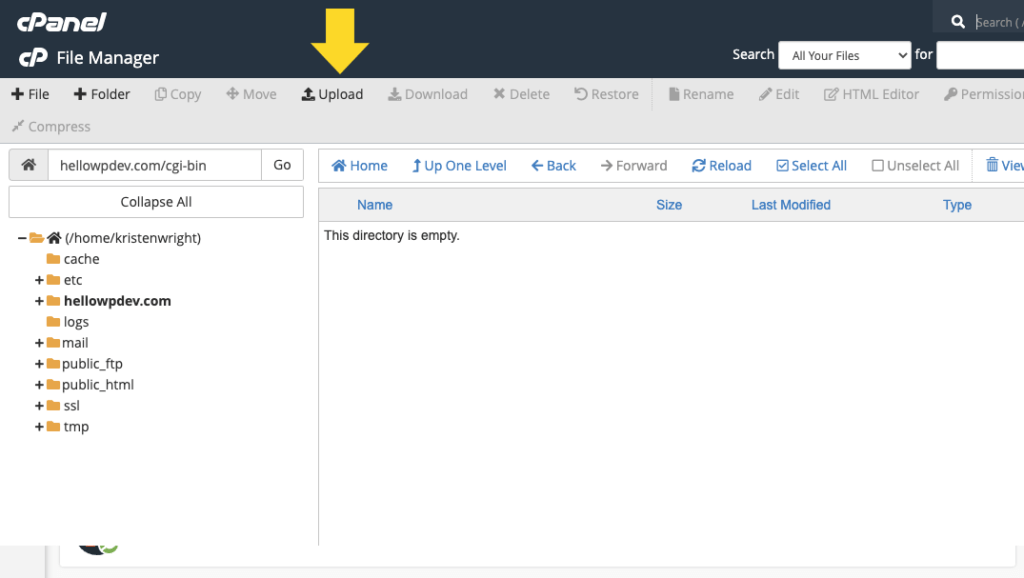
For this next step, you can use FTP access to the server or the File Manager within your cPanel. You just need to have access to upload (or delete) files on your server.
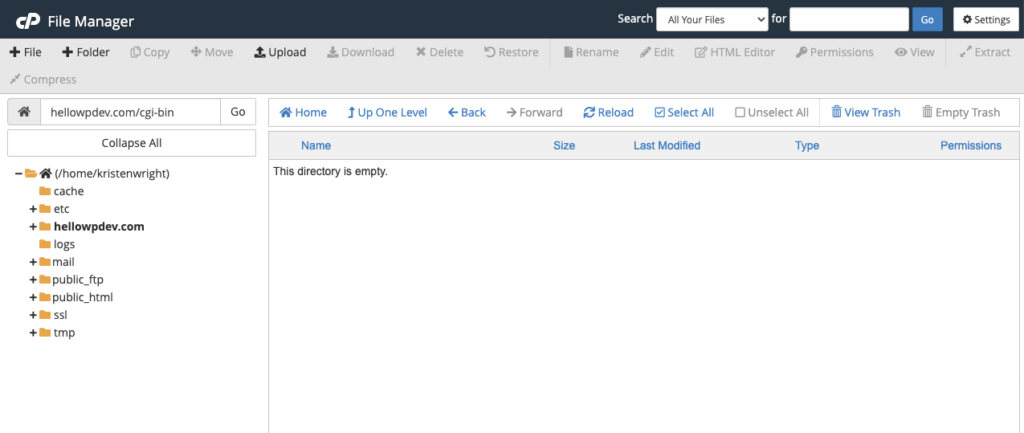
Open the directory (folder) of the final location of the WordPress site. Note: Most hosting providers will automatically set up and name the directory when you add the domain name to your hosting account. Your directories will be located in the /public_html directory.
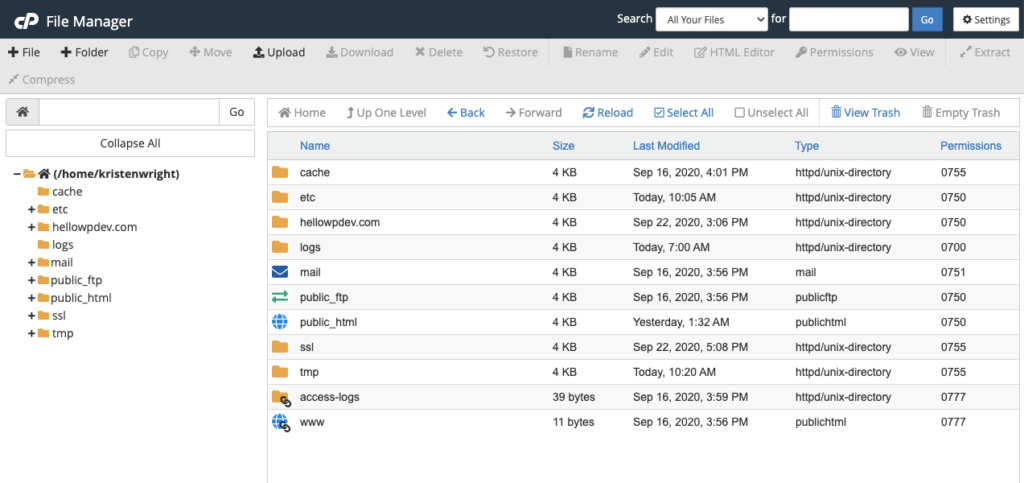
IMPORTANT: This directory will need to be empty prior to uploading the backup zip file and the importbuddy.php file. If there are existing files in this directory, go ahead and delete them so you have an empty folder.
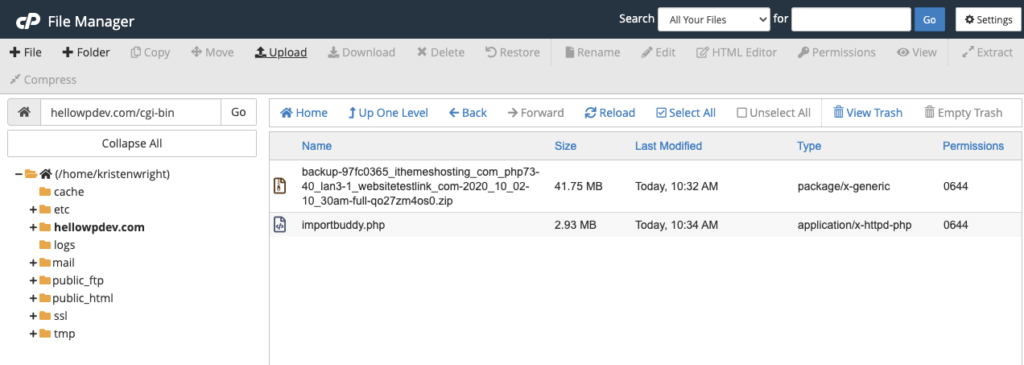
Upload the importbuddy.php file and the backup zip file to this empty directory. You can use the Upload function within the File Manager here.
After you upload the importbuddy.php file and the backup zip file, the directory should look like this.
6. Walk through the ImportBuddy Steps to Finish the Move
This final series of steps will guide you through using ImportBuddy to finish up the site move.
Navigate to the site URL/importbuddy.php. For our example site move, we’d visit this link in your browser:
http://examplesite.com/importbuddy.php
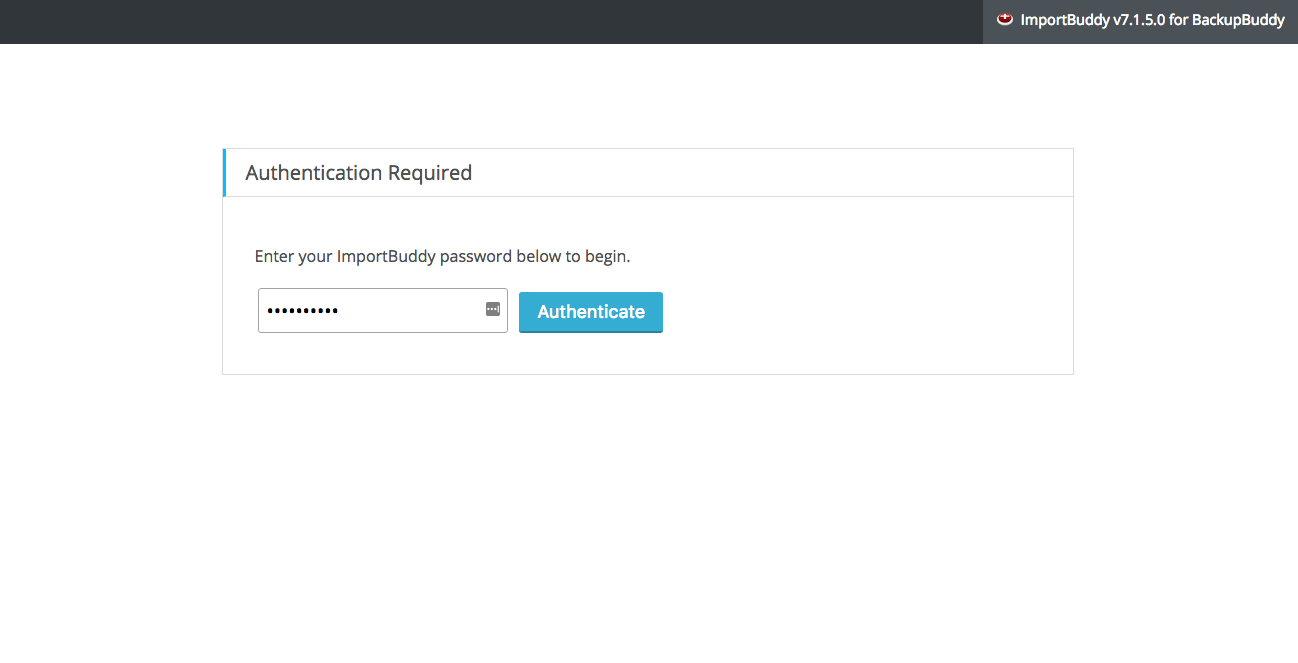
After this page loads, you’ll see the first ImportBuddy screen. Enter the password you created back in step 4 of this tutorial (or the password you set when you first set up BackupBuddy). Click the “Authenticate” button.
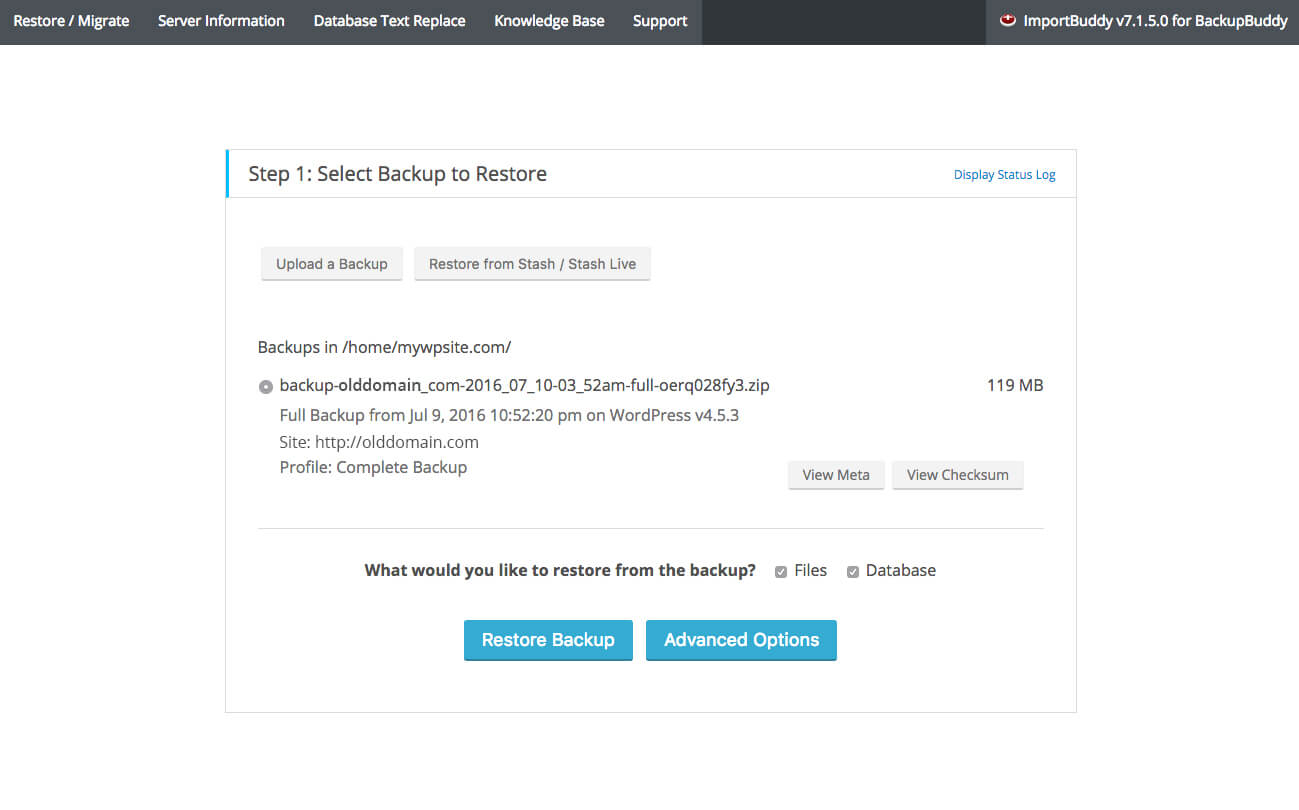
For Step 1 of the ImportBuddy process, verify that the backup file is selected (it will be by default). Click the “Restore Backup” button.
On the next page, enter your database settings under the “New Database” section. This will be the database name, database user and database password you created in steps 7-10. Your page should look something like this. Click the “Next Step” button.

| Old Database Database | New Database | Explanation | |
|---|---|---|---|
| Database Server | localhost | localhost | In almost all cases, this field will be “localhost.” This is the address to the mySQL server where your database will be stored. The location of your mySQL server will be provided to you by your host if it differs from “localhost.” |
| Database Name | olddomain_phs | clientsite_newdatabase | This is the name of the new database we created in step 7. |
| Database User | olddomain_user | clientsite_newuser | This is the name of the new user we created in step 8. |
| Database Password | *************** | *************** | This is the password for the user you created in step 8. |
| Database Prefix | wp_ | wp_ | This is the prefix given to all tables in the database. For the purposes of this tutorial, we’ll leave it at wp_ (since we’re moving a site to new domain). |
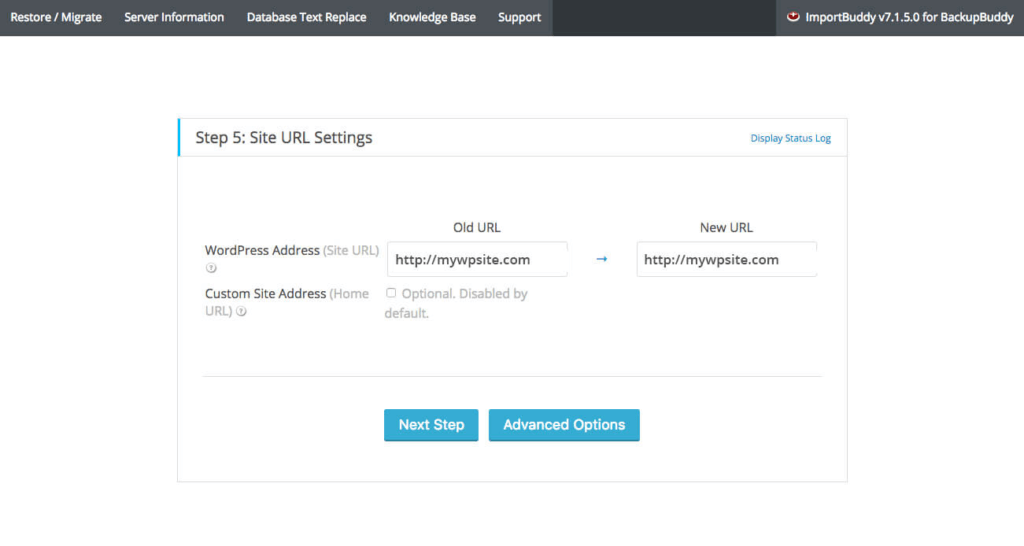
ImportBuddy will finalize the migration and ask you to confirm the New URL. Click the “Next Step” button.
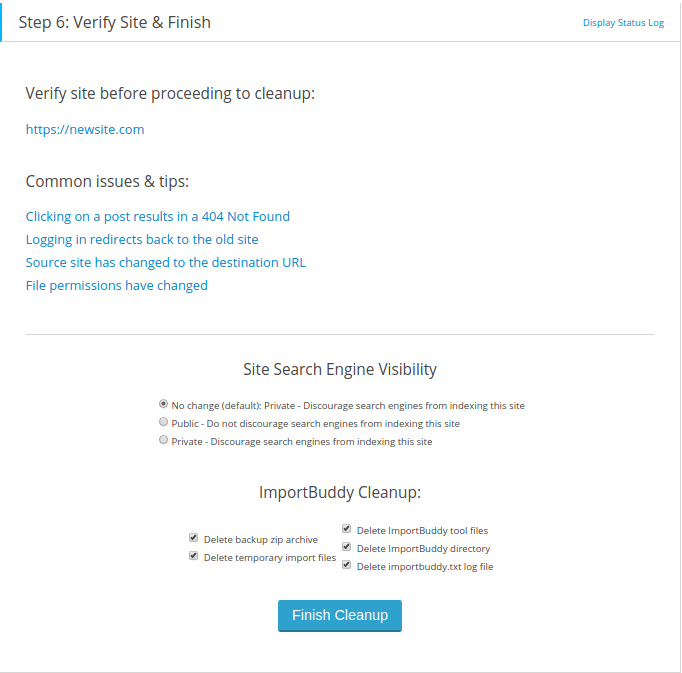
Verify the site is working by clicking on the site URL. Click the “Finish Cleanup” button.
That’s it! Your new WordPress site will be ready to go on the new server or web host.
Move an Entire WordPress Site Today with BackupBuddy
Get BackupBuddy today, the original 3-in-1 WordPress backup plugin. Easily backup, restore and move a WordPress site to a new host or server … in one plugin!
Get BackupBuddy, the Original 3-in-1 WordPress Backup Plugin
Easily backup, restore and move a WordPress site to a new host or server … in one easy to use plugin! Backup your database, entire WordPress installation, just your plugins, themes, or Media Library files … and set up automatic backup schedules.
Join us for the next Solid Academy Webinar!
Free weekly webinars that will help you master WordPress and increase your business's bottom line.
What is a WordPress Phishing Attack?
Learn how to identify and prevent phishing attacks on WordPress websites.
Kiki SheldonWebsite Protection: 5 Ways to Keep Your Website Safe
Robust website protection is the shield that stands between your business and relentless cyber attacks. Prioritizing website protection enables businesses to fortify defenses to safeguard their online presence and preserve the trust of their customers in the face of ever-evolving cybersecurity threats.
Kiki Sheldon23 Ideas To Grow Your WordPress Business in 2023
WordPress is the most popular website-building platform worldwide, trusted by numerous brands. WordPress enables you to build a user-friendly and highly reliable site, together with tools and plugins to enhance your marketing and work like a lead magnet. All these features make WordPress the platform chosen by more than 43% of businesses globally.
SolidWP Editorial TeamSign up now — Get SolidWP updates and valuable content straight to your inbox
Sign up
Get started with confidence — risk free, guaranteed

