New! Banned Users Gets an Upgrade in iThemes Security Pro 6.7.0
The iThemes Security Pro Banned Users feature just got an upgrade. Banned Users version now gives you more flexibility on how bans are enforced on your website. Plus, with the new Banned Users Security Card, you can manage your bans directly from your WordPress Security Dashboard. What is the Banned Users Feature in iThemes Security Pro?

The iThemes Security Pro Banned Users feature just got an upgrade. Banned Users version now gives you more flexibility on how bans are enforced on your website. Plus, with the new Banned Users Security Card, you can manage your bans directly from your WordPress Security Dashboard.
What is the Banned Users Feature in iThemes Security Pro?
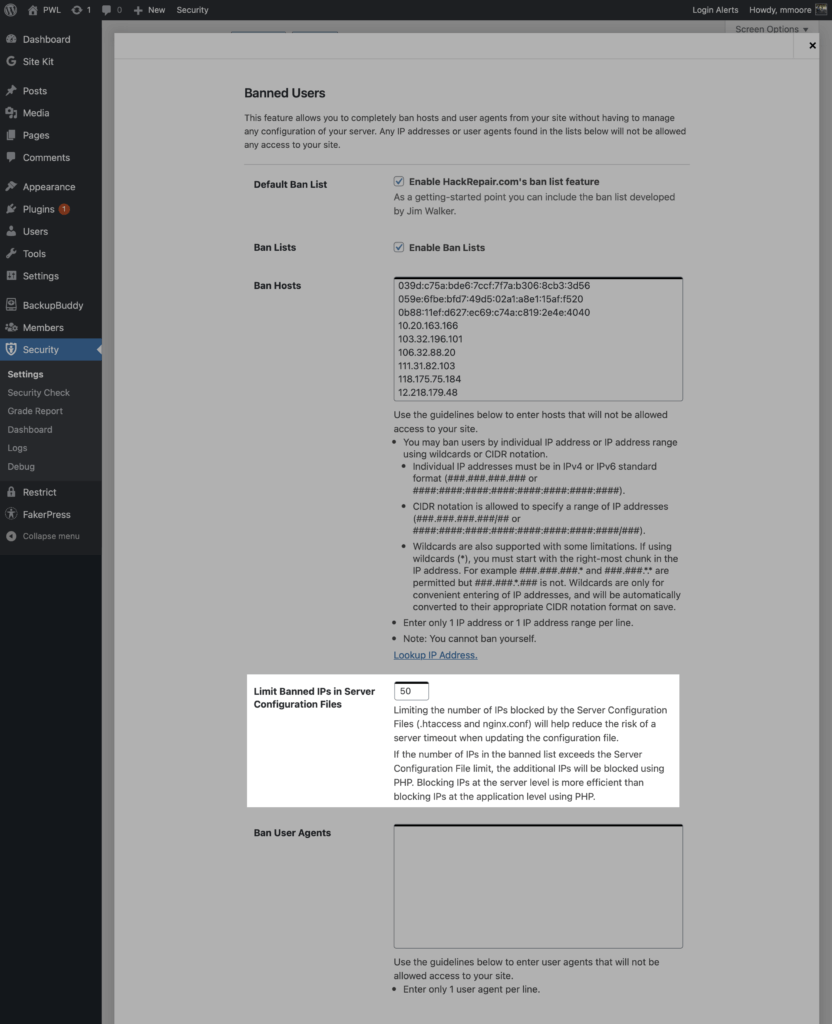
The Banned Users feature in iThemes Security Pro allows you to completely ban hosts or user agents from your site that have displayed nefarious activities such as brute force attacks, repeatedly hitting 404s, or attempting to use the “admin” username to login. Once a host or user agent is banned, they can no longer access your website.
With a few simple settings, iThemes Security Pro can create a banned users list of IP addresses and user agents. You can also utilize a default ban list from HackRepair.com as a starting point for known bad actors.
How to Add the Banned Users Card to Your Security Dashboard
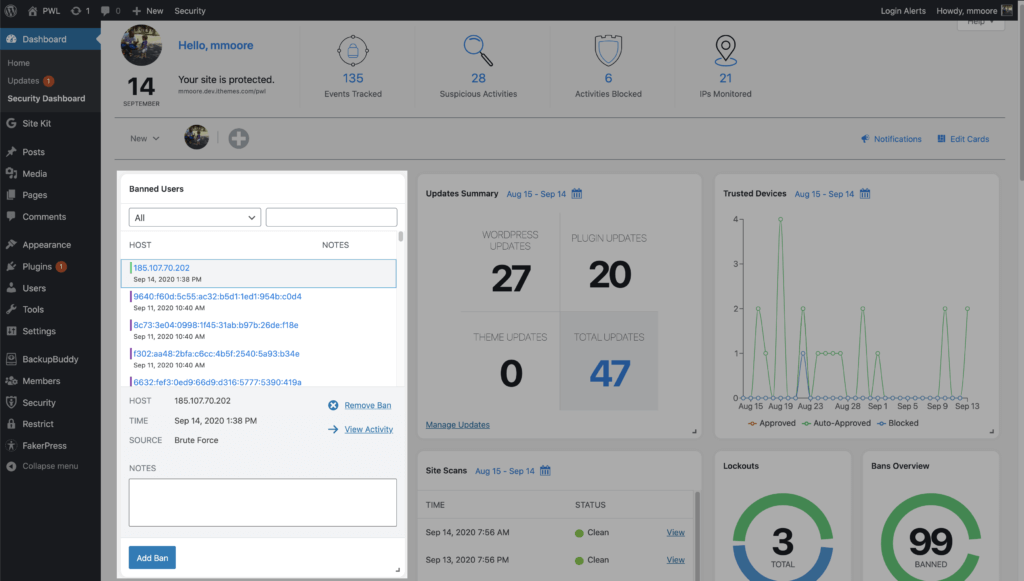
After updating to iThemes Security Pro version 6.7.0 head over to your WordPress Security Dashboard.
Once you are on your Security Dashboard, click the Edit Cards button and then click the + next to Banned Users.

After adding the Banned Users card, adjust the size to fit where you want it in your WordPress security dashboard.
The New Banned Users Security Card Overview
The new Banned Users security card brings some new tricks to help you manage bans on your website. Let’s cover 6 different ways the new Banned Users Security Card can help you quickly manage your bans.
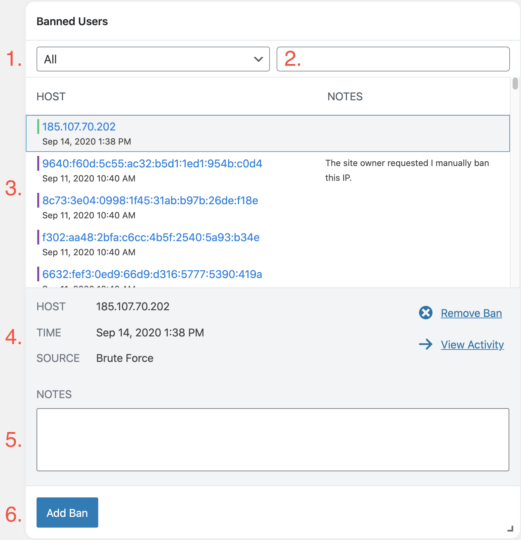
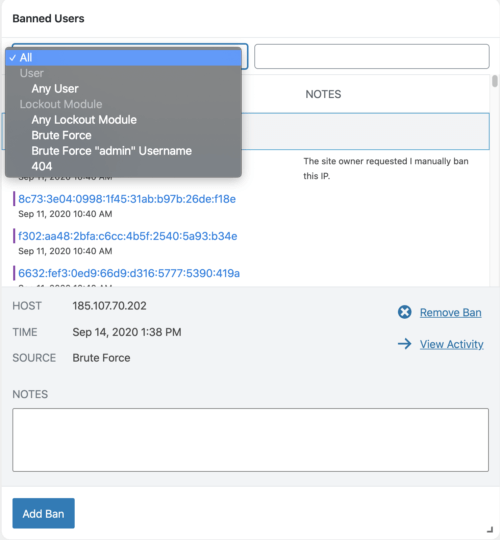
1. Filter Banned IPs
The first drop-down in the Banned Users card allows you to filter IPs by the reason they got banned. This is helpful if you want to sort bans by user or lockout module (brute force, 404, using the “admin” username).
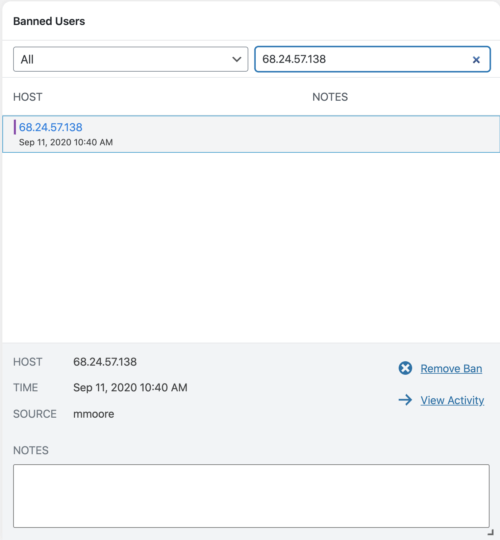
2. Search for an IP in banned list
The Banned Users card search field can be used to find an IP in your banned hosts list. This can come in handy when you need to remove an IP that was inadvertently banned.
3. Banned Hosts List
The Banned Users banned hosts list mirrors the banned host list in the iThemes Security Banned Users settings. The color to the left of the IP coordinates with the reason the IP is banned.
Green = Invalid Login Attempt
Red = Failed reCAPTCHA Submission
Orange = Too Many 404s
Blue = Login Attempt with the “Admin” Username
Purple = Manually Banned
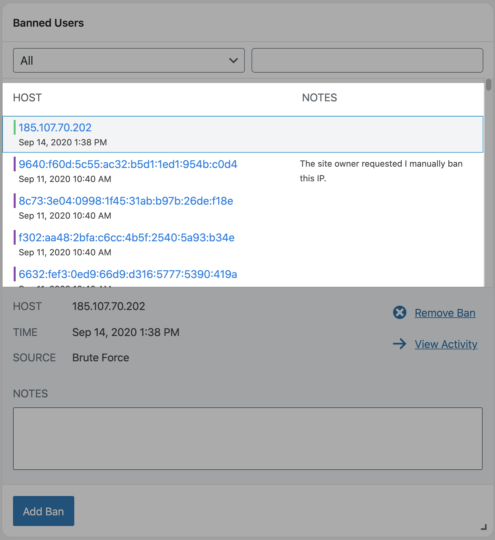
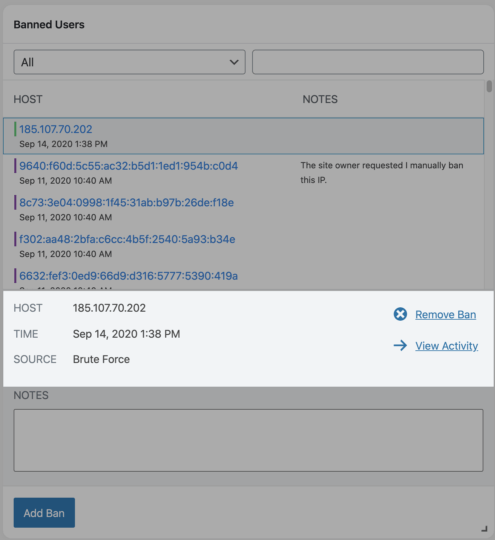
4. Selected IP Options
Selecting an IP in the banned host list will display the IP, Time of ban, and the Source of the ban. You will find options to Remove Ban and to View Activity of the IP in the security logs.
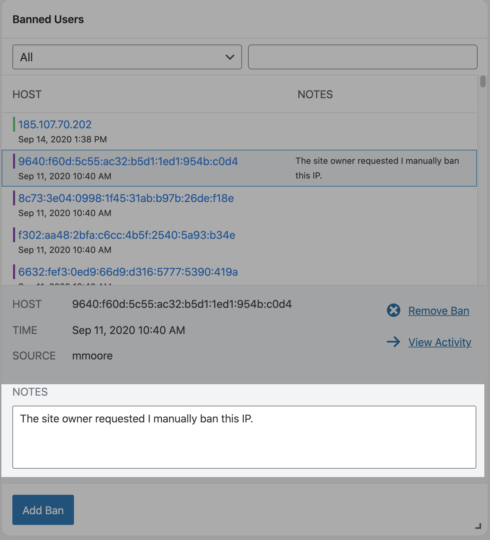
5. New! Banned Hosts Notes
You now have the option to attach a note to a banned IP. For example, it can be helpful to add a quick message explaining why an IP was manually banned.
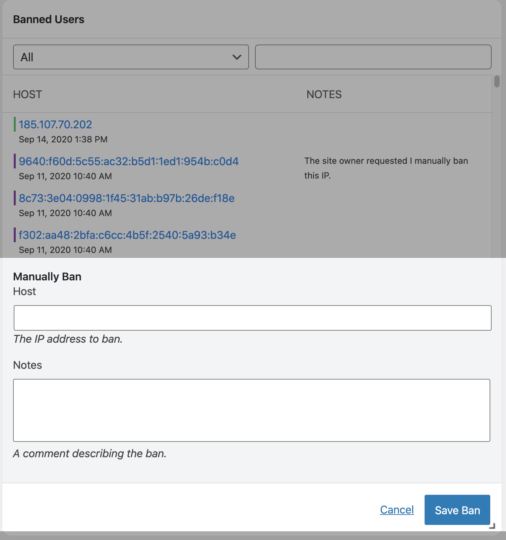
6. Add Ban
Clicking the Add Ban button will bring up a menu where you can manually add an IP to the banned hosts list. After the menu opens, enter the IP you want to ban and a short note explaining the ban.
New! Reduce Server Timeouts with Limits on Banned IPs in Server Configuration Files
With the new Limit Banned IPs in Server Configuration Files option in the Banned Users settings, you can now limit the number of banned IPs that iThemes Security Pro writes to your .htaccess or ngninx.conf files.
Why would I want to limit the number of banned IPs in my server config file?
Limiting the number of IPs blocked by the Server Configuration Files (.htaccess and nginx.conf) will help reduce the risk of a timeout when the server updates these files.
Every time a file is updated, the server will rewrite the whole file. This means that if you have an .htaccess file with 200 banned IPs and you have a new IP added to your banned list, the server will have to rewrite all 201 IPs. If you have any other server rules written to your .htaccess, those rules will have to be rewritten along with the 201 bans.
The larger your .htaccess or nginx.conf files are, the higher the chance of a server timeout when they are updated. This especially true when your website is under attack, and your server has to update your server config file multiple times to keep up with all of the new IPs.
What happens if I have more banned IPs than allowed in my server config file?
If the number of IPs in the banned list exceeds the Server Configuration File limit, the additional IPs will be blocked using PHP.
One thing to keep in mind when setting the Limit Banned IPs in Server Configuration Files option is that blocking IPs at the server level is more efficient than blocking IPs at the application level using PHP. However, the end result of both methods is the same… bad guys get blocked from accessing your website.
New! Banned Users Security Card for Your WordPress Security Dashboard
The iThemes WordPress Security Dashboard utilizes security cards to organize all your security activity in a more digestible way. Security Cards break the info from your security logs down to easy to consume bite-sized nuggets of data. With this update, now you can add a new Banned Users Card to your dashboard so that you can easily view stats and settings related to the Banned Users feature.
Get iThemes Security Pro Now
iThemes Security Pro Banned Users upgrade gives you more control over how bans are enforced on your WordPress website. Plus, you can manage more of your website’s security from the WordPress Security Dashboard with the new Banned Users security card.
With the iThemes Security Pro plugin, you can secure and protect your WordPress website today.
Get iThemes Security Pro now
Join us for the next Solid Academy Webinar!
Free weekly webinars that will help you master WordPress and increase your business's bottom line.
What is a WordPress Phishing Attack?
Learn how to identify and prevent phishing attacks on WordPress websites.
Kiki SheldonWebsite Protection: 5 Ways to Keep Your Website Safe
Robust website protection is the shield that stands between your business and relentless cyber attacks. Prioritizing website protection enables businesses to fortify defenses to safeguard their online presence and preserve the trust of their customers in the face of ever-evolving cybersecurity threats.
Kiki Sheldon23 Ideas To Grow Your WordPress Business in 2023
WordPress is the most popular website-building platform worldwide, trusted by numerous brands. WordPress enables you to build a user-friendly and highly reliable site, together with tools and plugins to enhance your marketing and work like a lead magnet. All these features make WordPress the platform chosen by more than 43% of businesses globally.
SolidWP Editorial TeamSign up now — Get SolidWP updates and valuable content straight to your inbox
Sign up
Get started with confidence — risk free, guaranteed

