WordPress Post Types: The Complete Guide
If you're the type of WordPress developer that cares a lot about design and organization, it's time to fully understand WordPress post types. As you well know, not all WordPress sites are simple blogs. Often, developers require more than the simple, standard pages and posts. They need to be able to add completely new content types.

If you’re the type of WordPress developer that cares a lot about design and organization, it’s time to fully understand WordPress post types.
As you well know, not all WordPress sites are simple blogs. Often, developers require more than the simple, standard pages and posts. They need to be able to add completely new content types.
But what is the best way to shatter the glass ceiling of WordPress design and development, while still giving the user a great UX?
The answer is found in WordPress post types and WordPress custom post types.
By learning, understanding and implementing the full potential of WordPress post types, you’ll turn your admin area into an exciting, organized and personalized place that’s all your own.
WordPress post types allow designers to easily organize content by allowing the creation of new buckets to put your unique content types.
But what does that mean exactly and where do you begin?
What can the use of WordPress custom post types do for the overall UX of your site?
Let’s find out.
What are WordPress Post Types?
On the most basic scale, a WordPress post type works like the familiar posts and pages in your admin area.
By default, WordPress core houses several different content types that are divided into post types. One of these content types is called a post. However, this is only one of the many standard post types in WordPress.
When you use WordPress core, it’ll automatically come with the following post types, which are each stored in the wp_posts table of your WordPress database:
- Pages
- Posts
- Revisions
- Attachments
- Custom CSS
- Navigation menus
- Changesets
Each of these post types have editor and title fields, just like you’re used to with regular pages and posts.
And when you create a custom post type, which we’ll show you in this guide, it’ll appear within your WordPress admin menu just like the standard WordPress post types.
Once you’ve implemented a WordPress custom post type, you’ll be able to add content to it just like you do when you add a new piece of blog content to your posts section.
However, with WordPress post types, you can make these post types do a lot more than standard posts and pages. You can also customize how your site’s front-end displays your post type content to site users.
A new post type can be anything you want it to be. Depending on the subject matter of your site, it could be things like:
- Homes
- Reviews
- Case Studies
- Movies
- Inspirational Quotes
- Etc.
WordPress post type functionality makes any new type of content possible.
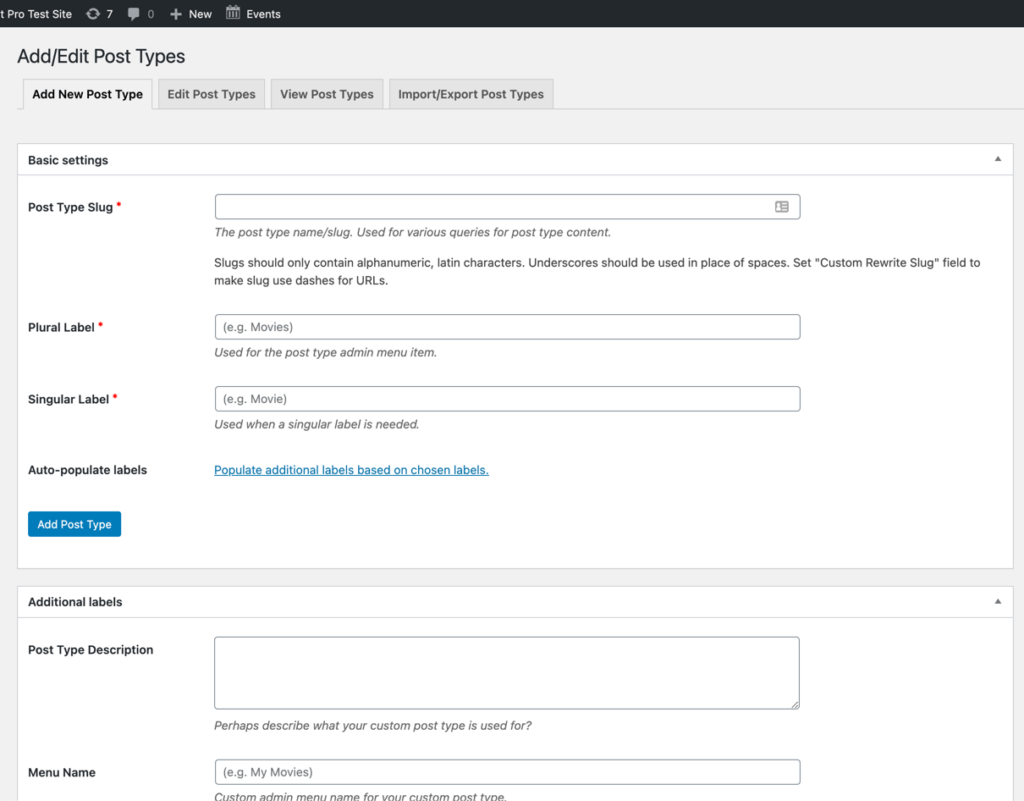
Of course there are plugins that help you create WordPress post types. But you may not necessarily want a plugin to have this much control over your site design and functionality.
If you want complete control over your design and UX, the best option is to code your own custom post types.
We will suggest a plugin later in this guide for those of you that prefer that option for creating WordPress custom post types.
But the best way for you to register, add or create a WordPress post type is to code it directly into your site’s theme. This is done by using the WordPress register-post-type function.
By using this function, you can add content to your new post type bucket immediately and have it display on your site.
Even better, it’s only going to require adding five lines of code to get you going.
A Look at WordPress Custom Post Types
Now that you have a basic understanding of WordPress post types and custom post types, it’s time to get your hands a little dirty.
To start out, follow these steps to create a new post type:
- Login to your admin area.
- Open your code editor and the functions.php file of your theme.
- Add the five lines of code shown below to the top of the functions.php file.
- Refresh the browser.
- Check the WordPress admin menu under Comments for the new post type menu item.
- Flush your permalinks.
Here’s the code to add:
<?php
  add_action( 'init', function() {
    $label = 'Books';
    $type = 'book';
    register_post_type( $type, [ 'public' => true, 'label' => $label ] );
  });
You should now have a new post type.
But what can you actually do with the new post type?
The Power of WordPress Post Types and WordPress Custom Post Types
To really dig into post types, let’s work with one specific example of creating a new portfolio website that needs to feature a list of case studies.
For this, we’ll register a new post type to manage each of the case studies.
Using the default Twenty Twenty WordPress theme, we’ll begin by adding our Study post type into the theme.
First, open up the Twenty Twenty theme’s functions.php file in your code editor. This is where you’ll be writing your post type code.
The new post type must be registered at the top of the functions.php file. This is done with a init WordPress hook using add_action(). When you use the function to register_post_type to add the post type, it won’t work properly without the init hook.
Then, start with three arguments for the register_post_type:
- Public – This means setting the post type so that everyone can access it.
- Description – This isn’t used much but it’s still good to have.
- Label – This is an argument we’ll expand on a bit later.
<?php
  add_action( 'init', function() {
    $type = 'study';
    $label = 'Studies';
    $arguments = [
        'public' => true, // Allow access to post type
        'description' => 'Case studies for portfolio.', // Add a description
        'label' => $label // Set the primary label
    ];
    register_post_type( $type, $arguments);
  });
Be sure that you flush your permalinks every time you complete a change.
Customizing Post Type Labels
WordPress will, by default, label the new post type as Post throughout your site’s admin area. But you might want the labels to be marked as the new post type called Study, not Post.
In order to override the post type default labels, you’ll need to manually call them out.
To properly set labels, create a new function that compiles labels without cluttering up your post type registration code.
Simply add the following function into your theme so that it can be used within the post type registration process:
<?php
  function xcompile_post_type_labels($singular = 'Post', $plural = 'Posts') {
    $p_lower = strtolower($plural);
    $s_lower = strtolower($singular);

    return [
      'name' => $plural,
      'singular_name' => $singular,
      'add_new_item' => "New $singular",
      'edit_item' => "Edit $singular",
      'view_item' => "View $singular",
      'view_items' => "View $plural",
      'search_items' => "Search $plural",
      'not_found' => "No $p_lower found",
      'not_found_in_trash' => "No $p_lower found in trash",
      'parent_item_colon' => "Parent $singular",
      'all_items' => "All $plural",
      'archives' => "$singular Archives",
      'attributes' => "$singular Attributes",
      'insert_into_item' => "Insert into $s_lower",
      'uploaded_to_this_item' => "Uploaded to this $s_lower",
    ];
  }
Then, in the registration code, you’ll need to call the function we just created, xcompile_post_type_labels(). Use it for your labels, then check your admin area.
<?php
  add_action( 'init', function() {
    $type = 'study';

    // Call the function and save it to $labels
    $labels = xcompile_post_type_labels('Study', 'Studies');

    $arguments = [
      'public' => true,
      'description' => 'Case studies for portfolio.',
      'labels' => $labels // Changed to labels
    ];
    register_post_type( $type, $arguments);
  });
How’s everything looking so far?
Menu Icon and Position for WordPress Custom Post Types
Ever since WP Dashicons were introduced, it’s become very easy to add menu icons to post types.
To accomplish this, first set the menu_icon argument to a Dashicon name. For this example, we’ll use the computer desk icon by using value dashicons-desktop.
<?php
  add_action( 'init', function() {
    $type = 'study';
    $labels = xcompile_post_type_labels('Study', 'Studies');

    $arguments = [
      'public' => true,
      'description' => 'Case studies for portfolio.',
      'menu_icon' => 'dashicons-desktop', // Set icon
      'labels' => $labels
    ];
    register_post_type( $type, $arguments);
  });
Now, if you’d like to change the location of the menu item, use the menu_position argument. This argument will take a value starting with 0 and ending with 100. The chosen value will list a menu item higher or lower on the menu base, with a 0 value being at the top and 100 at the bottom.
Now, we should add a featured image to the new post type.
How To Enable and Disable Featured Image, Title and Editor
To add or change the default admin form fields for your post type, such as Featured Image, Title, and Editor fields, use a set supports argument.
There are many options you can turn on and off by using the post type supports argument. They are:
- Title field
- Editor
- Author box
- Thumbnail (featured image)
- Excerpt
- Trackbacks
- Custom-fields
- Comments
- Revisions
- Page-attributes
- Post-formats
For your new Study post type, you can override the default WordPress options and add your own featured image by applying the thumbnail option.
Before you do this, make sure you’ve enabled theme support for post-thumbnails. This is done by using the add-theme-support function.
It only requires a few additional lines of code to use the support feature, and it will enable the featured image.
<?php
  // Add theme support for featured image / thumbnails
  add_theme_support('post-thumbnails');

  add_action( 'init', function() {
    $type = 'study';
    $labels = xcompile_post_type_labels('Study', 'Studies');

    // Declare what the post type supports
    $supports = ['title', 'editor', 'revisions', 'page-attributes', 'thumbnail'];

    $arguments = [
      'supports' => $supports, // Apply supports
      'public' => true,
      'description' => 'Case studies for portfolio.',
      'menu_icon' => 'dashicons-desktop',
      'labels' => $labels,
    ];
    register_post_type( $type, $arguments);
  });
Not a lot of WordPress designers or developers make it this deep into WordPress custom post types. Now is a good time to give yourself a little pat on the back.
The Hierarchy of WordPress Custom Post Types
While WordPress Posts cannot have child posts, Pages can. A child of a Page is considered a subpage.
If you’d like, you can have WordPress custom post types use a hierarchy like Pages by using the hierarchical argument.
For our Studies post type example, we wouldn’t necessarily need this. But if you require it for your specific project, this is the code to use:
<?php
  add_action( 'init', function() {
    $type = 'study';
    $labels = xcompile_post_type_labels('Study', 'Studies');

    // Declare what the post type supports
    $supports = ['title', 'editor', 'revisions', 'page-attributes', 'thumbnail'];

    $arguments = [
      'hierarchical' => false, // Do not use hierarchy
      'supports' => $supports,
      'public' => true,
      'description' => 'Case studies for portfolio.',
      'menu_icon' => 'dashicons-desktop',
      'labels' => $labels,
    ];
    register_post_type( $type, $arguments);
  });
How To Enable the REST API for a New Post Type
REST API changed WordPress forever. As such, you’ll want your new post type to be able to access all of the newest features of WordPress, such as Gutenberg.
Enabling REST API for new WordPress custom post types is as simple as setting the show_in_rest argument to true.
When the REST API is enabled, your new post type will begin using Gutenberg (if it supports the editor as well).
<?php
  add_action( 'init', function() {
    $type = 'study';
    $labels = xcompile_post_type_labels('Study', 'Studies');

    // Declare what the post type supports
    $supports = ['title', 'editor', 'revisions', 'page-attributes', 'thumbnail'];

    $arguments = [
      'show_in_rest' => true, // Enable the REST API
      'hierarchical' => false,
      'supports' => $supports,
      'public' => true,
      'description' => 'Case studies for portfolio.',
      'menu_icon' => 'dashicons-desktop',
      'labels' => $labels,
    ];
    register_post_type( $type, $arguments);
  });
When you enable REST API in WordPress, you’ll also be able to access the new post type as a JSON object through specific WordPress endpoints.
To view the endpoint for the post type REST, use this /wp-json/wp/v2/study.
To change your post type base name in the URL to studies instead of study, use the rest_base argument.
<?php
  add_action( 'init', function() {
    $type = 'study';
    $labels = xcompile_post_type_labels('Study', 'Studies');

    // Declare what the post type supports
    $supports = ['title', 'editor', 'revisions', 'page-attributes', 'thumbnail'];

    $arguments = [
      'rest_base' => 'studies', // Change the REST base
      'show_in_rest' => true,
      'hierarchical' => false,
      'supports' => $supports,
      'public' => true,
      'description' => 'Case studies for portfolio.',
      'menu_icon' => 'dashicons-desktop',
      'labels' => $labels,
    ];
    register_post_type( $type, $arguments);
  });
And just like that, API is set and Gutenberg is enabled on the post type.
How To Add Gutenberg to WordPress Custom Post Types
Remember, Gutenberg can’t be enabled for custom post types unless it supports the editor and has REST API enabled.
Once enabled, to add Gutenberg to your post type, we need to forget about our Study post type for a second and create a new post type that we’ll call Article.
We’ll use the Article post type to enable Gutenberg.
<?php
  add_action( 'init', function() {
    $type = 'article';
    $labels = xcompile_post_type_labels('Article', 'Articles');

    $arguments = [
      'rest_base' => 'articles',
      'show_in_rest' => true, // Required for Gutenberg
      'supports' => ['editor'], // Required for Gutenberg
      'public' => true,
      'description' => 'Case studies for portfolio.',
      'menu_icon' => 'dashicons-desktop',
      'labels' => $labels,
    ];
    register_post_type( $type, $arguments);
  });
You’ll notice that the two arguments that you need to add Gutenberg are:
'show_in_rest' => true,
'supports' => ['editor'],
How To Remove Gutenberg from WordPress Custom Post Types
If you want to remove Gutenberg from one of your post types, simply add the action hook use_block_editor_for_post_type into the functions.php file of your theme.
This is done with the following code:
<?php
add_filter('use_block_editor_for_post_type', function($enabled, $post_type) {

  // List of post types to remove
  $remove_gutenberg_from = ['study'];

  if (in_array($post_type, $remove_gutenberg_from)) {
    return false;
  }

  return $enabled;
  }, 10, 2);
This forcibly disables Gutenberg from the post type.
Note that not every one of your WordPress custom post types should be enabled with Gutenberg. There are times when you may want to use the classic WordPress editor with post types.
The disable Gutenberg function also comes in handy when the post type needs to be accessible from the REST API.
In those cases, disabling Gutenberg is the direction you’ll want to go.
Enabling Archives and Setting Up the Front-End
We’ve finally arrived at the point where it’s time to address our front-end design of WordPress custom posts.
There are three things you’ll need to do when you want to set up the list of WordPress custom post type content:
- Enable has_archive argument.
- Set rewrite rules slug to a plural form of your post type name. In the case of this guide’s example, it would need to be changed to “studies.”
- Flush your permalinks.
<?php
  add_action( 'init', function() {
    $type = 'study';
    $labels = xcompile_post_type_labels('Study', 'Studies');

    // Declare what the post type supports
    $supports = ['title', 'editor', 'revisions', 'page-attributes', 'thumbnail'];

    $arguments = [
      'rewrite' => [ 'slug' => 'studies' ] // Change the archive page URL
      'has_archive' => true, // Enable archive page
      'rest_base' => 'studies',
      'show_in_rest' => true,
      'hierarchical' => false,
      'supports' => $supports,
      'public' => true,
      'description' => 'Case studies for portfolio.',
      'menu_icon' => 'dashicons-desktop',
      'labels' => $labels,
    ];
    register_post_type( $type, $arguments);
  });
With all of that in place, it’s time to begin to theme the content of your custom post type. For now, we’ll use the default Twenty Twenty theme. Of course, you can use any theme that you’d like.
WordPress Custom Post Type Template
Before we template our custom post type, let’s first look at the WordPress Template Hierarchy.
If you’re not already familiar with the way WordPress works with templates, think of it as similar to the way CSS handles specificity. While it’s not overly important to get bogged down in the details, that simple analogy will help you have a better understanding of the WordPress Template Hierarchy.
There are two specific template files to pay attention to within the templating hierarchy for our new Study post type.
They are:
1. single-study.php – This is for the single page when a user navigates to http://yourcoolsite.com/studies/your-cool-study-post to view a single study.
2. archive-study.php – This is for the archive page when a user navigates to http://yourcoolsite.com/studies to view a list of all studies.
WordPress will, by default, use the single.php and archive.php templates of your theme for the front-end design of custom post types. However, when a specific template exists for custom post types, single-study.php and archive-study.php will override the defaults in WordPress.
Single Page
As we’re using the default WordPress Twenty Twenty theme in this guide, we’ll first need to create the file name of single-study.php and work with it.
In the single post type template file, add this WordPress loop:
<?php
	/**
	 * The template for displaying single posts and pages.
	 *
	 * @link https://developer.wordpress.org/themes/basics/template-hierarchy/
	 *
	 * @package WordPress
	 * @subpackage Twenty_Twenty
	 * @since 1.0.0
	 */

	get_header();
	?>

	<main id="site-content" role="main">

	        <?php

	        if ( have_posts() ) {

	                while ( have_posts() ) {
	                        the_post();

	                }
	        }

	        ?>

	</main><!-- #site-content -->

	<?php get_template_part( 'template-parts/footer-menus-widgets' ); ?>

	<?php get_footer(); ?>
Archive Page
The archive page for the post type uses the same exact process as the single page did. The only difference is that you’ll use the archive-study.php template rather than single-study.php.
For your archive page, you’ll want it to link to every study and only show the title of “Study.”
Of course, feel free to have your own fun with this code:
<?php
  /*
  Template Name: Archive-Study
  */
  get_header(); ?>

  <div id="container">
  	<div id="content" role="main">

  		<?php the_post(); ?>
  		<h1 class="entry-title"><?php the_title(); ?></h1>

  		<?php get_search_form(); ?>

  		<h2>Archives by Month:</h2>
  		<ul>
  			<?php wp_get_archives('type=monthly'); ?>
  		</ul>

  		<h2>Archives by Subject:</h2>
  		<ul>
  			 <?php wp_list_categories(); ?>
  		</ul>

  	</div><!-- #content -->
  </div><!-- #container -->


  <?php get_footer(); ?>
Now that your archive page is perfectly in place, it looks like you’re done. But what happens if you have one hundred or more case studies?
How To Modify the Archive Page Query
Archive pages will only list the number of items that the admin specifies in Settings > Reading. Often, you won’t want the same limit applied to custom post types as your main blog or article feed.
When you want to remove the limit on your archive page, simply modify the main query by using the hook pre_get_posts.
After you’re hooked into pre_get_posts, you’ll be able to access and modify the main WP_Query object.
In order to list all studies on your archive page, you’ll need to:
- Use the hook pre_get_posts.
- Detect if the method is_main_query is what’s running the main query.
- Detect if you’re on the study archive page using is_post_type_archive.
- In the main WP_Query, set posts_per_page to -1. This removes all number limits and lists everything.
<?php
  add_action('pre_get_posts', function( WP_Query $query ) {
    if($query->is_main_query() && $query->is_post_type_archive('study')) {
      $query->set('posts_per_page', -1);
    }
  });
By using the hook pre_get_posts, you’re directly accessing the SQL query that WordPress is already running. The query gives you access to posts, pages and your custom post types without writing any SQL.
That’s always a bonus.
Using a Plugin for WordPress Custom Post Types
If you’re not the type to dig into code and would rather create and modify your custom post types with a plugin, Custom Post Type UI provides an easy-to-use interface for registering and managing custom post types (and taxonomies).
The plugin is highly rated and is configured to work with WordPress versions 5.5 and higher.
It’s been tested up to 5.6.
Using a Generator for WordPress Custom Post Types
Want a really easy way to get your code for custom post types (or taxonomies)? Check out GenerateWP. You can use GenerateWP to create a wide range of custom code. It’s pretty simple too. Just fill out the correct form and get code to copy/paste.
You can even see training webinar about Custom Post Types from a few years ago that featured GenerateWP. The good news is that custom post types have been around so long, the training is still relevant. 🙂
WordPress Post Types Are Your New Best Friend
Whether you’re working with WordPress post types manually or with a plugin, it’s extremely important to have your site equipped with the best WordPress backup plugin available.
Editing code always has the potential to cause conflicts that may send your site in a direction that you didn’t intend.
In those cases, BackupBuddy and iThemes Security, a powerful WordPress security plugin, will come to the rescue and get you safely back to work.
Join us for the next Solid Academy Webinar!
Free weekly webinars that will help you master WordPress and increase your business's bottom line.
What is a WordPress Phishing Attack?
Learn how to identify and prevent phishing attacks on WordPress websites.
Kiki SheldonWebsite Protection: 5 Ways to Keep Your Website Safe
Robust website protection is the shield that stands between your business and relentless cyber attacks. Prioritizing website protection enables businesses to fortify defenses to safeguard their online presence and preserve the trust of their customers in the face of ever-evolving cybersecurity threats.
Kiki Sheldon23 Ideas To Grow Your WordPress Business in 2023
WordPress is the most popular website-building platform worldwide, trusted by numerous brands. WordPress enables you to build a user-friendly and highly reliable site, together with tools and plugins to enhance your marketing and work like a lead magnet. All these features make WordPress the platform chosen by more than 43% of businesses globally.
SolidWP Editorial TeamSign up now — Get SolidWP updates and valuable content straight to your inbox
Sign up
Get started with confidence — risk free, guaranteed
