
We made Solid Central to save you time and hassle managing multiple WordPress sites. With Central, you can manage all your WordPress sites from one convenient dashboard.
There are two easy ways to set up your sites in Central:
- Use Central’s “Add Site” option after logging in to the Central dashboard
- Manually install the Central plugin on all your WordPress sites
How to Add Sites From the Central Dashboard
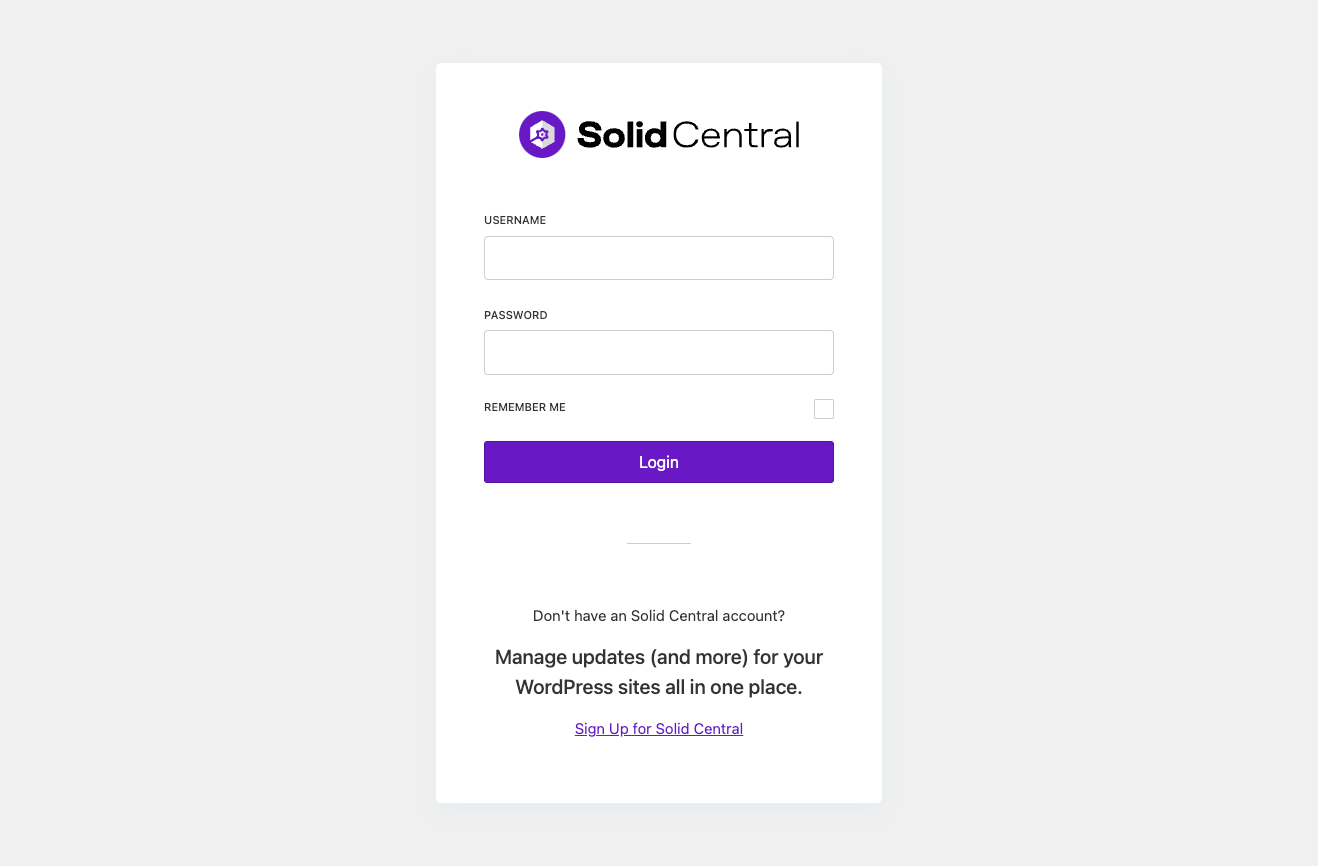
1. Log in to the Central dashboard using your SolidWP username and password. Bookmark https://central.solidwp.com for future use.

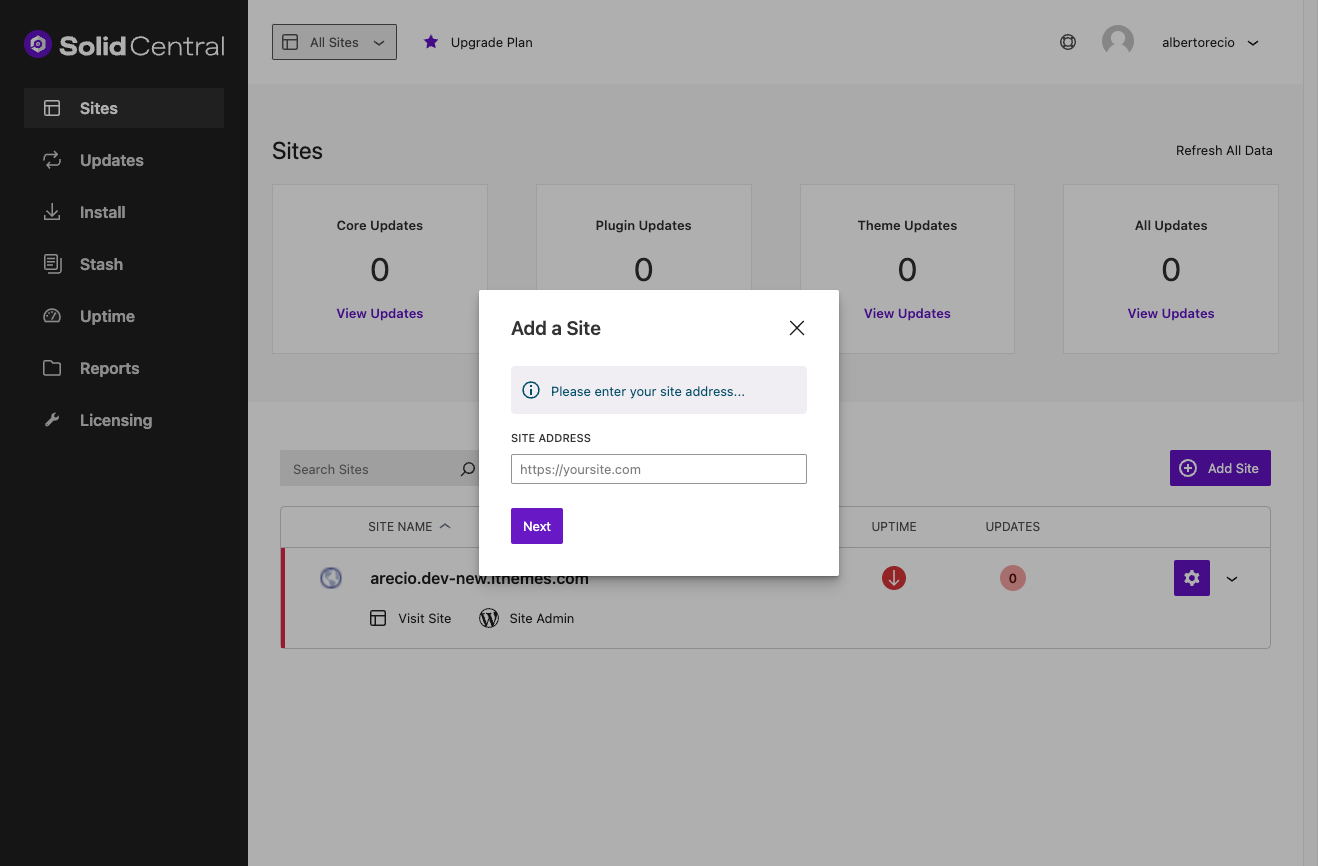
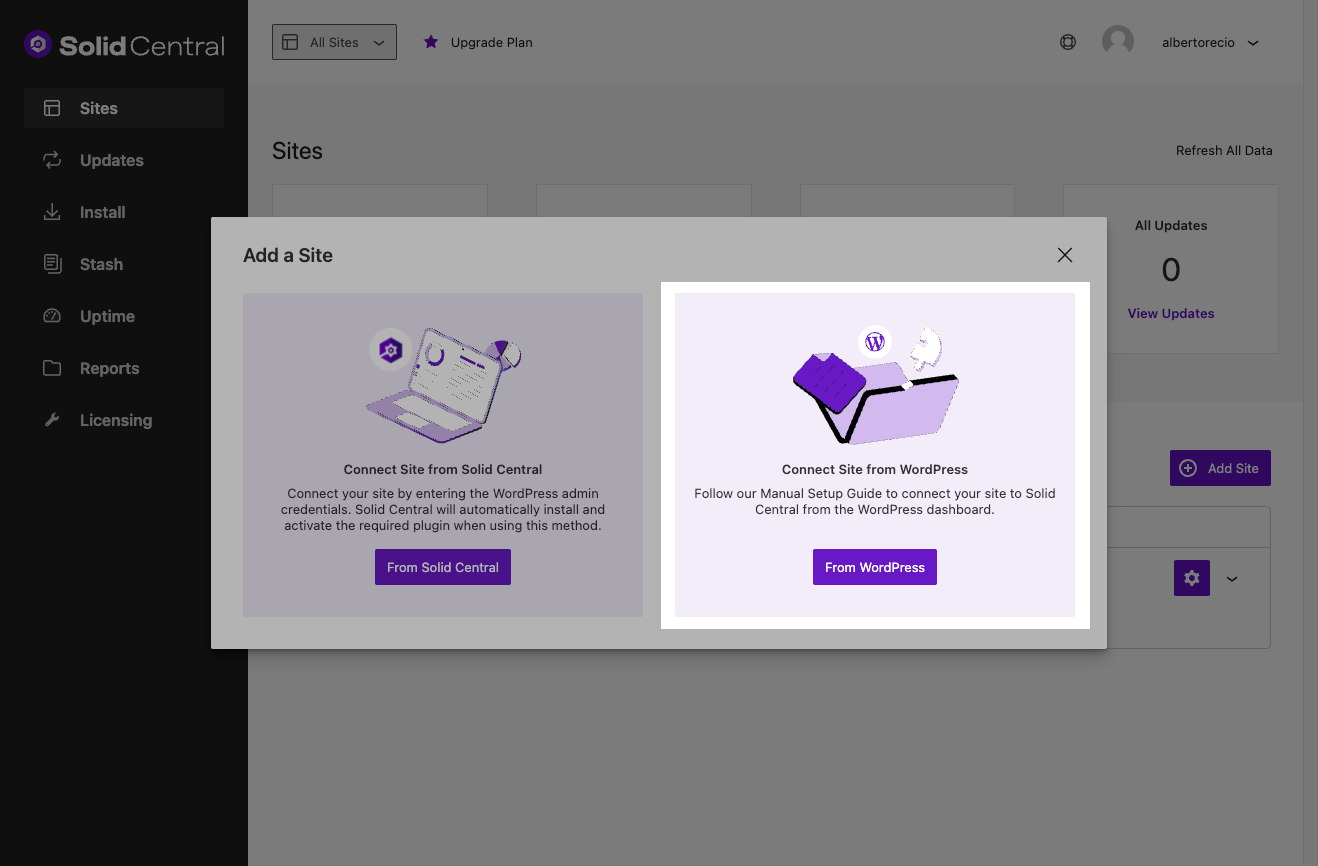
2. Once you log into the Central dashboard, you will be presented with three different methods to add your first site. Click on the Connect Site From Central card.

3. Enter the site URL and the credentials of the site’s admin user. You will also have the option to automatically add the site to Uptime Monitoring and scheduled monthly report generation.
4. After Central completes the authentication process, your site will be connected, and the Central dashboard will now show it in the list of connected sites.
To add more sites to Central in the future, you can always use the Add Site button from the Home tab in the upper right corner of the screen.
How to Manually Install the Central Plugin
If you have any problems adding your sites to Central from the Add Site option in the Central dashboard, you can manually upload the Central plugin to your WordPress site.
1. To get started, log into the Central dashboard using your SolidWP username and password.
2. From the Central dashboard, click the Connect Site From WordPress card.
3. On the next page, click the Download Central Plugin button.
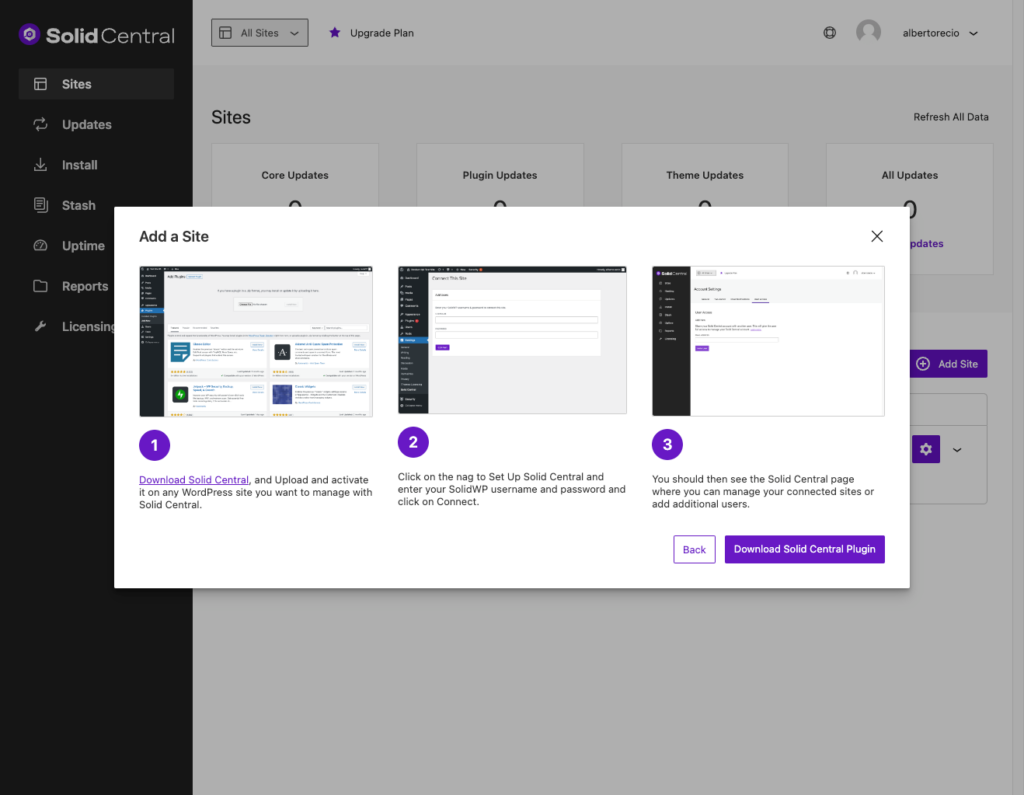
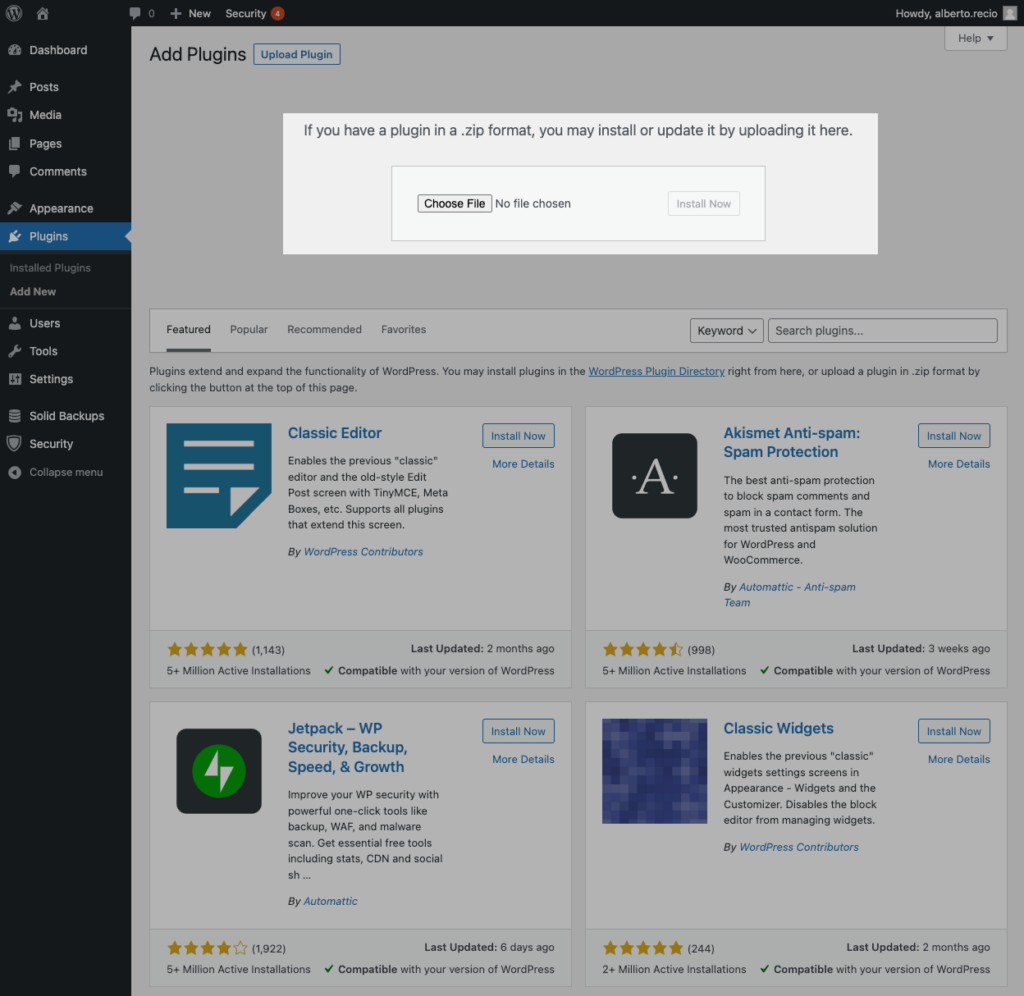
4. Log into the WordPress site you want to connect to Central. Now, navigate to the site’s Add Plugins page and click the Upload Plugin button.
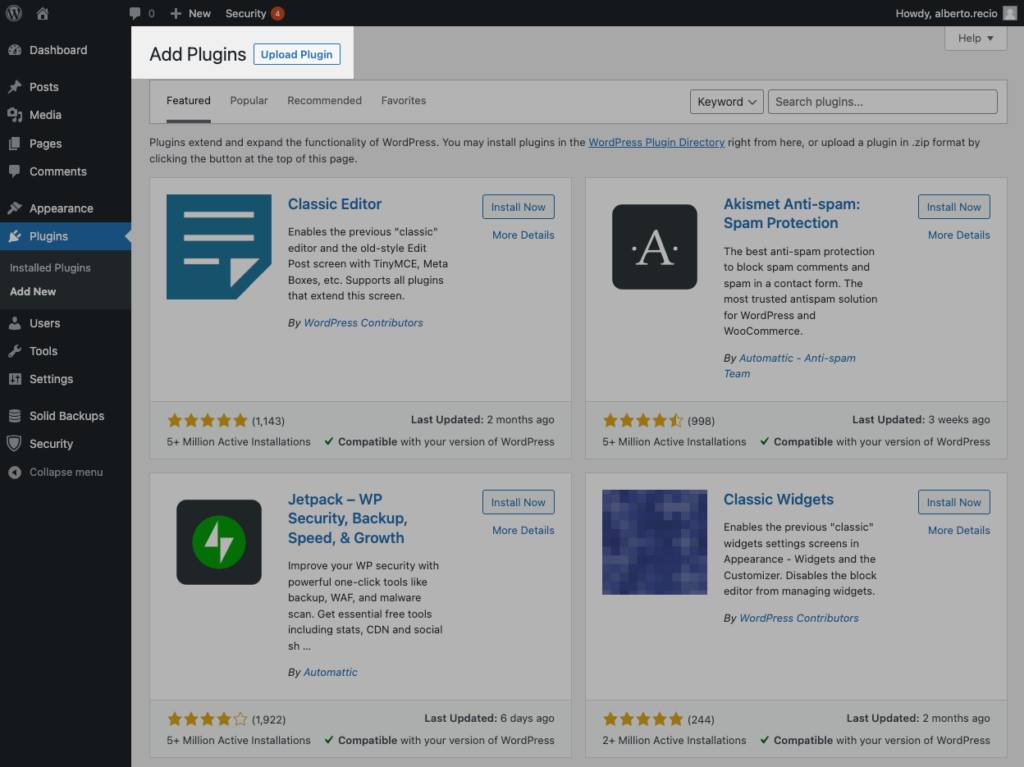
5. Next, Install and Activate the Central plugin.
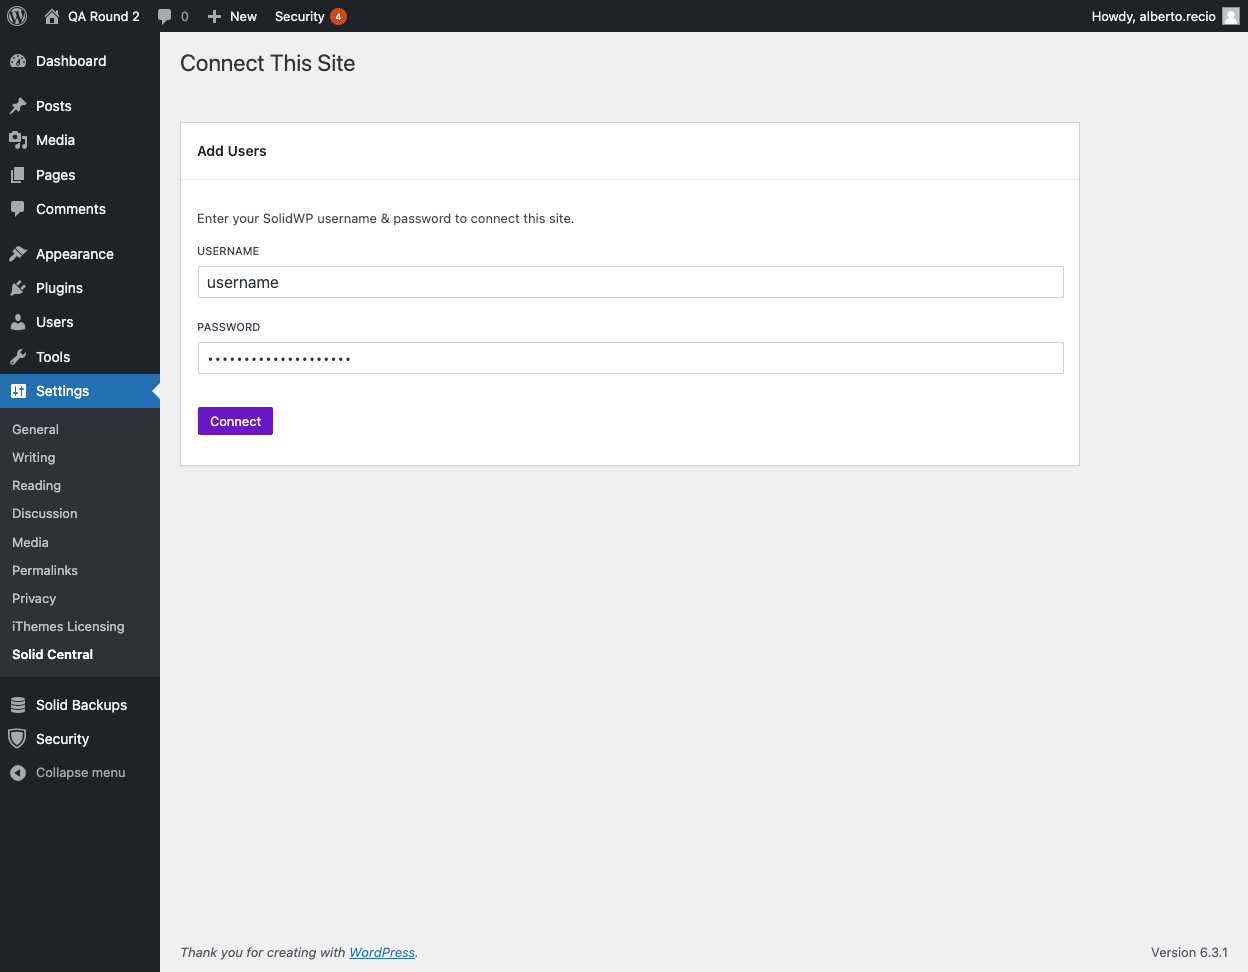
6. After activating Solid Central, you’ll see the prompt to Set Up Central.
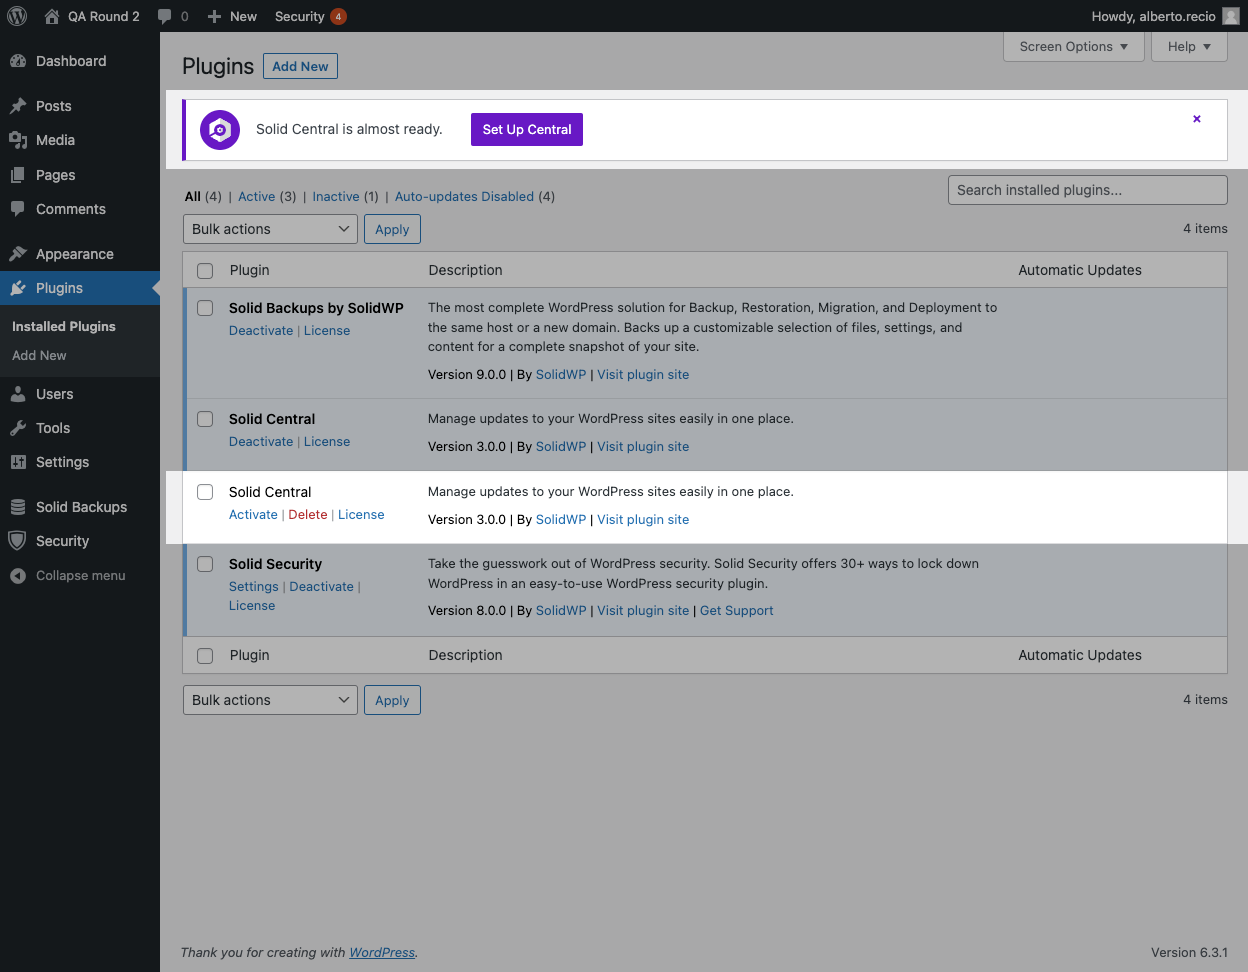
7. On the Solid Central Settings page, enter your SolidWP username and password and click Sync.
Then, you’ll see the Solid Central page where you can manage your synced sites or add additional users. Adding additional users is helpful if more than one person manages updates for this site.

Managing Your Synced Sites – The Central Dashboard
From the Central page, click the Go Manage Your Synced Sites button to return to your Central dashboard. You can also access the Central dashboard directly at central.solidwp.com. You’ll now see your synced sites here.
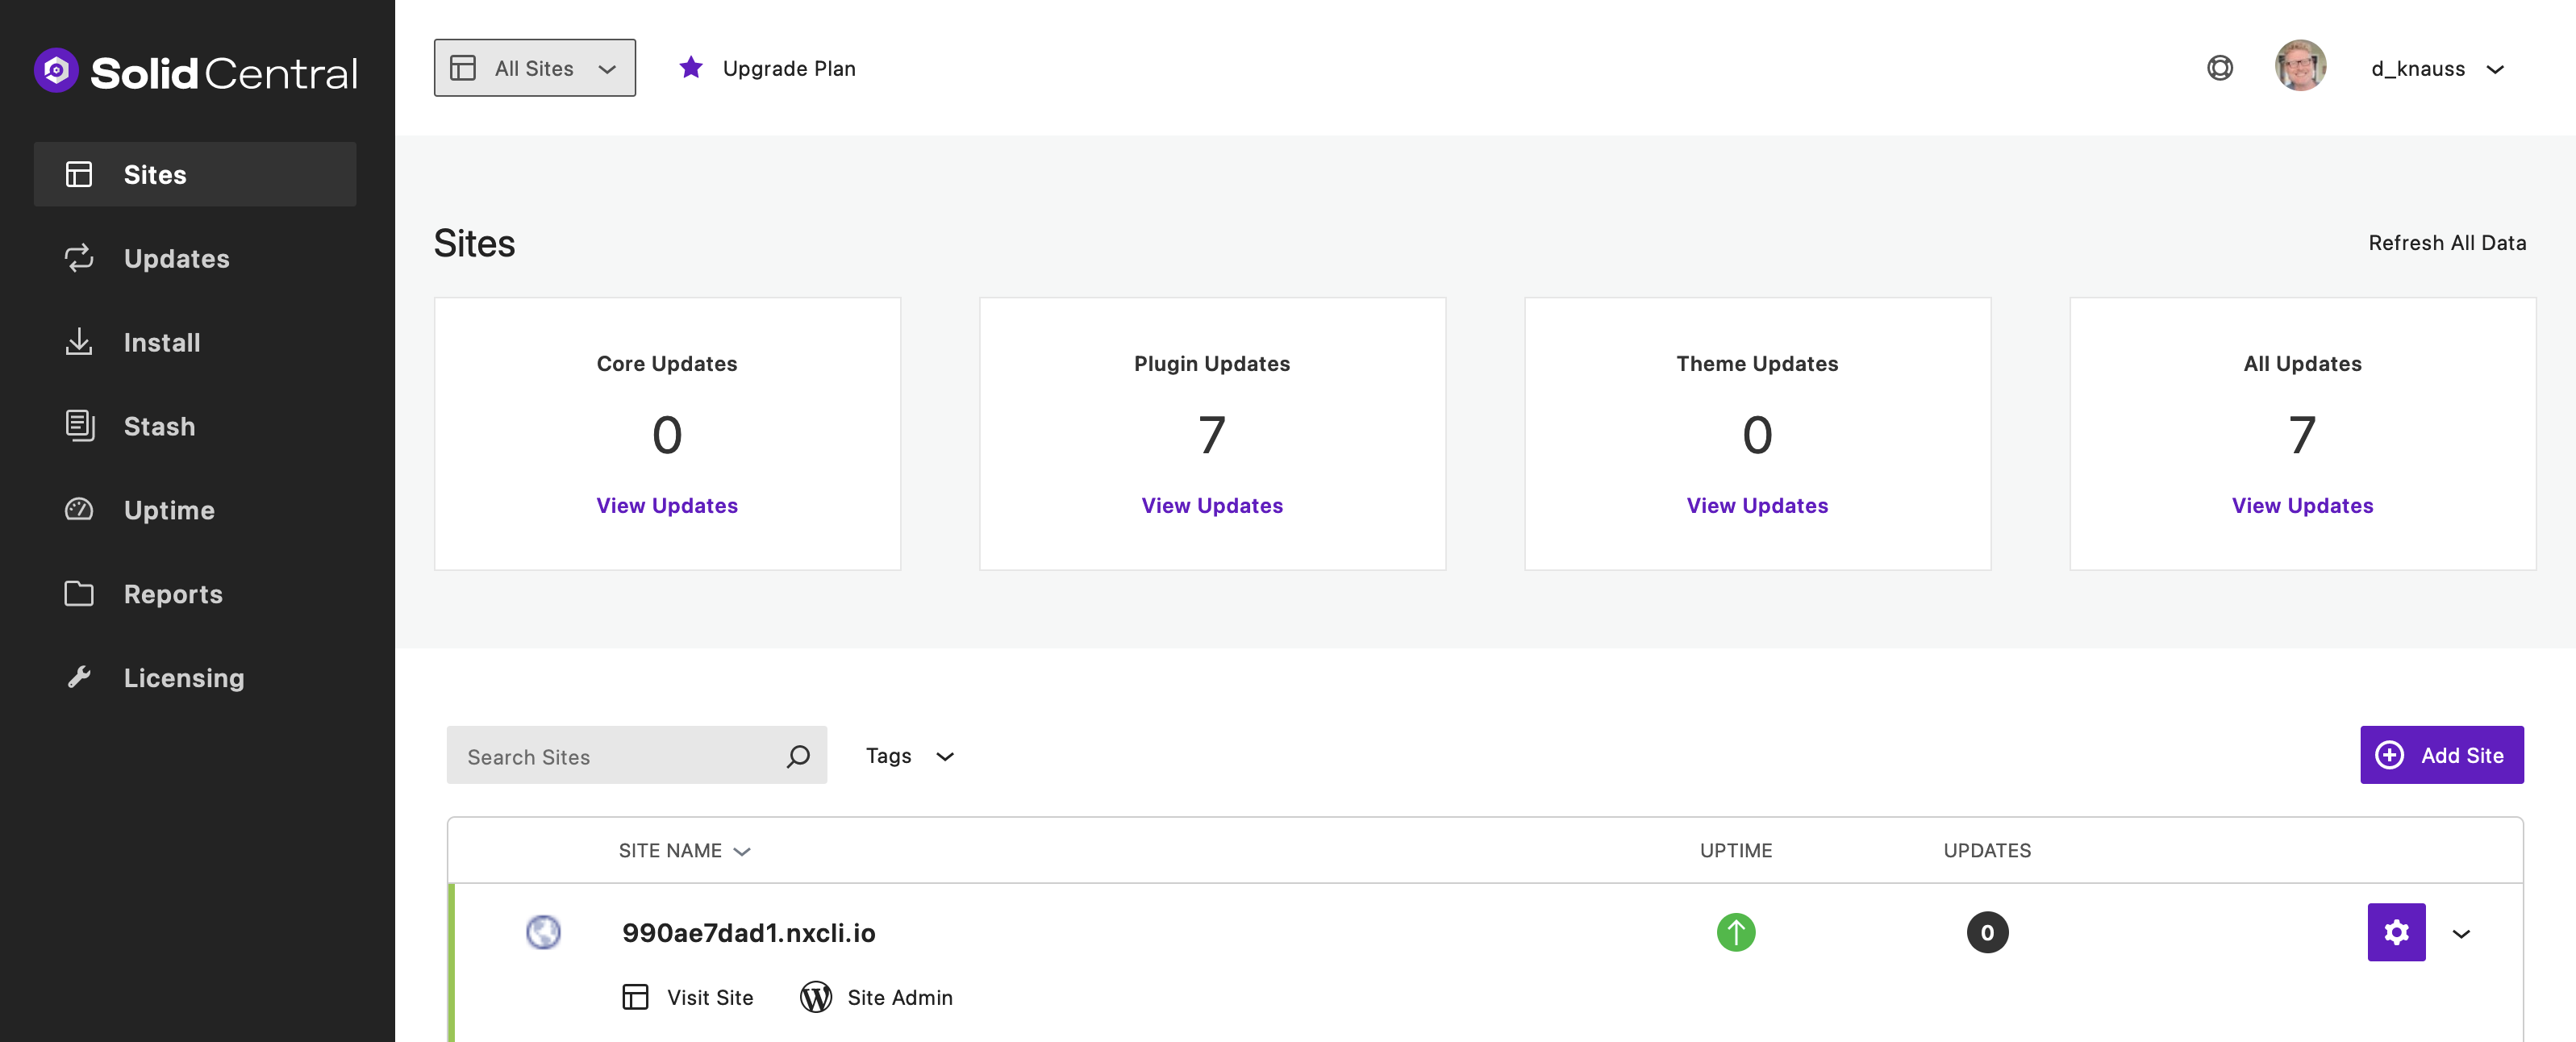
Click the URL for any of your synced sites to view the Site Overview for that individual site.
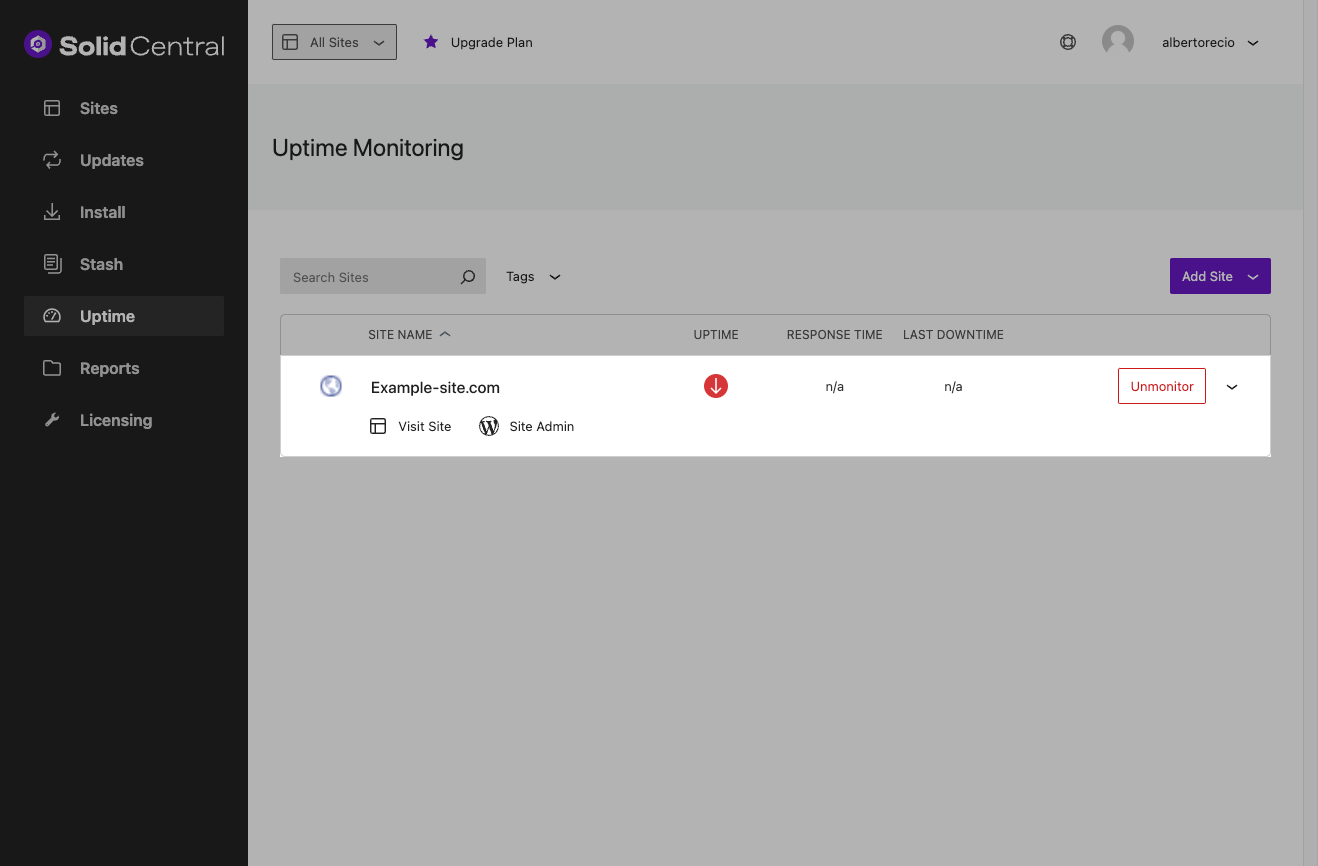
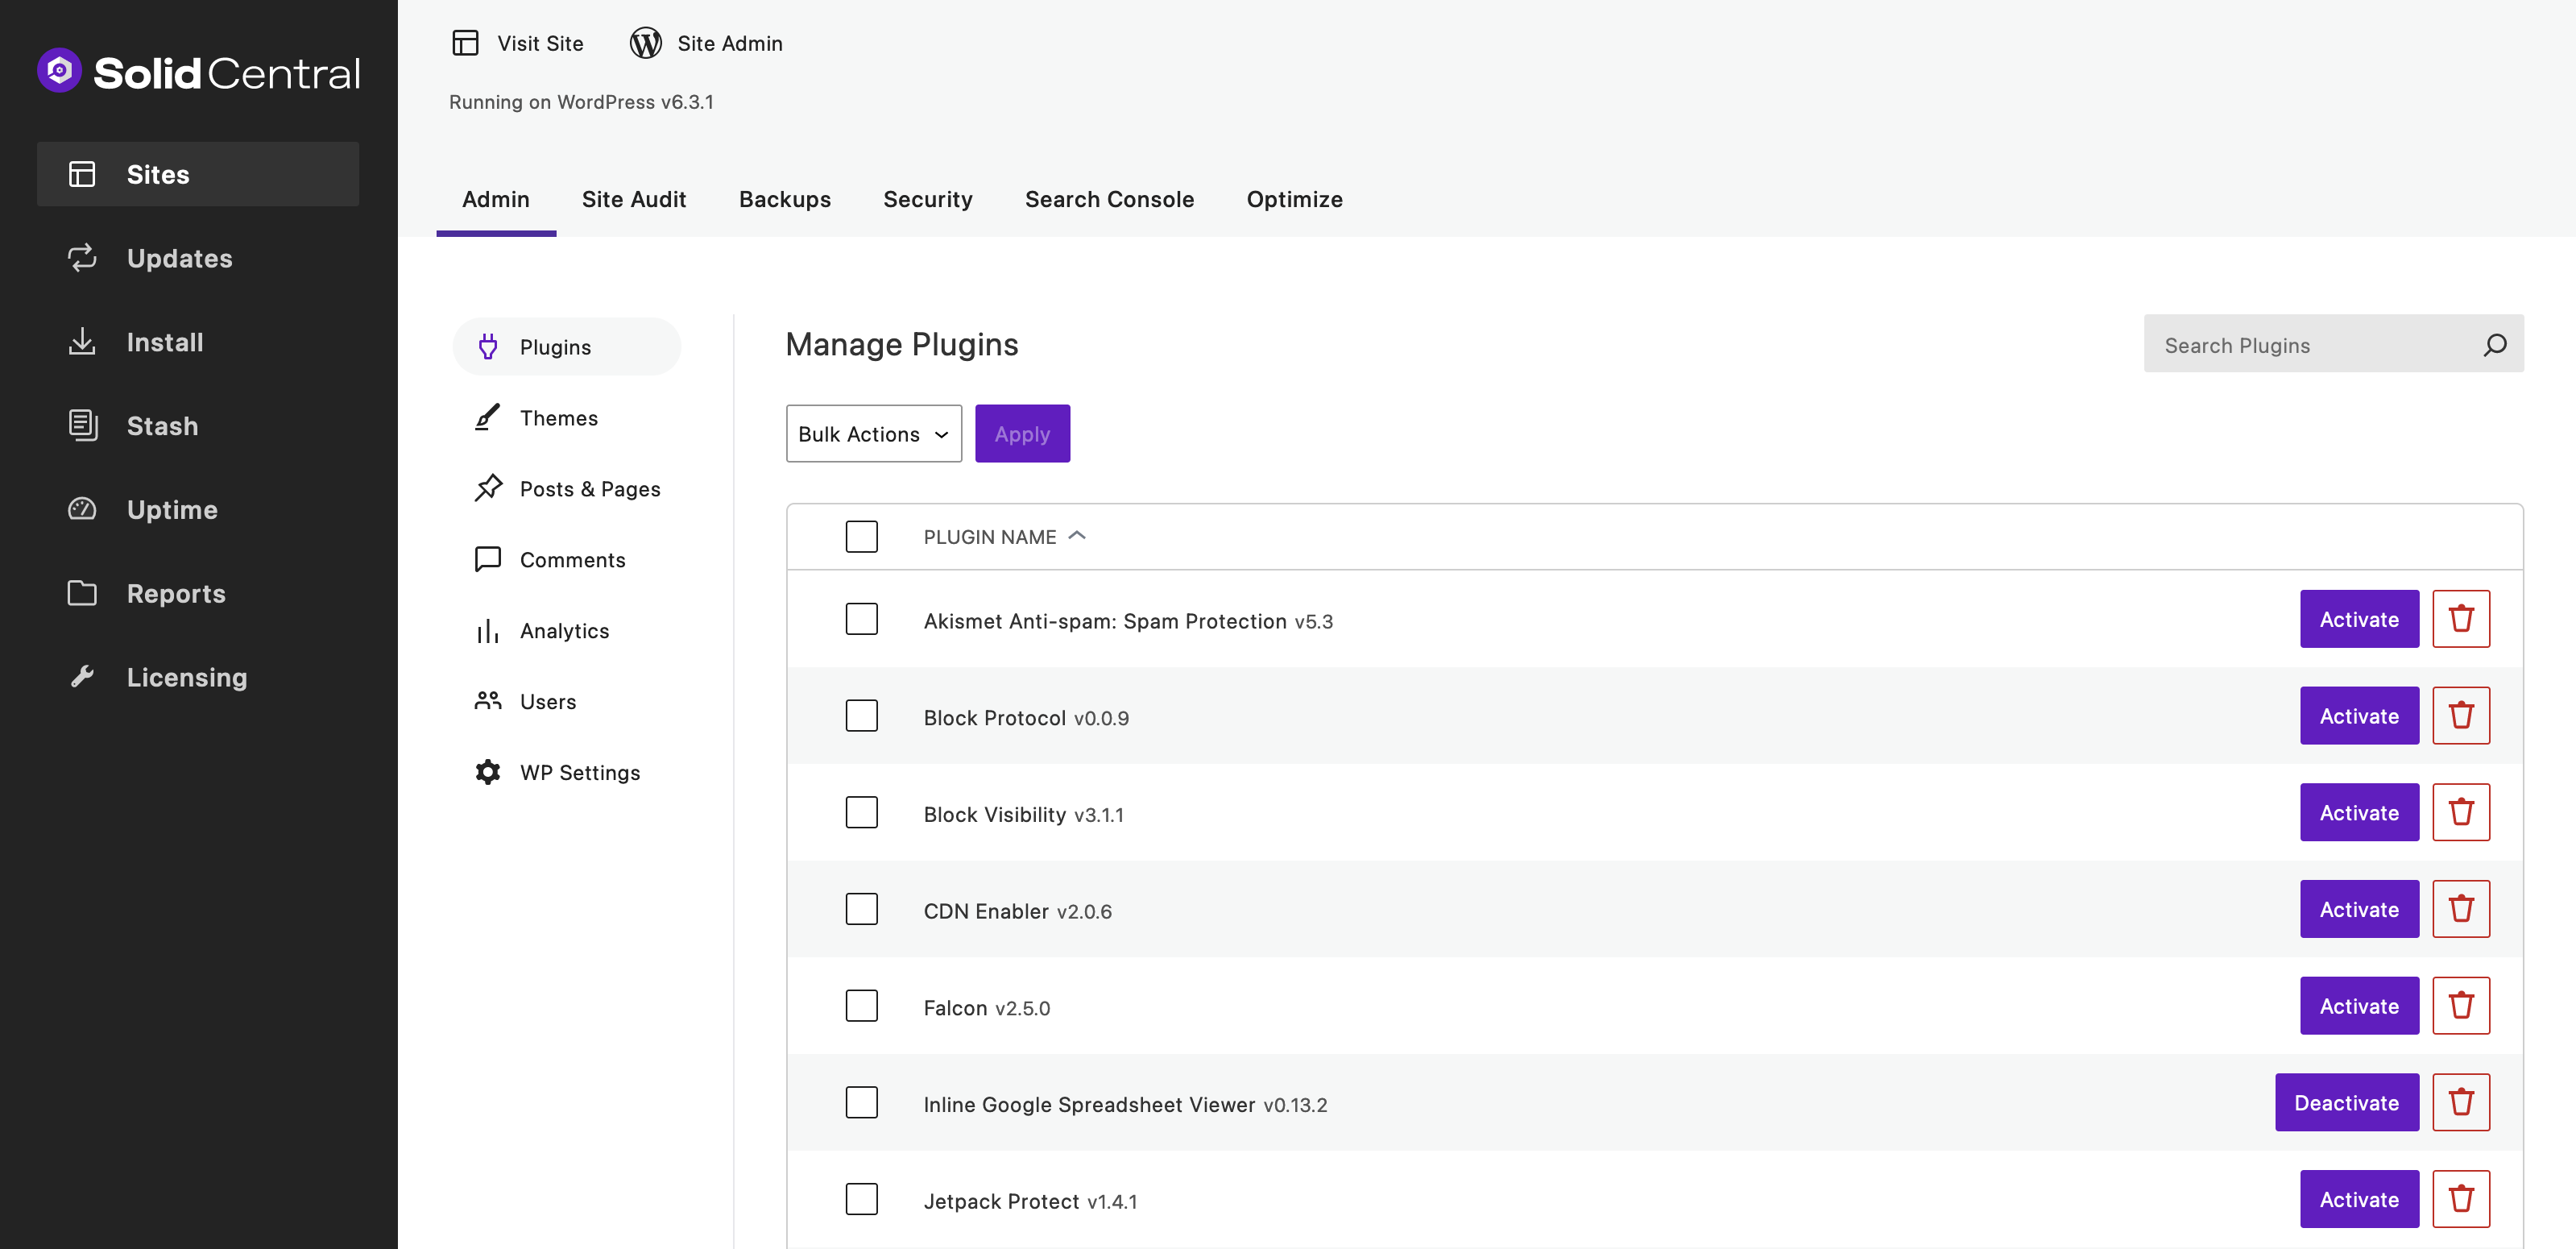
From the Site Overview screen, you can manage the site’s security, backups, updates, users, posts, pages, comments, and core settings. You can also connect to Google Analytics and Google Search Console.
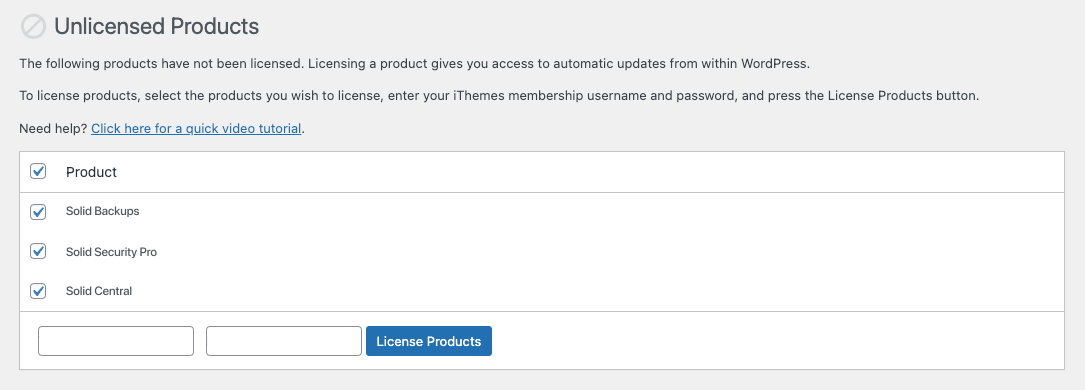
A Quick Note on Enabling Theme and Plugin Updates for Your SolidWP Products
To receive updates and support from SolidWP, you will need to activate your license for your SolidWP products.
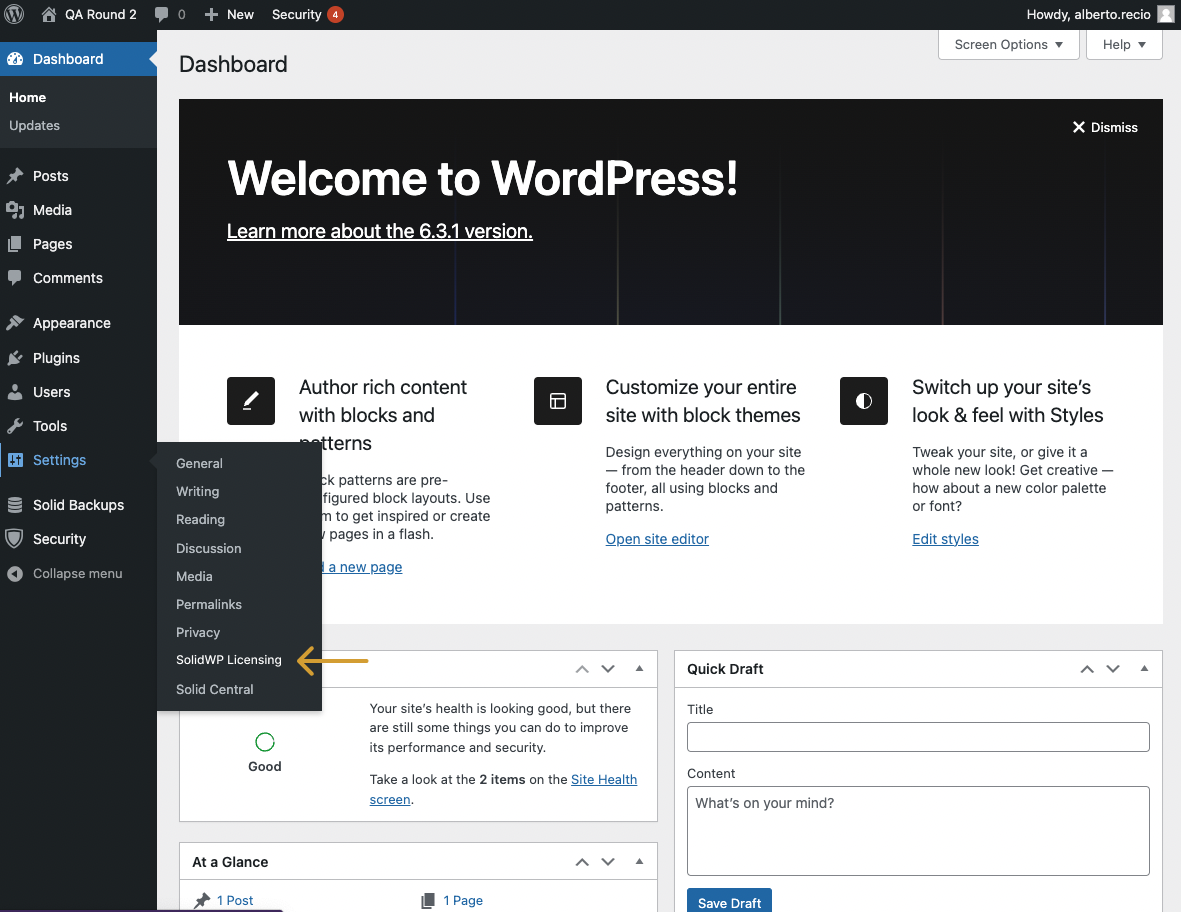
To activate licenses for your StellarWP / SolidWP themes and plugins, log in to your WordPress site and visit Settings > SolidWP Licensing.
Activate your license for all your products in the Unlicensed Products section by entering your SolidWP username and password. For more info on licensing your SolidWP products, visit this tutorial.
Once you’ve added licenses to your SolidWP products (if applicable), you’re ready to get started with Central.
Support
If you have questions or need help, visit the SolidWP Help Center. Our team of moderators will be happy to help out.
Feature Requests & Solid Central Roadmap
We would love your feedback on how we can improve Solid Central to give you the best experience for efficiently managing your WordPress sites from one location, so visit the Solid Central feature request page to send us your ideas.
Get Release Notes for SolidWP products delivered right to your inbox.
Sign up
Join us for the next Solid Academy Webinar!
Free weekly webinars that will help you master WordPress and increase your business's bottom line.
What is a WordPress Phishing Attack?
Learn how to identify and prevent phishing attacks on WordPress websites.
Kiki SheldonWebsite Protection: 5 Ways to Keep Your Website Safe
Robust website protection is the shield that stands between your business and relentless cyber attacks. Prioritizing website protection enables businesses to fortify defenses to safeguard their online presence and preserve the trust of their customers in the face of ever-evolving cybersecurity threats.
Kiki Sheldon23 Ideas To Grow Your WordPress Business in 2023
WordPress is the most popular website-building platform worldwide, trusted by numerous brands. WordPress enables you to build a user-friendly and highly reliable site, together with tools and plugins to enhance your marketing and work like a lead magnet. All these features make WordPress the platform chosen by more than 43% of businesses globally.
SolidWP Editorial TeamSign up now — Get SolidWP updates and valuable content straight to your inbox
Sign up
Get started with confidence — risk free, guaranteed

