Moving WordPress in a Staging Environment
Reliable WordPress backups are just one of the many benefits of using BackupBuddy to protect and manage your sites. One of the lesser-known capabilities of BackupBuddy is to provide the flexibility to create a WordPress staging environment. Every web developer should know that it is unwise to edit live websites (even though everyone does it).

 Every web developer should know that it is unwise to edit live websites (even though everyone does it). So what should a person do if they are trying to keep themselves from editing a live WordPress site? The answer is to create a staging environment.
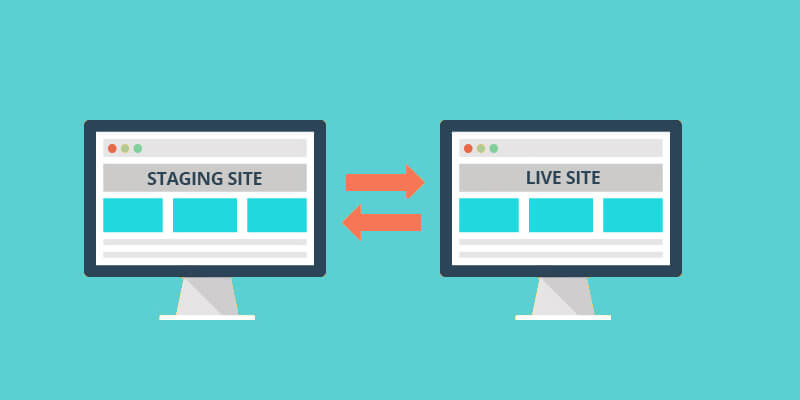
Basically, a WordPress staging environment is two WordPress websites in two different locations/servers that are linked together in a way that allows both sites to be in sync with one another. When you make a modification to the staging version of the WordPress website, you can push those changes to the live version of the WordPress website. And in the same manner when things change (new post, comments, etc) occur on the live version of the WordPress website you can pull the changes from the live version down to the staging version.
If this sounds complicated, have no fear. BackupBuddy, our WordPress backup plugin, can do all of the hard work of syncing up two WordPress websites and enabling the ability of the staging version to push and pull changes. With BackupBuddy, you’ll never have to edit a live website again and worry about the site going down because you left off a semi-colon in your code.
Every web developer should know that it is unwise to edit live websites (even though everyone does it). So what should a person do if they are trying to keep themselves from editing a live WordPress site? The answer is to create a staging environment.
Basically, a WordPress staging environment is two WordPress websites in two different locations/servers that are linked together in a way that allows both sites to be in sync with one another. When you make a modification to the staging version of the WordPress website, you can push those changes to the live version of the WordPress website. And in the same manner when things change (new post, comments, etc) occur on the live version of the WordPress website you can pull the changes from the live version down to the staging version.
If this sounds complicated, have no fear. BackupBuddy, our WordPress backup plugin, can do all of the hard work of syncing up two WordPress websites and enabling the ability of the staging version to push and pull changes. With BackupBuddy, you’ll never have to edit a live website again and worry about the site going down because you left off a semi-colon in your code.
How to Use BackupBuddy to Create a Staging Environment
In this walk-through, I will be using a localhost version of the WordPress website that is being developed and managed as my staging version and will push the changes to the live version which will be on its own VPS server. The live version will be the only version accessible to the general public. Side Note: The step-by-step method being shown here is just ONE of the ways to setup a staging environment for your WordPress site. Step #1 – Build Your WordPress Site on your Localhost This step is fairly simple, you just need to start building your future WordPress site on your localhost and when you are ready to put the localhost version of your WordPress site up onto the live server you can continue to Step #2. Step #2 – Use BackupBuddy to Make a Copy of the Localhost Site Everything starts with making a current backup using BackupBuddy to capture the complete site as it exists on the localhost.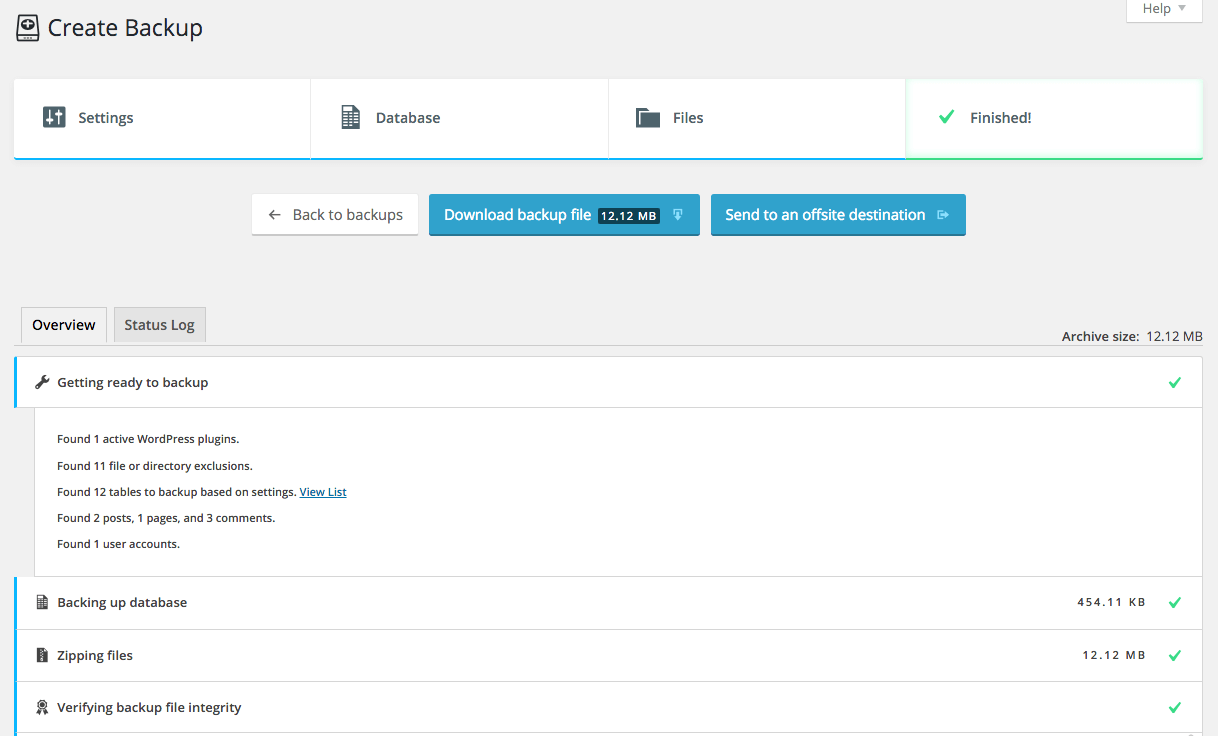 Step #3 – Send the Copy of the Localhost Site to the Live server
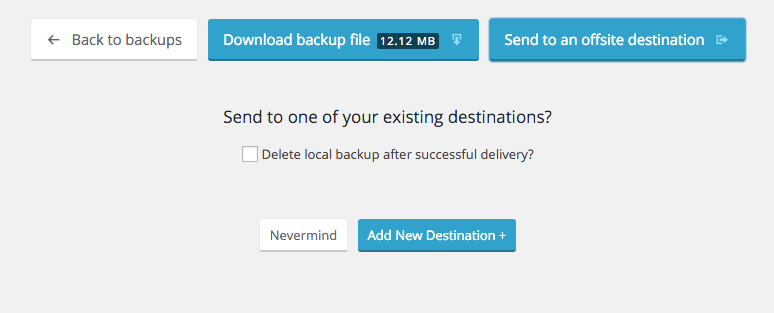
Once you have made a BackupBuddy backup of your WordPress staging website you need to send that file to an Offsite Destination. (Which will be your live server connection details.)
Step #3 – Send the Copy of the Localhost Site to the Live server
Once you have made a BackupBuddy backup of your WordPress staging website you need to send that file to an Offsite Destination. (Which will be your live server connection details.)
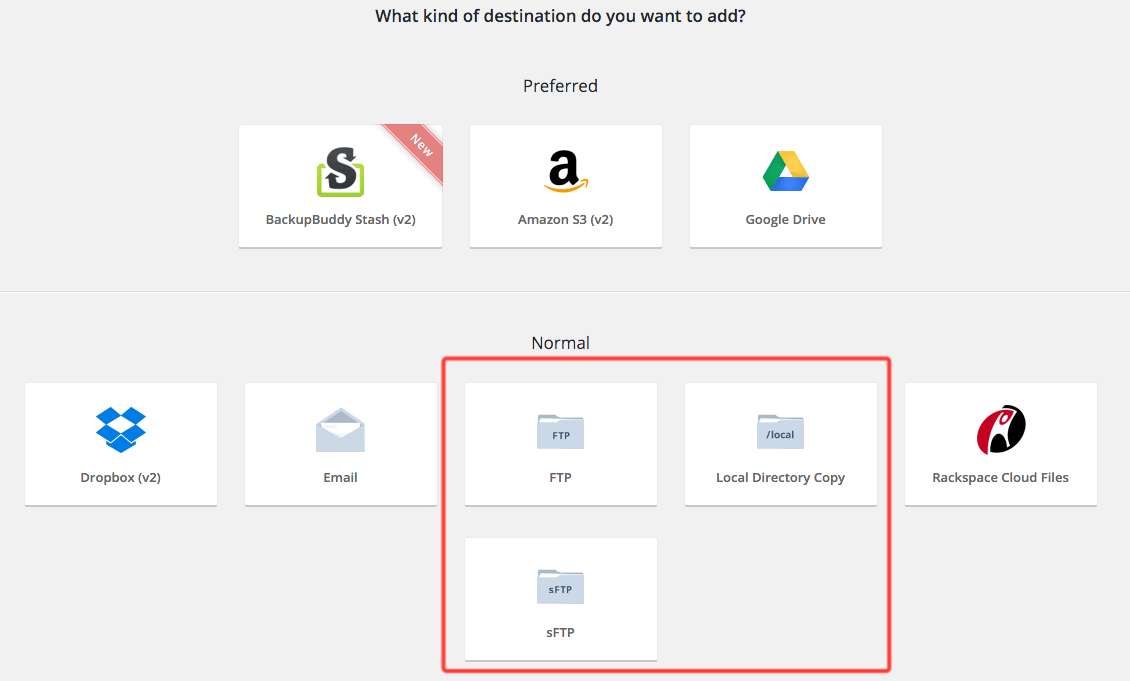
 Since the live server is normally going to be another server (or another location on the current server) that is different from the staging server location most users will find that selecting either FTP, sFTP, or Local Directory Copy will be the remote destination they are looking to connect.
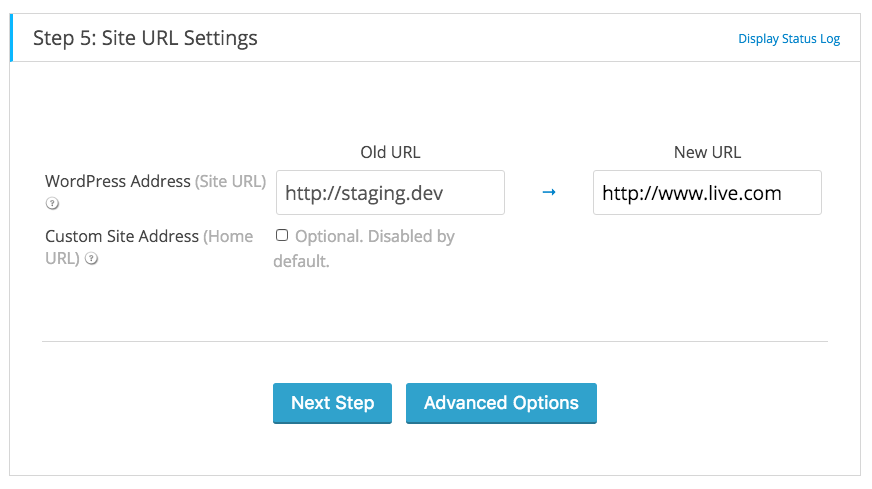
 Once you send the BackupBuddy file to the remote destination (the live site), you will also need to send the importbuddy.php file to that same remote destination. The one thing to remember during the restoration/migration process using BackupBuddy importbuddy.php to get the staging version of the site up onto the live site is during Step #5 and setting the new domain URL.
 Once the site is working on the live server you can log in to the WordPress Admin area and continue to Step #4.
Step #4 – Prepare the Live Server to Connect with the Staging Server
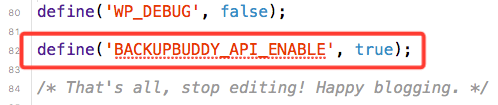
You will need to open the wp-config.php file of the live server in order to add a single line of code to the file.
Once the site is working on the live server you can log in to the WordPress Admin area and continue to Step #4.
Step #4 – Prepare the Live Server to Connect with the Staging Server
You will need to open the wp-config.php file of the live server in order to add a single line of code to the file.
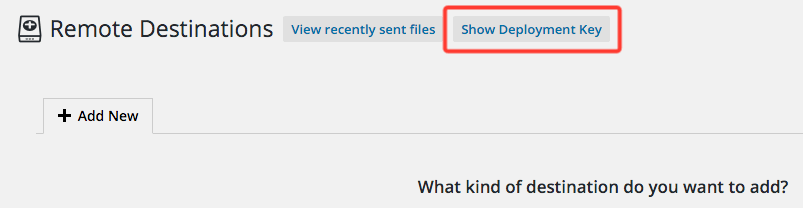
 Save the wp-config.php file and visit the BackupBuddy Remote Destinations page on the live server version of your WordPress website. You will now see a link at the top that says Show Deployment Key at the top of the page.
 This Show Deployment Key link will open up a new section that contains a long string of characters (ie the key) that you will need to Copy to your computer’s clipboard.
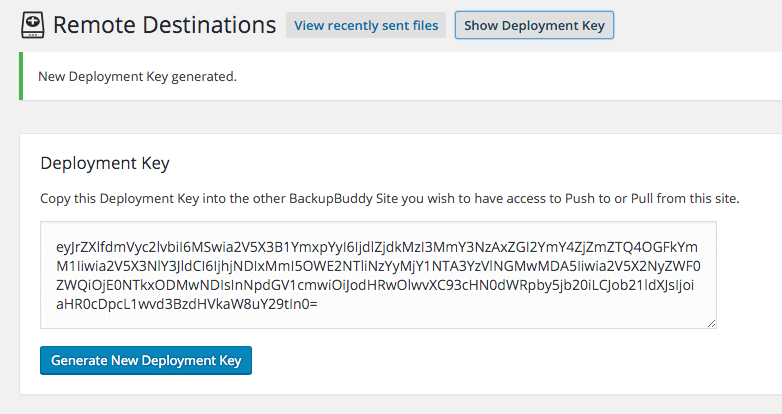 Once you have copied the Deployment Key that was generated by the live server you can continue to Step #5 and you will be pasting the Deployment Key into a Remote Destination box on the staging server.
Step #5 – Connect the Staging Server to the Live Server
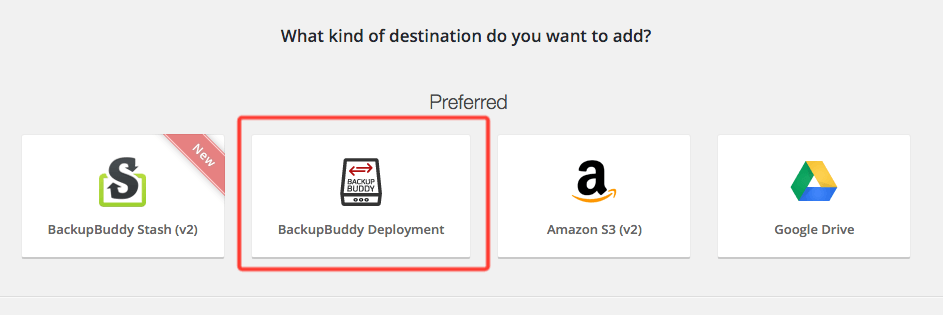
For this step you will be logging back into your staging or localhost version of your site and visiting the Remote Destination section of BackupBuddy. You need to add a new destination and select the BackupBuddy Deployment icon.
Once you have copied the Deployment Key that was generated by the live server you can continue to Step #5 and you will be pasting the Deployment Key into a Remote Destination box on the staging server.
Step #5 – Connect the Staging Server to the Live Server
For this step you will be logging back into your staging or localhost version of your site and visiting the Remote Destination section of BackupBuddy. You need to add a new destination and select the BackupBuddy Deployment icon.
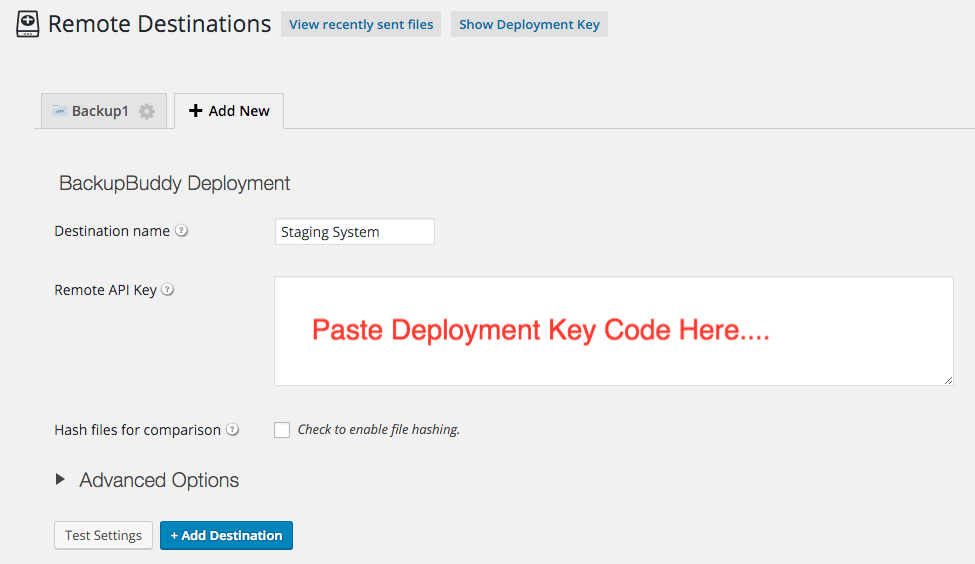
 You can name the new BackupBuddy Deployment destination anything you like and then paste the code you copied earlier from the live server’s Show Deployment Key window. Reminder: Do not paste the Deployment Key from the staging server into the staging server’s remote destination. Nothing will work if you do this.
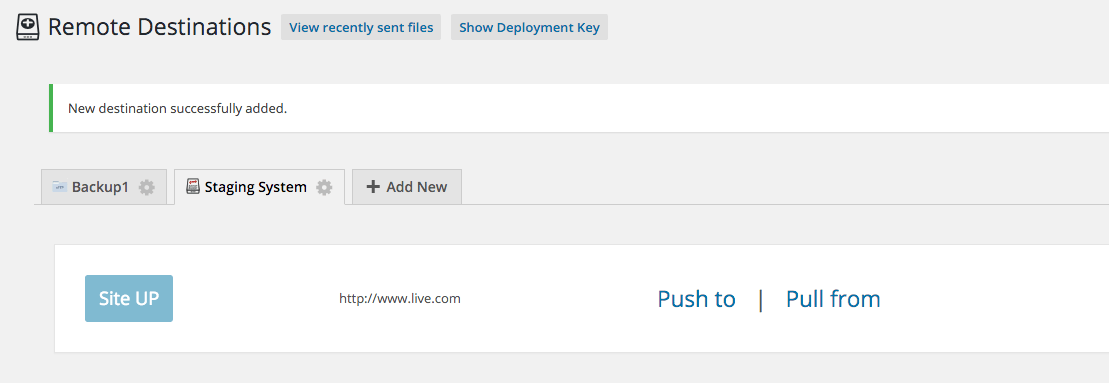
 Now that both the live version of your WordPress website and the staging version of your WordPress website are connected you can manage the entire system through your staging or localhost version of your website.
 When you are about to make a modification to the site, customize some function in the theme’s functions.php file, add a new plugin, etc you can follow the simple four steps:
- On the staging version of the site will press the Pull From link in the Remote Destinations settings of BackupBuddy. This makes sure that any new comments, edits, changes that exist on the live version of the site are brought down to the staging version of the site.
- You then make the modifications, edits, additions, deletions, and even new blog posts/content to your staging version of the site.
- Test and Preview your staging version of your WordPress site.
- When you are done with your modifications and the test/preview works you go back to the Remote Destinations settings of BackupBuddy on the staging version of the WordPress website and press the Push To link to send all the changes to the live server.
- Test and Preview the live version of your WordPress site.
- Make sure that the LIVE server is the version of BackupBuddy that generates the Deployment Key Code is the code you copy and…
- The STAGING server is the version of BackupBuddy that creates the BackupBuddy Deployment Remote Destination that you paste into the Remote API Key field.
- You PUSH and PULL the changes from the STAGING server not from the live server.
Have you used and setup a WordPress staging environment with BackupBuddy yet?
Get BackupBuddy now
Join us for the next Solid Academy Webinar!
Free weekly webinars that will help you master WordPress and increase your business's bottom line.
What is a WordPress Phishing Attack?
Learn how to identify and prevent phishing attacks on WordPress websites.
Kiki SheldonWebsite Protection: 5 Ways to Keep Your Website Safe
Robust website protection is the shield that stands between your business and relentless cyber attacks. Prioritizing website protection enables businesses to fortify defenses to safeguard their online presence and preserve the trust of their customers in the face of ever-evolving cybersecurity threats.
Kiki Sheldon23 Ideas To Grow Your WordPress Business in 2023
WordPress is the most popular website-building platform worldwide, trusted by numerous brands. WordPress enables you to build a user-friendly and highly reliable site, together with tools and plugins to enhance your marketing and work like a lead magnet. All these features make WordPress the platform chosen by more than 43% of businesses globally.
SolidWP Editorial TeamSign up now — Get SolidWP updates and valuable content straight to your inbox
Sign up
Get started with confidence — risk free, guaranteed
