
Secure your site. Protect your business.
In partnership with:

Why secure your site with SolidWP?
3 Steps to a Secure Site with SolidWP

Enhance login security

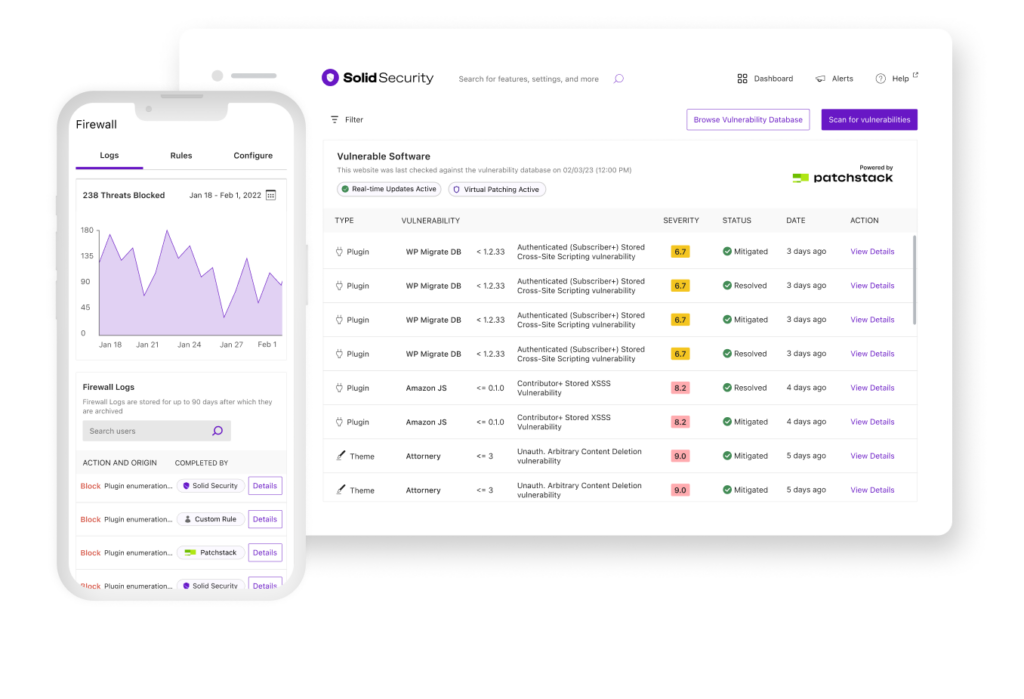
Scan for vulnerabilities

Stop brute force attacks
Pro Feature*
Your foundation for a secure website since 2014. Built by WordPress security experts.

We promise you’ll love it, or your money back.
We’re confident SolidWP will exceed expectations, with premium support to help resolve issues. If you’re unsatisfied for any reason, reach out within 30 days of your purchase. We’ll find a solution or issue a full refund.
The only WordPress security plugin you need — period
Skip the hassle of authentication apps, password managers, and complex password requirements.
Rest easy with local and network brute force protection. Local protection bans IP addresses and login attempts based on your lockout rules. Network protection goes further by banning IPs caught trying to break into other sites.
Monitor your site’s behind-the-scenes activity. Solid Security keeps 24/7 watch over your site’s security and alerts you to threats.
30,000 websites are hacked every day
20-40%
Of WordPress sites have vulnerable code right now
50%
Nearly half of all targeted cyberattacks prey on small- to medium-sized businesses
20%
Of businesses nearly faced bankruptcy after a cyberattack (2022)
2.98M
The average cost of a data breach for businesses with fewer than 500 employees was $2.98 million in 2021

Customer trust, business stability, and brand reputation are lost when your site is breached
1,779
Vulnerabilities disclosed in WordPress-related plugins, themes, and the core WordPress platform in 2022
57%
The United States saw a 57% jump in cyberattacks as hackers exploit vulnerable websites with unhardened security practices
Let’s make sure your website isn’t one of them
Trusted by thousands of businesses all over the world


“I was using one of Solid Security’s competitors and we still got hacked! Since I’ve been using Solid Security our site has been rock solid! Love the products and the team.”
Erica Eide —
Founder, small business
“The Solid Suite of products helps me help my clients get more visible online and help them make more money with their website. Highly recommended!”
Paul Taubman —
Chief Online Strategist
“Using SolidWP products helps me make a difference in the success of others. I know I can count on them to deliver the results I want for my clients.”
Sue Spencer —
Founder, web design
